Category Archives: Vegetarian Recipes

Garden Gratin

Jerusalem artichokes are easy to grow, they’re part of the sunflower family and are very undemanding on the gardening front. Pop the tubers into the ground and after that they pretty much look after themselves.

We grew Jerusalem artichokes last year and then forgot about them until last week when I went on an exploratory dig and discovered lots of knobbly roundish roots. They were in great condition and there are plenty of them. It’s presented the dilemma of what two do with them. Luckily they don’t all need to be eaten at once , they look quite comfortable in the bucket, muddy but dry, and will hopefully sit for a while whist we eat them up.

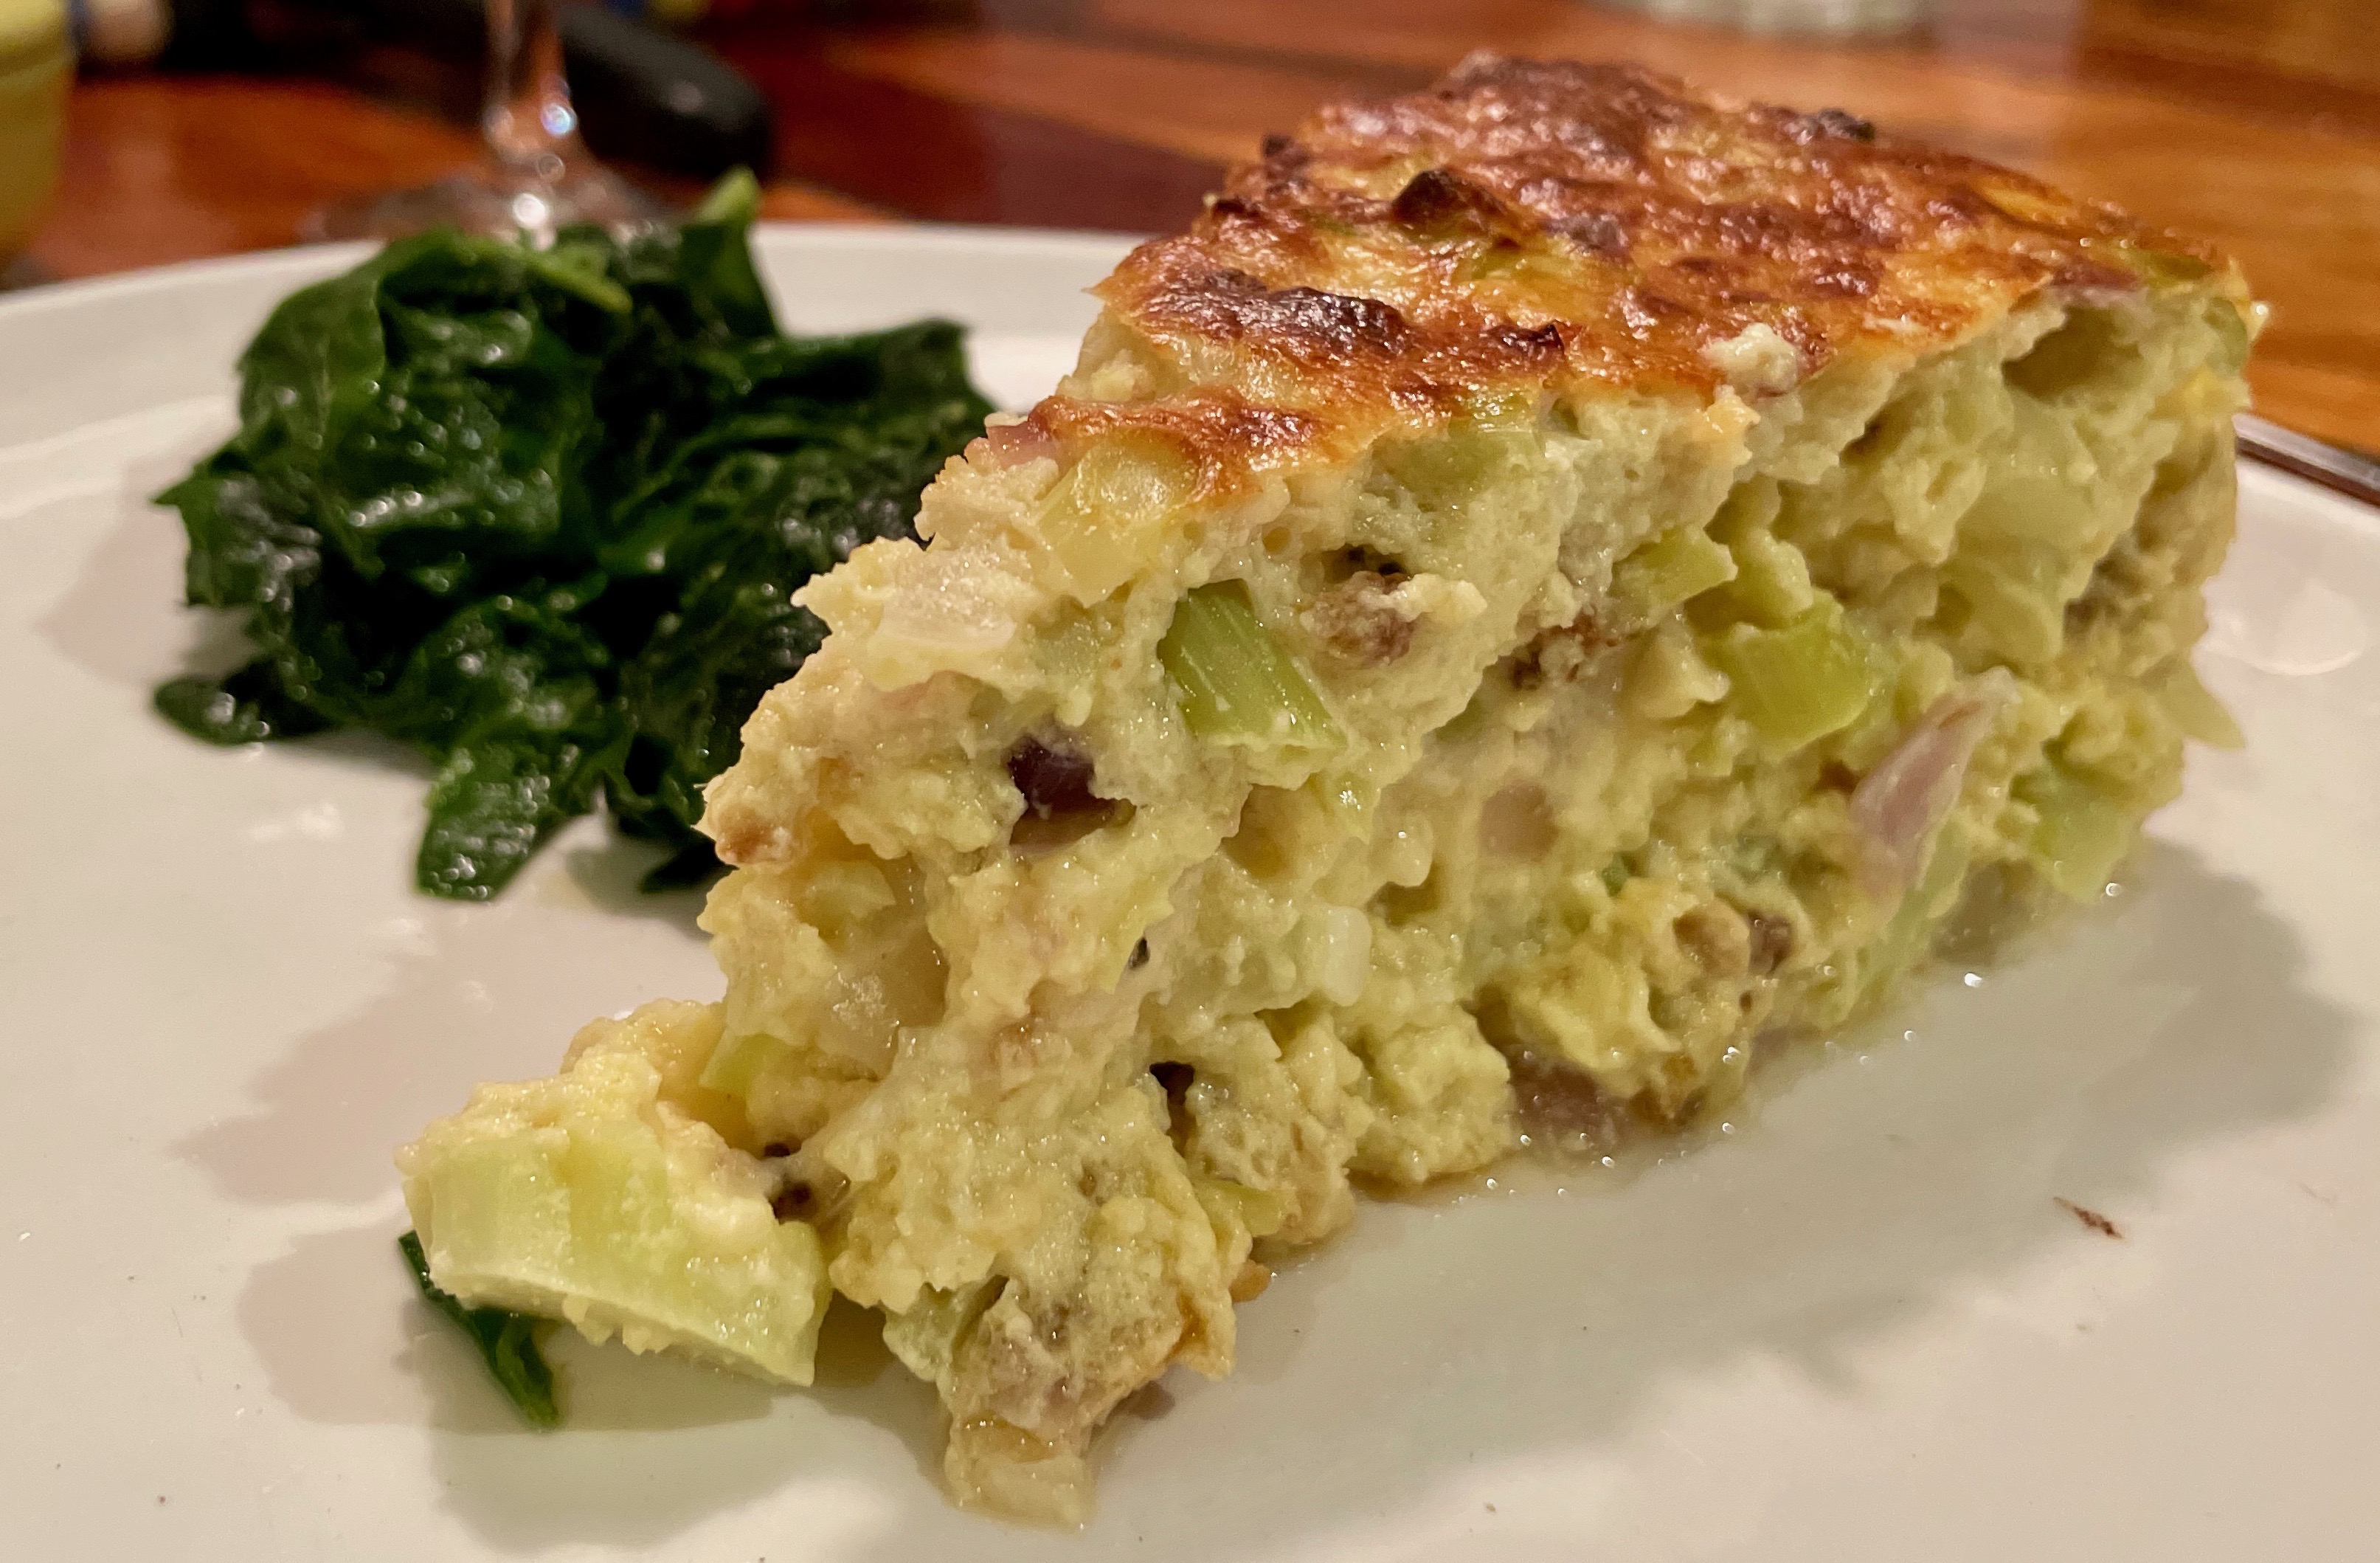
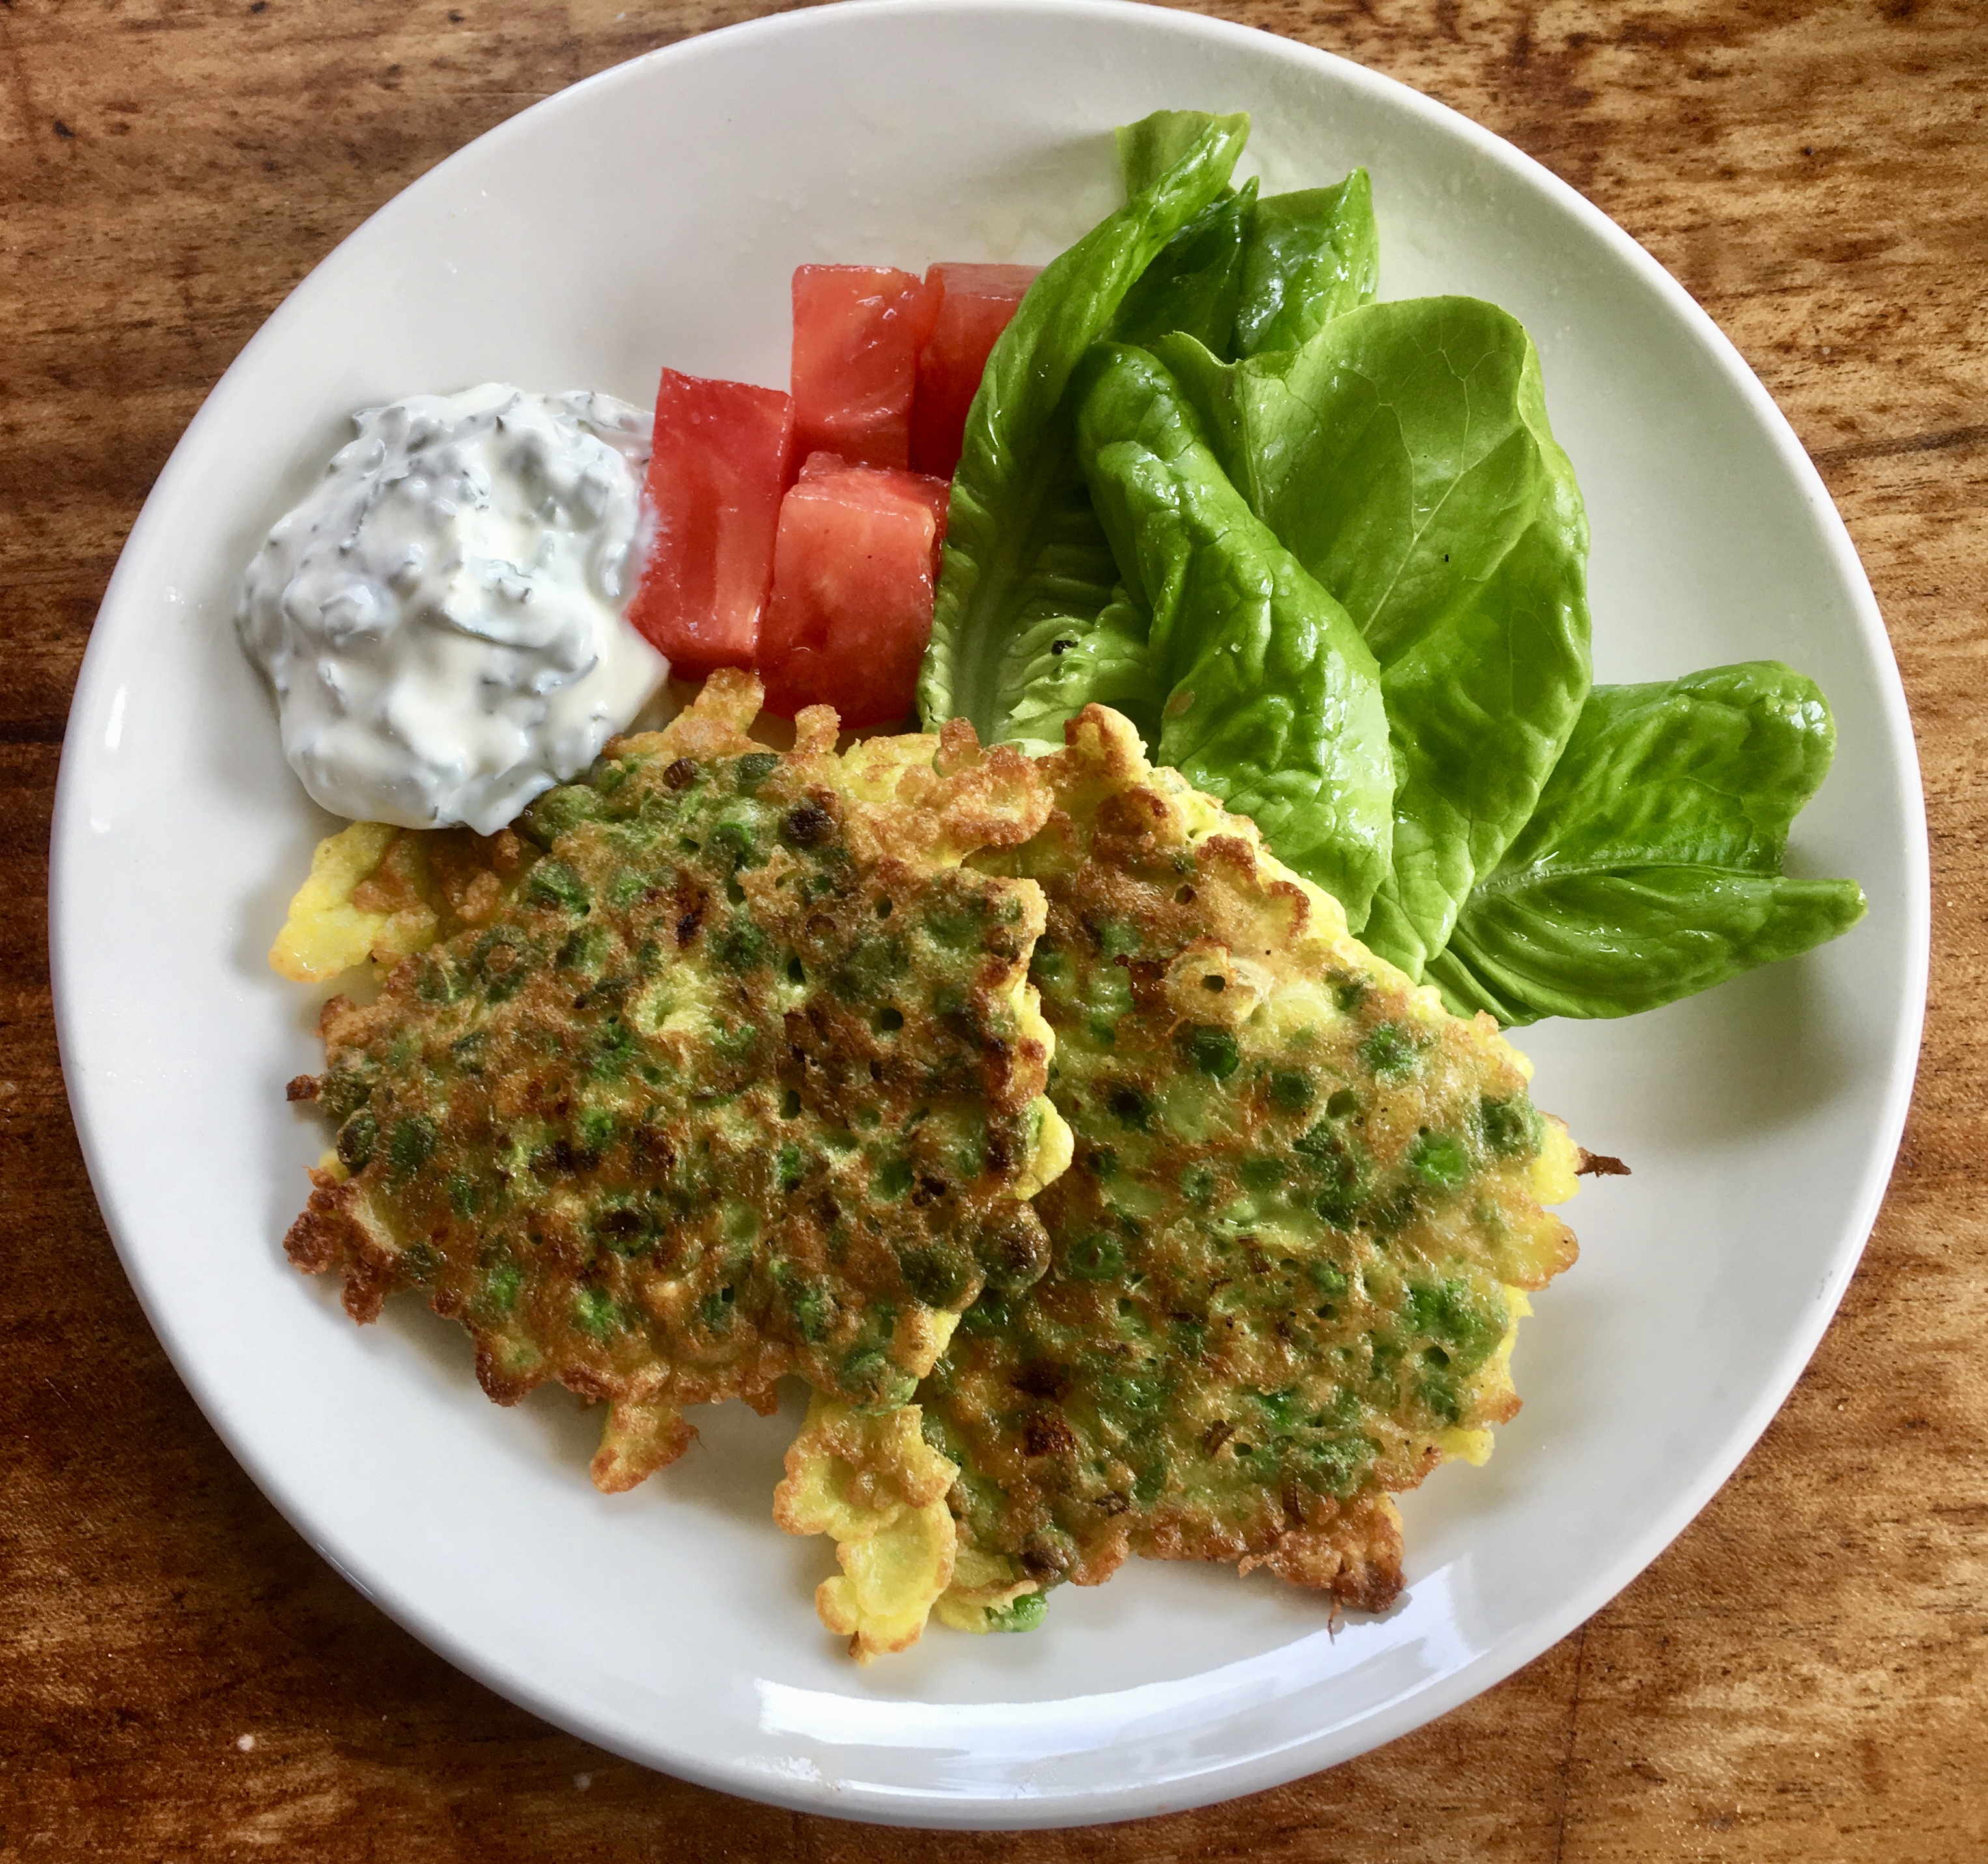
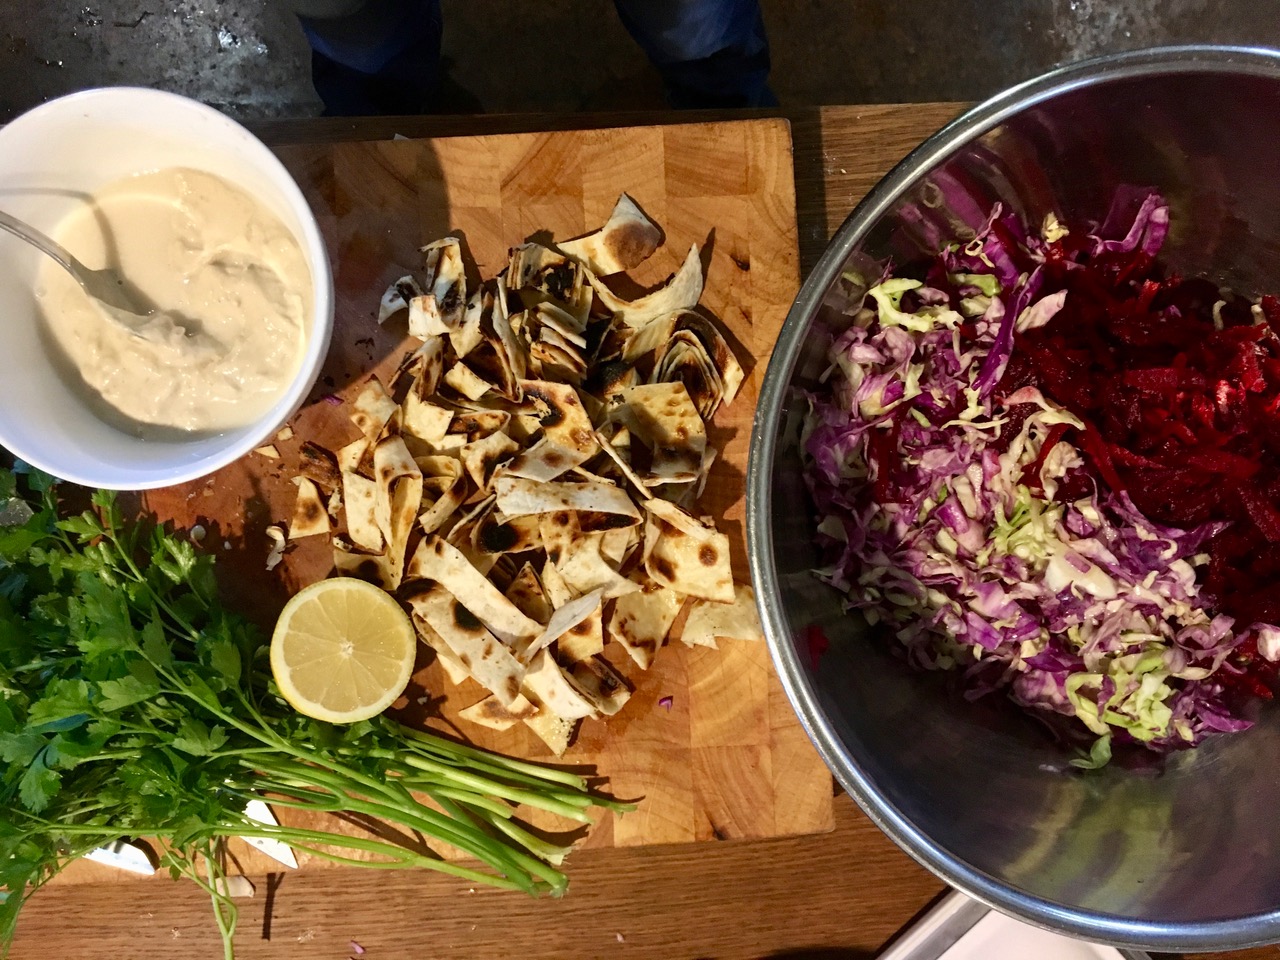
First up I made a gratin. I mixed some with potatoes, spinach, leeks and Tallegio cheese. This was adelightful combo, creamy, cheesy and very tasty with the sautéed leeks and spinach layered through and perfect eating for this weeks wet and wild weather. We ate the gratin after a beetroot and blood orange salad which is why the plate is pink.

One of the properties of Jerusalem artichokes is that they have a high content of inulin. Inulin has lots of dietary bonuses; plenty of fibre which in turn is helpful in managing diabetes, constipation and general gut health but they really should come with a warning. These powerful vegetables have great flavour but are also very windy. All that fibre causes mighty flatulence. Our duvet almost hit the ceiling when we went to bed. I guess it’s the type of vegetable to be only eaten with close family or friends – they aren’t known as fartichokes for nothing. Apparently if you eat them little and often you can override this side affect so I guess we need to proceed through the stash and see what happens.

The gratin was delicious!

Garden Gratin

600g potatoes

600g jerusalem artichokes

1tbs olive oil

250g fresh spinach

2-3 leeks

25g butter

a small bunch of thyme

300mls cream

250g Tallegio cheese

salt and pepper

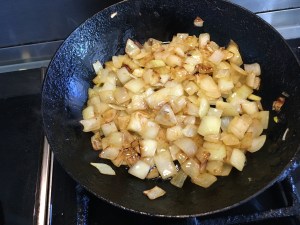
Peel the potatoes and artichokes then slice very thinly. Put them into a big bowl. Drizzle over little olive oil, season with salt and pepper and add the thyme. Toss well .

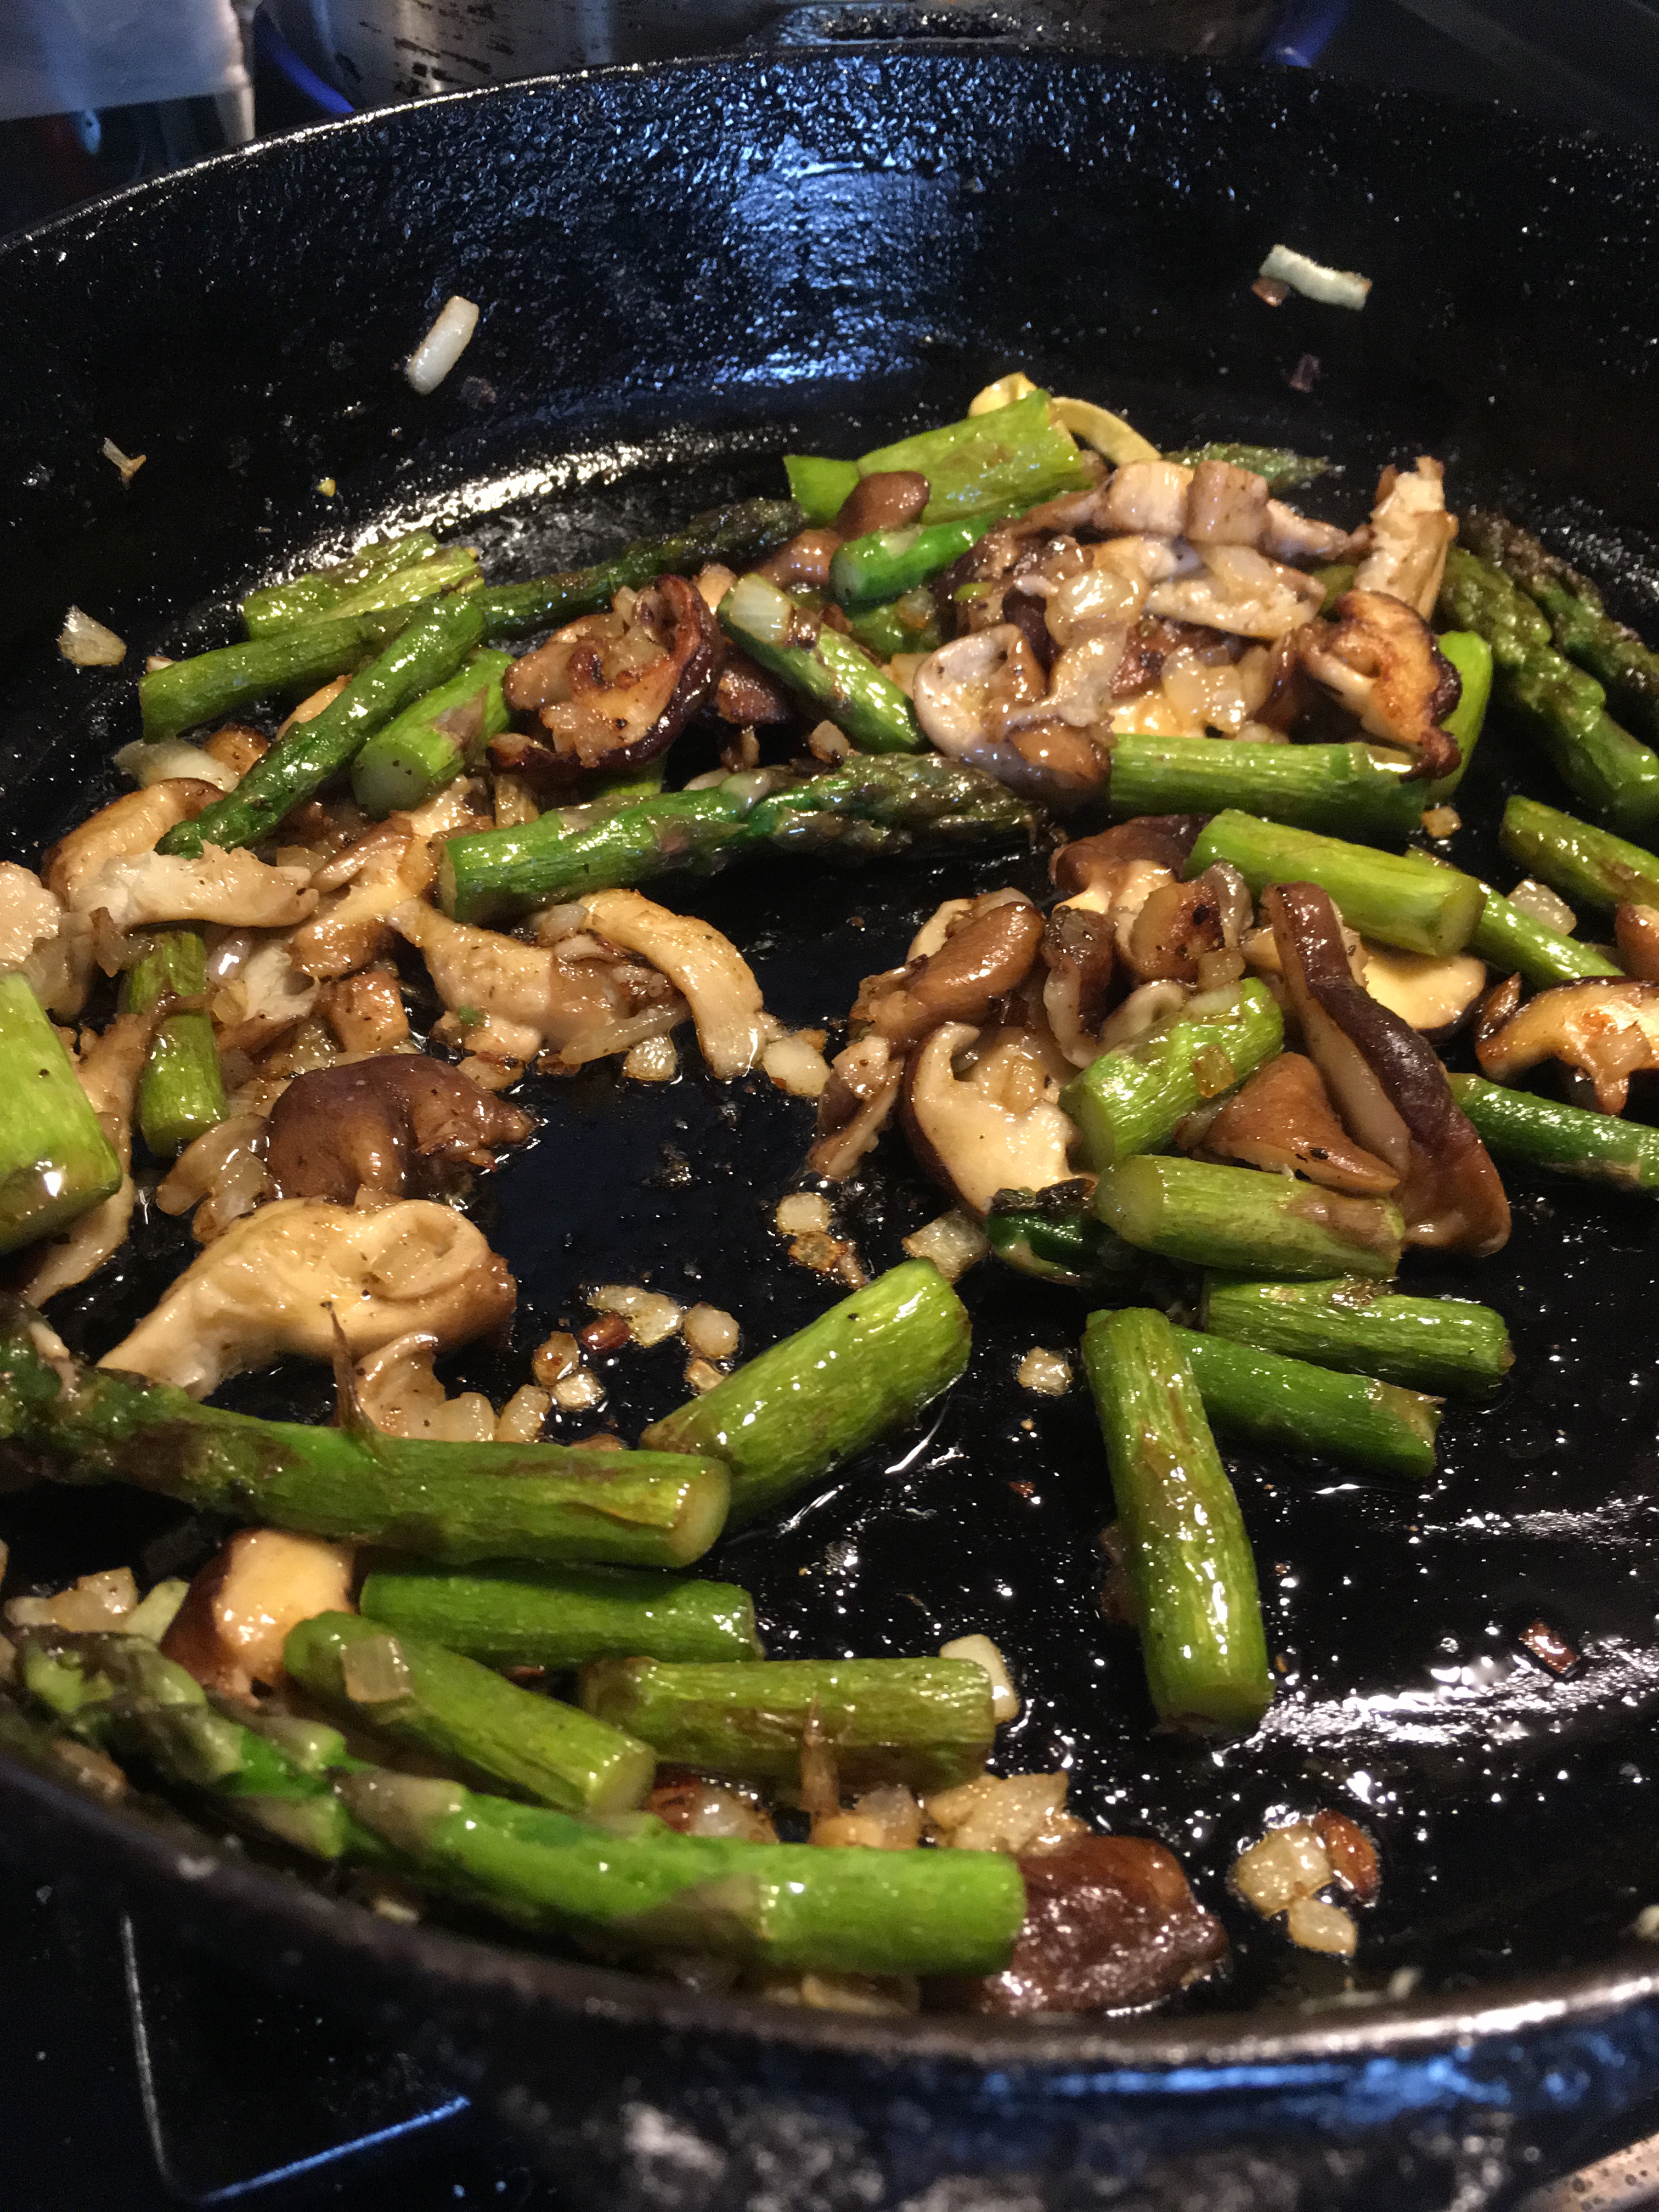
Clean the leeks then slice small. Wash the spinach and trim any big stalks. Put a saucepan with little butter on the heat, add the leeks and when it begins to sizzle turn the heat low and cover with a lid. Shake very couple of minutes until the leeks soften then stir in the spinach. Cover again with the lid and cook for 2-3 minutes until the spinach has wilted down. Season with salt and pepper.

Pre heat the oven 190c

Rub a little butter or olive oil around a gratin dish put in a layer of half the potatoes and artichokes then add the spinach and leeks. Break the tallgio into small pieces and distribute over the top then layer up the remaining potatoes and artichokes.

Put the cream into a small saucepan and bring too the boil. Pour the cream over the vegetables. Cover the gratin dish with a piece off aluminium foil then bake for 50 minutes. Remove the foil and bake for another 15-20 minutes or until the top of the gratin is golden.

Allow to sit for 10 minutes before eating. The ideal amount of time to consume a salad.


Giant Cauliflowers Make Giant Cakes

Finally our cauliflowers have arrived, there’s a colony of them and some are seriously big.

We have waited so long. I was convinced we would have caulis for Xmas but nope, nothing happened . We just had these huge plants on long stems that seemed to be in some kind of animated suspension and now, all at once they are emerging. It’s far from the first cauliflowers that we have grown but usually they arrive rather inconveniently in August or are very welcome in October and November. Last years lockdown meant we got our seeds where we could and I must have picked up this winter variety. I’ve now checked it out and discovered that winter cauliflowers take 40-50 weeks to mature which is quite some time to nurture a vegetable but they are so welcome. A joy to the eye and they’re going to be exciting to eat, or perhaps I should say a challenge.

We regularly make cauliflower fritters and cauliflower pakoras which are both delicious but last night I broke out and and made a cauliflower Sfomato with the enormous cauliflower that I had picked. Sformato looks like a cake which has a touch of a soufflé to it. It’s also enormous, enough to feed 6- 8 for dinner or 4 for dinner and 4 for lunch!

I have feeling we’re going to have cauliflowers coming out of our ears!

Cauliflower Sformato

1 large cauliflower

olive oil to roast the cauliflower

2 red onions, peeled and chopped

90g butter

90g flour – I used rice flour as it’s gluten free

800mls milk

6 eggs

75g grated parmesan or mature cheddar, grated

1tbs Dijon mustard

1/2tsp smoked paprika

Pre heat the oven 190c

Line the base and sides of a 24-26cm loose bottomed cake tin

Break the cauliflower into even sized florets and toss with little olive oil and salt. Spread out on a large baking sheet and roast for 20 minutes. leave aside to cool a little then chop small.

Melt the butter in a large saucepan (mine was little small) then stir in the flour. Cook gently for a few minutes then begin to add the milk. Do this in stages, whisking the milk and roux(flour mix) until it comes together in one mass before adding a little more. You will end up with a fairly thick sauce. Season with salt and cracked black pepper. Stir the chopped cauliflower, smoked paprika, mustard and grated cheese.

Check the seasoning then pour into the prepared tin.

Bake in the centre of the oven for 40 minutes or until a knife comes out clean.

Bake in the centre of the oven for 40 minutes or until a knife comes out clean.

Leave to rest for a few minutes before removing the tin and serving.

It’s not going to win a beauty contest but very tasty!


Tomato Party

0643ac84-f52c-4f50-b62a-fc71088622fb

Storm Ellen did a superb job of flattening our beans but fortunately the tomato tunnel stood strong and our beautiful tomatoes are still ripening and bursting with flavour.

The feasting is endless. Tomatoes with everything.

Whilst browsing for tomato ideas I came across a recipe for Panzanella. It was the picture that caught my fancy as a salad using old bread that was dried then got wet again sounded odd. I checked out a few more recipes and realised this idea had real potential and no better chance of success than when surrounded by ripe home grown tomatoes.

Panzanella originates in Italy where there are ripe tomatoes and dry bread aplenty. These simple ingredients paired with the best olive oil and vinegar that you can lay your hands on make a stunning salad.

The first step is to dry out the bread, which proved easier said than done in a West Cork kitchen. I used thick slices of sour dough bread as recommended and spread it out in a bread basket and left it in the kitchen to dry.

In the south of Europe where these recipes originate bread bought in the morning is stale by the evening, hence the proliferation of recipes using old bread but no such luck here. Two days later the bread was still perfectly edible and far from dry so I turned the oven on for assistance.

I couldn’t resist rubbing the slices of bread with a cut clove of garlic before ripping it into small pieces and tossing with a drizzle of olive oil. ( if you like garlic bread, you will like this) I spread the bread on a baking tray, popped it in the oven and ten minutes later it was beautifully dry .

Now is the moment to make this recipe if you live in this part of the world. The local tomatoes are ripe and at their full flavour potential. The only time of the year we can eat such tasty tomatoes without travelling. Check out the farmers markets and small stores that sell home grown vegetables

This recipe is well worth the effort = dry bread and tomatoes tossed together with olive oil, vinegar and basil makes a sublime combination however odd it might sound, a real flavour and texture bomb in the mouth.

Simplicity at its best

fullsizeoutput_20f3

Panzanella

Tuscan Tomato and Bread salad


4  large ripe tomatoes

4 thick slices sourdough or country bread

3 cloves garlic

1 small red onion.

1 bunch basil

150mls extra virgin olive oil

50mls vinegar – the best you have

1 tsp Dijon mustard

Salt and black pepper

Anchovies in oil (optional)


Put the oven on 180c

Cut the crusts from the slices of bread, rub with a cut side of garlic – no need to peel it.. Tear the bread into small pieces (2cm).

IMG_9648

Put it into a bowl, drizzle over a little olive oil 1-2tbs, toss well then spread out on a baking tray. Bake for ten minutes then check. The bread should be crisp but not brown.

Dice the tomatoes into 1 -2cm cubes, sprinkle over a little salt and put them into a sieve or colander and set them over a bowl to catch the juices. Leave for 15-20 minutes.

fullsizeoutput_20f6

Peel and finely slice the red onion. Massage in a few grains of salt to separate and soften the onion. Peel the remaining 2 cloves of garlic and chop very finely.

fullsizeoutput_20fa

Put the garlic into a small bowl together with the Dijon mustard, vinegar and the juice that has run off from the tomatoes. Whisk these together then drizzle in the olive oil whilst continuing to whisk until you have a creamy emulsion. Stir in the sliced onion.

IMG_9678

Put the tomatoes and dried bread into a bowl – approx. 50/50 of each. (Keep any remaining bread to top other salads or soup). Chop the basil and add to the bowl, pour over the dressing then toss together until well mixed. Leave aside for ten minutes to let the flavours to mingle before serving.

IMG_9680


Eggstraordinary Times

Our chickens have no idea that the covid virus has slowed most of the world down so we have a lot of eggs They are laying like machines, their systems in synch with the daylight hours. The eggs are piling up in baskets on the window sill awaiting a mission in life, Ordinarily we pass these valuable ovoids around our friends but as we have to stay at home we’re having to up our intake.

I’m digging out recipes that use eggs, this is a tasty one.

Indian Style Eggs is a fast and easy dish for brunch or lunch. A kind of a lightly spiced Indian style omelette with salad piled on top. I use garam masala, which is a mix of spices, which have been toasted and ground.

Indian Style Omelette with Salad on Top.


2 onions

2tbs ghee or vegetable oil

5 eggs

½ tsp salt

1 tsp garam masala

1 big ripe tomato or a handful of ripe cherry tomatoes

1 green chilli (optional)

a handful of chopped fresh coriander.


Peel the onions, cut them in half, then cut into 1cm slices.

Cut the slices into 1 cm pieces.

Heat a frying pan, add the oil or ghee then fry the onions on a medium high heat until they are translucent but still a bit crisp. This will take a few minutes. The onions shouldn’t brown.

Whisk the eggs in bowl together with the salt, then pour over the onions. Give the pan a little shake to mix the eggs and onions together then using a fork, draw the egg mixture that is setting to the middle, repeat this again with the set egg and give the pan a shake to even the ingredients out.

Sprinkle the teaspoon of garam masala over the top then turn the heat to low and cover the omelette with a lid for a couple of minutes, until the top is more or less set. Don’t overcook as the residual heat will make the eggs finish setting.

Dice the tomato/es and season with a little salt. Thinly slice the chilli. Maybe check out how hot it is by testing the end near the stalk. If you find it too hot remove some of the seeds as this is where the heat is. Of course if you don’t like chillies leave the chilli out and maybe substitute chopped spring onion.

Chop the fresh coriander.

Scatter the tomatoes, chilli and coriander over the top of the omelette and eat immediately.


In Anticipation of Peas

fullsizeoutput_147f

It’s a busy time in the garden, lots to sow, transplant and weed but not a vast selection to eat. There are plenty of green things – salad leaves, herbs, baby spinach, a few bolting leeks but for the rest we are waiting.

This recipe is in anticipation of the peas.

Our peas are about 15cms tall and on the up, beginning to climb their chicken wire fence. There’s a way to go but they’re coming

There is still time to plant peas if you have the space. They enjoy the Irish climate and providing the mice don’t eat the seeds will soon emerge and start climbing up, grasping with tiny tendrils to whatever is close by so it’s best to make a fence to keep them where you want them.

The main reason I plant pod peas is because they are so sweet. We snack on them in the garden so probably only half the harvest hits the kitchen.

The secret with peas is to eat them as soon as you pick them, before the sugars convert to starch. This is why frozen peas are so successful and indeed can be superior to pod peas.as unless they were recently picked they will have become a little starchy.

These little green orbs have a lot going for them as they are a source of plant-based protein, officially a legume not a vegetable. Paired with eggs, a little fresh goats cheese or yoghurt to make a complete protein this makes a nutritious vegetarian option that is easy and fast to make.

I was going to make the recipe in the blender but there was a power cut so instead of buzzing the mix I got stuck in with  a potato masher  and the result was chunky pea in batter delicious so the recipe can be made either way. If you use a blender pulse buzz and stop before the mix is smooth.

We’re using Sunview fresh goats cheese, which comes from Kilmichael near Macroom. Goats cheese has a dodgy reputation but this new season fresh cheese is creamy and delicious, not in the least bit goaty.

If you can’t handle goats cheese use a little feta or leave it out.

We ate these with mint and yoghurt sauce and salad on the side.


Pea fritters


300g peas

3 eggs

3-4 spring onions

zest of half a lemon

50g crumbled fresh goats cheese

50g cornflour

½ tsp baking powder

½ tsp salt

oil to fry.


Bring apot of water to the boil , add the peas then cook for 3-4 minutes. Drain and refresh under the cold tap then put aside .

Crack the eggs into a bowl. Seive the cornflour and baking poiwder then whisk into the eggs together with the slat.

Finely chop the spring annions then stir into the batter with the lemon zest, goats cheese and peas. Mash with apotato masher to crush the peas.

Heat a frying pan, pour in a little oil – enough ti just cover the bottom of the pan. Spoon in 3 or 4 tablespoons of the batter, allowing each fritter to spread but not join up. Turn the heat to medium and fry the fritter for 2-3 inutes then flip over and cook the otherside. Repeat until the mix is used up. I made 10 fritters.


Mint Yoghurt Sauce


250mls Greek yoghurt

1 tbs finely chopped mint

salt. And cracked black pepper.


Mix te yoghurt and finely chopped mint together then season with salt and cracked black pepper.


Tagliatelle with Asparagus and Shiitake Mushrooms

I’m just about all ‘kaled’ out. We have eaten some amount of kale and spinach in the last six weeks and I am almost happy to see the plants bolt. We will miss them but the new baby salad leaves and rocket are much more exciting.

There’s not much else ready to pick in the garden at this time of the year unless you are lucky enough to have an asparagus patch. We don’t. I tried to grow asparagus some years back but eventually lost patience and pulled it all up. There never seemed to be enough for dinner, just the odd alien popping up here and there but not enough for a bunch.

Luckily there are successful asparagus growers in West Cork and now is the time to grab a bunch before it’s moment of glory passes and there’s another years wait.

This recipe is a kind of vegetable carbonara, a bit of an oxymoran as any self-respecting Italian will tell you that carbonara only has four ingredients – eggs, pancetta, pecorino or parmesan and spaghetti but as with all recipes tweaking can produce great results.

I have used asparagus and locally grown shiitake mushrooms. Shiitake mushrooms are feather light when fresh but become meaty and super tasty when cooked.  Any long wiggly pasta will work for this recipe. If you get your timing right this dish can be cooked in the time that it takes to cook your pasta


Tagliatelle with Asparagus and Shiitake Mushrooms

Serves 2


1 small onion

7-8 stems asparagus

100g shiitake mushrooms

50g butter

50mls olive oil

2egg yolks

4tbs cream

50g grated parmesan or pecorino

250g tagliatelle/spaghetti/linguine

salt and cracked black pepper


Put a large saucepan of water on to boil, ready to cook the pasta

Peel and finely chop the onion

Snap the tough end from the asparagus and discard or put aside to make soup. Chop the rest of the asparagus in 3-4cm pieces

Slice the shiitake mushrooms.

In a small bowl mix the egg yolks, cream and grated cheese.

The vegetables are going to take roughly eight minutes to cook so now is the moment to decide when to add your pasta to the boiling water. Read the packet, add a large spoonful of salt to the water and cook the pasta according to the instructions – the vegetables can spend a minute or two resting whilst the pasta finishes cooking if needed

Heat a large frying pan or skillet and add the olive oil. When the pan is hot add the asparagus and cook for three to four minutes stirring every now and again. Season with salt and cracked black pepper and put aside. Next melt the butter in the pan and add chopped onion and the shiitake , mushrooms, cook on a high heat for three or four minutes, season with salt and cracked black pepper then put the asparagus back in.

IMG_3968

Take the pan off the heat.

Before draining the pasta reserve a few spoonfuls of the cooking water.

Drain the pasta, add to the vegetables and the egg mix then toss together adding some of the reserved water to get a creamy dressing.

Eat immediately


What’s With The Cabbage?

Before Xmas I received an email asking me if I had thought about what we were going to do for Veganuary in the shop (eating vegan food in January) it was from someone called Shane whom I presumed to be Shane Red Strand Coffee. I shot back an answer saying thanks for the idea, that it could be good fun and the next thing we got a box of samples in the post from a different Shane altogether of pretty vegan products!

The Veganuary idea does seem like a good idea  – to detox after Xmas, cut down on emissions by not eating meat and generally save our selves and the planet. And we have a lot of vegetables still growing in our garden.

The warm wet weather has the cabbages shining brightly, the leeks are standing to attention and the green stuff – parsley, spinach and kales are quite happy so there’s plenty for eating.

img_2224

Just the thing for a January detox – I have to say although I don’t take detoxes too seriously, I do think it’s good to make a little effort especially after all the feasting.

img_2366

My son Darragh came up with this recipe. He was home for Xmas and knocked this up for lunch one day. I had just come in from a walk and was ravenous. I thought this was delicious. The lightly pickled cabbage, grated beetroot, toasted seeds and something else that had a very interesting texture and flavour but wasn’t a vegetable. It was double toasted, shredded tortilla wrap. Highly recommended especially served with tahini sauce.

The recipe will make a large bowlful. Scale the recipe down proportionately if you want less.

Not yet named salad

2tbs olive oil + 50mls for dressing

1 fatty clove garlic

½ small red cabbage

½ sweetheart or york cabbage

1 tsp salt

1 large beetroot

1 bunch parsley – chopped

150g pumpkin seeds

tamari

2 large tortilla wraps

50mls lemon juice


Peel the garlic then finely chop – crush in a mortar if you have one – together with a little salt. Mix with 2 tbs olive oil . Leave aside.

Wash and tidy up the cabbage then slice thinly.

Begin slicing from the top of the cabbage, then half way down cut the cabbage in half and remove the stem. Finely slice the remaining cabbage

Put into a large bowl and toss with a teaspoon of salt. Leave the cabbage aside.

Peel and grate the beetroot.

Heat a small frying pan, turn the heat to medium and add the pumpkin seeds. Gently toss or stir until they begin to colour and smell a little toasty. Remove the pan from the heat and sprinkle over soya sauce or tamari. Tip into a bowl and put aside to cool.

Heat a large frying pan then reduce the heat to medium and fry the tortillas, on at a time, cooking each side until it becomes a little toasty (not burnt). Brush the tortillas with the garlic oil and cook briefly once again. Stack the tortillas then roll them into a loose cigar. Cut on the diagonal to make wedge shaped pieces.

Put a clean t-towel on the counter. Put the cabbage handfuls at a time over half of the towl – don’t tip the bowl because all the excess liquid will follow. Fold the t-towel over the cabbage and pat dry then gently roll the towel and pat again . Tip the cabbage into a clean dry bowl.

Add the grated beetroot and chopped parsley.

Drizzle over the olive oil and lemon juice then toss to mix.

Add half of the pumpkin seed and the shredded tortillas then toss again

Tip into a clean bowl and sprinkle pumpkin seeds on top.

img_2355


Tahini Sauce


Juice 1 lemon

1 clove garlic, peeled and finely chopped

2 big tbs light tahini

a pinch of salt

a little water to thin the sauce

Put all of the ingredients into a bowl except for the water and whisk until amalgamated. Thin with water to achieve a thick pouring consistency.

This salad is best eaten soon after making. Don’t forget to drizzle tahini sauce on top

img_2374


Aliens in the Vegetable Patch

fullsizeoutput_1130

Autumn is my favourite time for eating from the garden, there is such an abundance to choose from. The tomatoes in particular seem to have reached peak sweetness, perhaps it’s the long slow ripening on the vine. It is the reason we keep gardening as it’s impossible to buy this flavour.

We have harvested all our apples and potatoes and the beetroots are ready for eating. The beans and courgettes keep making a last ditch effort, everytime that the sun comes out they decide to have another go, so although we’re no longer picking bucketsful there’s plenty for dinner.

We have the best crop of pumpkins – almost ready- after the glorious summer. Pumpkins don’t like to grow below 18c and the prolonged heat this year really boosted them along. We’re delighted as this precious crop will store right through the winter.

The stars of the moment are the cauliflowers, which have appeared like aliens in the brassica patch. All at once! Which means there’s quite some cauliflower eating to be done so it goes without saying that this months recipe is with cauliflower.

I’ve combined the cauliflowers with pumpkin so it could also be a Halloween recipe.

The measurement for the pumpkin and cauliflower are guidelines as obviously cauliflowers don’t grow in half kilo units. They do not have to be exactly 500g, just roughly equal amounts of each. The amount of eggs also depends on the size so use two large eggs or three smaller ones.

I used salted ricotta for these fritters. Pecorino and Parmesan would also be good substitutes and who knows, maybe cheddar would work too but I have not tried this variation.


Cauliflower and Pumpkin fritters


500g pumpkin

500g cauliflower

2-3 eggs – lightly beaten

200g salted ricotta – grated

a large handful of parsley finely chopped

salt and pepper

oil for frying


Put a large pot of salted water to boil.

Peel the pumpkin and remove any seeds then chop into equal sized pieces of roughly 2cm each.

Wash the cauliflower well then cut into florets.

When the water is boiling add the pumpkin, as soon as the water returns to the boil turn the heat to medium /low because if the pumpkin is belting around in the pot the pumpkin will become fluffy. Cook for 10-15 minutes, until a knife will enter without resistance. Lift the pumpkin from the water then leave to drain in a colander.

Return the pot to the heat and add the cauliflower, cook for 4-5 minutes, just enough to take the edge off the rawness.  Drain into a colander and give it a good shake to remove excess water.

Gently mash the pumpkin and season with salt and pepper.

Put the cauliflower florets onto a chopping board and chop to small pieces paying particular attention to the stalks.

Put the pumpkin and cauliflower into a large bowl together with the beaten eggs and grated cheese and mix together with your hands.

Give the mix a good squish and it will hold together. Form the mix into golf ball sized pieces.

Heat a large frying pan and add enough oil to cover the bottom. Gently flatten the fritters and fry on a medium heat, flipping half way, until  golden on both sides.


These are best served with some kind of sauce/salsa. We ate ours with chopped tomatoes, olive oil and balsamic but when the tomatoes are gone we’ll move onto avocado salsa, yoghurt sauce or mayo.


Chilli Kale

I can happily munch away at bowls of stir fried chilli kale.

img_5842

It’s delicious  on the side of a dinner or piled on top. Last night I made a risotto with the last of the tomatoes and borlotti beans and piled some chilli kale on top.

img_5849

We grow a few different kinds of kale. My favourites are the Asparagus kale and Raggedy Jack or Red Russian as it’s also known. Both of these kales are more tender than curly kale or the more fashionable Cavalo de Nero but whatever you have got will work with the recipe below. Just cook a little longer if you are using curly or cavalo.

It’s quite a loose recipe – you need a big handful of kale for each serving as it cooks down considerably. Wash the kale, strip the central stem from each leaf then roll a few leaves together and cut finely.

img_5845

Heat a frying pan, add enough oil to cover the bottom and then add half teaspoon of chilli flakes, 1 teaspoon fennel seeds and a about a teaspoon of finely chopped garlic.

img_5844

Keep the heat low whilst the flakes, seeds and garlic gently flavour the oil then raise the heat and stir in the kale. You might have to add the kale  in two stages, letting the first batch wilt down before adding the second. Keep stirring the kale , season with a little salt and after a few minutes add couple of table spoons of water. The steam created will help the kale to cook.

img_5846

Test for doneness. If you think the kale’s still too coarse add another couple of tablespoons of water and repeat the process then serve with whatever you’re having.

Absolutely yummy!


Revithnos from Sifnos

Sifnos is one of the Cycladic islands in the Aegean Sea, it’s about 25kms long and 15kms wide and very hilly. It takes bit of effort to get there which is  why this beautiful spot is not a mass tourist destination. The main town, Apollonia is in the centre of the island and the roads run down from there to little villages, fishing ports and deserted beaches.

img_5733

The island also has plenty of tracks linking everywhere together which formerly would have been used by donkeys. There aren’t many donkeys these days, they seem to have been replaced by Suzuki Jimneys and similar little vehicles which are the only way to get down to many of the hamlets.

img_5731

Sifnos tourism has a walking trail initiative, there are lots of way marked tracks to beautiful places. It’s mostly a case of what goes down, must come up – challenging trails with spectacular views.

img_5735

We walked out from the village that we stayed in crunching almonds underfoot and feasting on ripe pomegranates, figs and prickly pears. There are trees laden with lemons, olives and quince waiting to be harvested.

img_5711

The views are spectacular and with the glorious autumn weather, a very comfortable 25c-30c – it’s a great way to get an all over tan.

img_5708

The friendly people who are happy to have visitors are famous for their traditional Greek food, lots of vegetable mezze, grilled fish and meat. Bakeries  produce pastries of all sorts of shapes and sizes filled with different cheeses or cheese and spinach and these make great portable emergency rations.

Chickpeas are one of the crops grown on the island. It’s crop that doesn’t require watering which on an island where it mightn’t rain for eight months is a good thing. I now realise  why my chickpea growing experiment failed so miserably in Ireland,as not only is there a very high humidity  I watered them to boot. No wonder they weren’t happy!

The recipe that the island is most famous for is Revithnos – a chickpea soup – one of these ‘live to be one hundred’ recipes. It’s cooked slowly in the oven using just a few key ingredients – chickpeas, onion, olive oil, lemon and bay leaves. It’s traditionally served on a Sunday with bowl of olives and fresh bread. The chickpeas are soaked overnight on Friday then  rinsed and cooked in a ceramic pot  called a tsoukali. Formerly everyone took their pots to the bakers who loaded up the ovens and left  them overnight to be collected for lunch after church on Sunday. The slow cooking makes the chickpeas velvety soft in an emulsion of olive oil and onion which is brightened up with a squeeze of lemon juice. It’s another one of these dishes that isn’t going to win a beauty contest but will healthily sustain body and soul.

img_5756

Cooking something in the oven for 4-5 hours is probably off putting  for most of us and  we don’t have friendly bakers with wood fired ovens around here so it’s probably best to cook the chickpeas slowly on top in a heavy pot with a good lid then finish up for an hour or so in the oven. If you own an Aga or range you’re in business. Just pop the pot in the slow oven and go to bed!

Revithnos – Chickpea Soup

350g chickpeas

150mls olive oil

2 large onions

2-4 cloves garlic

1 -2 bay leaves

lemon juice

salt and pepper

water

a handful of parsley


Soak the chickpeas over night then drain well.

Peel the onions and garlic and chop finely.

Put the olive oil into a heavy pot and heat gently. Add the chopped onion and cook until the onions melt down but don’t let them brown. Stir in the chopped garlic and cook for a further two minutes then add the chickpeas and bay leaf. Stir everything together for a few minutes then add enough water to cover everything by 2-3cm. Bring to the boil, reduce to a low simmer and cover with a tight fitting lid. Cook for one to one and a half hours or until the chickpeas are soft.

Stir in the juice of a lemon , add a little more water if it looks like it’s getting dry and season with a little salt. Pop the pot into a low oven , 150c, oven for an hour.

Serve with a little chopped parsley on top, lemon wedges and fresh bread and olives on the side.

A glass of red wine goes down well with this too!