Author Archives: lettercollumkitchenproject

About lettercollumkitchenproject

A cook that gardens. Sun addict. Not a good addiction in West Cork hence the travel addiction. Add in a splotch of kitchen snooping while away, a big walled organic garden while home and a kitchen full of a bit of everything. Runs an organic bakery/delicatessen/food shop with her husband using food from the garden and the years of accumulated kitchen snooping. Check out the shop and garden at www.lettercollum.ie

Steps, Small Churches and Pies

We arrived into Amorgos, the third of the Cycladic islands that we have visited on this trip late last night. We kind of ended up here by default after the ferries were cancelled due to extreme wind. 

This turnaround of our plans had the man in the ferry ticket bemused.

‘Amorgos’ he said when we asked for two tickets. “Are you sure?”, “Why?’, at which point we asked if there was something wrong with Amorgos, “it’s so far away’ said the ticket man who had never been here and it was. Six and a half hours bumping through the sea in a small ferry boat but now that we’re here we glad we made the trip. 

We did wonder last night when we landed. It was super windy, howling, but otherwise very quiet. We woke up this morning with the wind still whipping through the narrow streets but it cleared the clouds to reveal a blue sky. 

Amorgos is quite a big island but sparsely populated. There’s one main road that seems to traverse the central spine of the island with side roads that switch backwards and forwards down to the sea on either side. It’s very steep and there are lots of steps. Steps up into the towns, steps down to the coast and lots of rough donkey paths when the steps peter out.

Steps are something most of the Cycladic islands seem to have in common, along with lots of very small churches and bakeries that make great pies. Pies is quite a loose term as they come in all shapes and sizes, savoury and sweet.

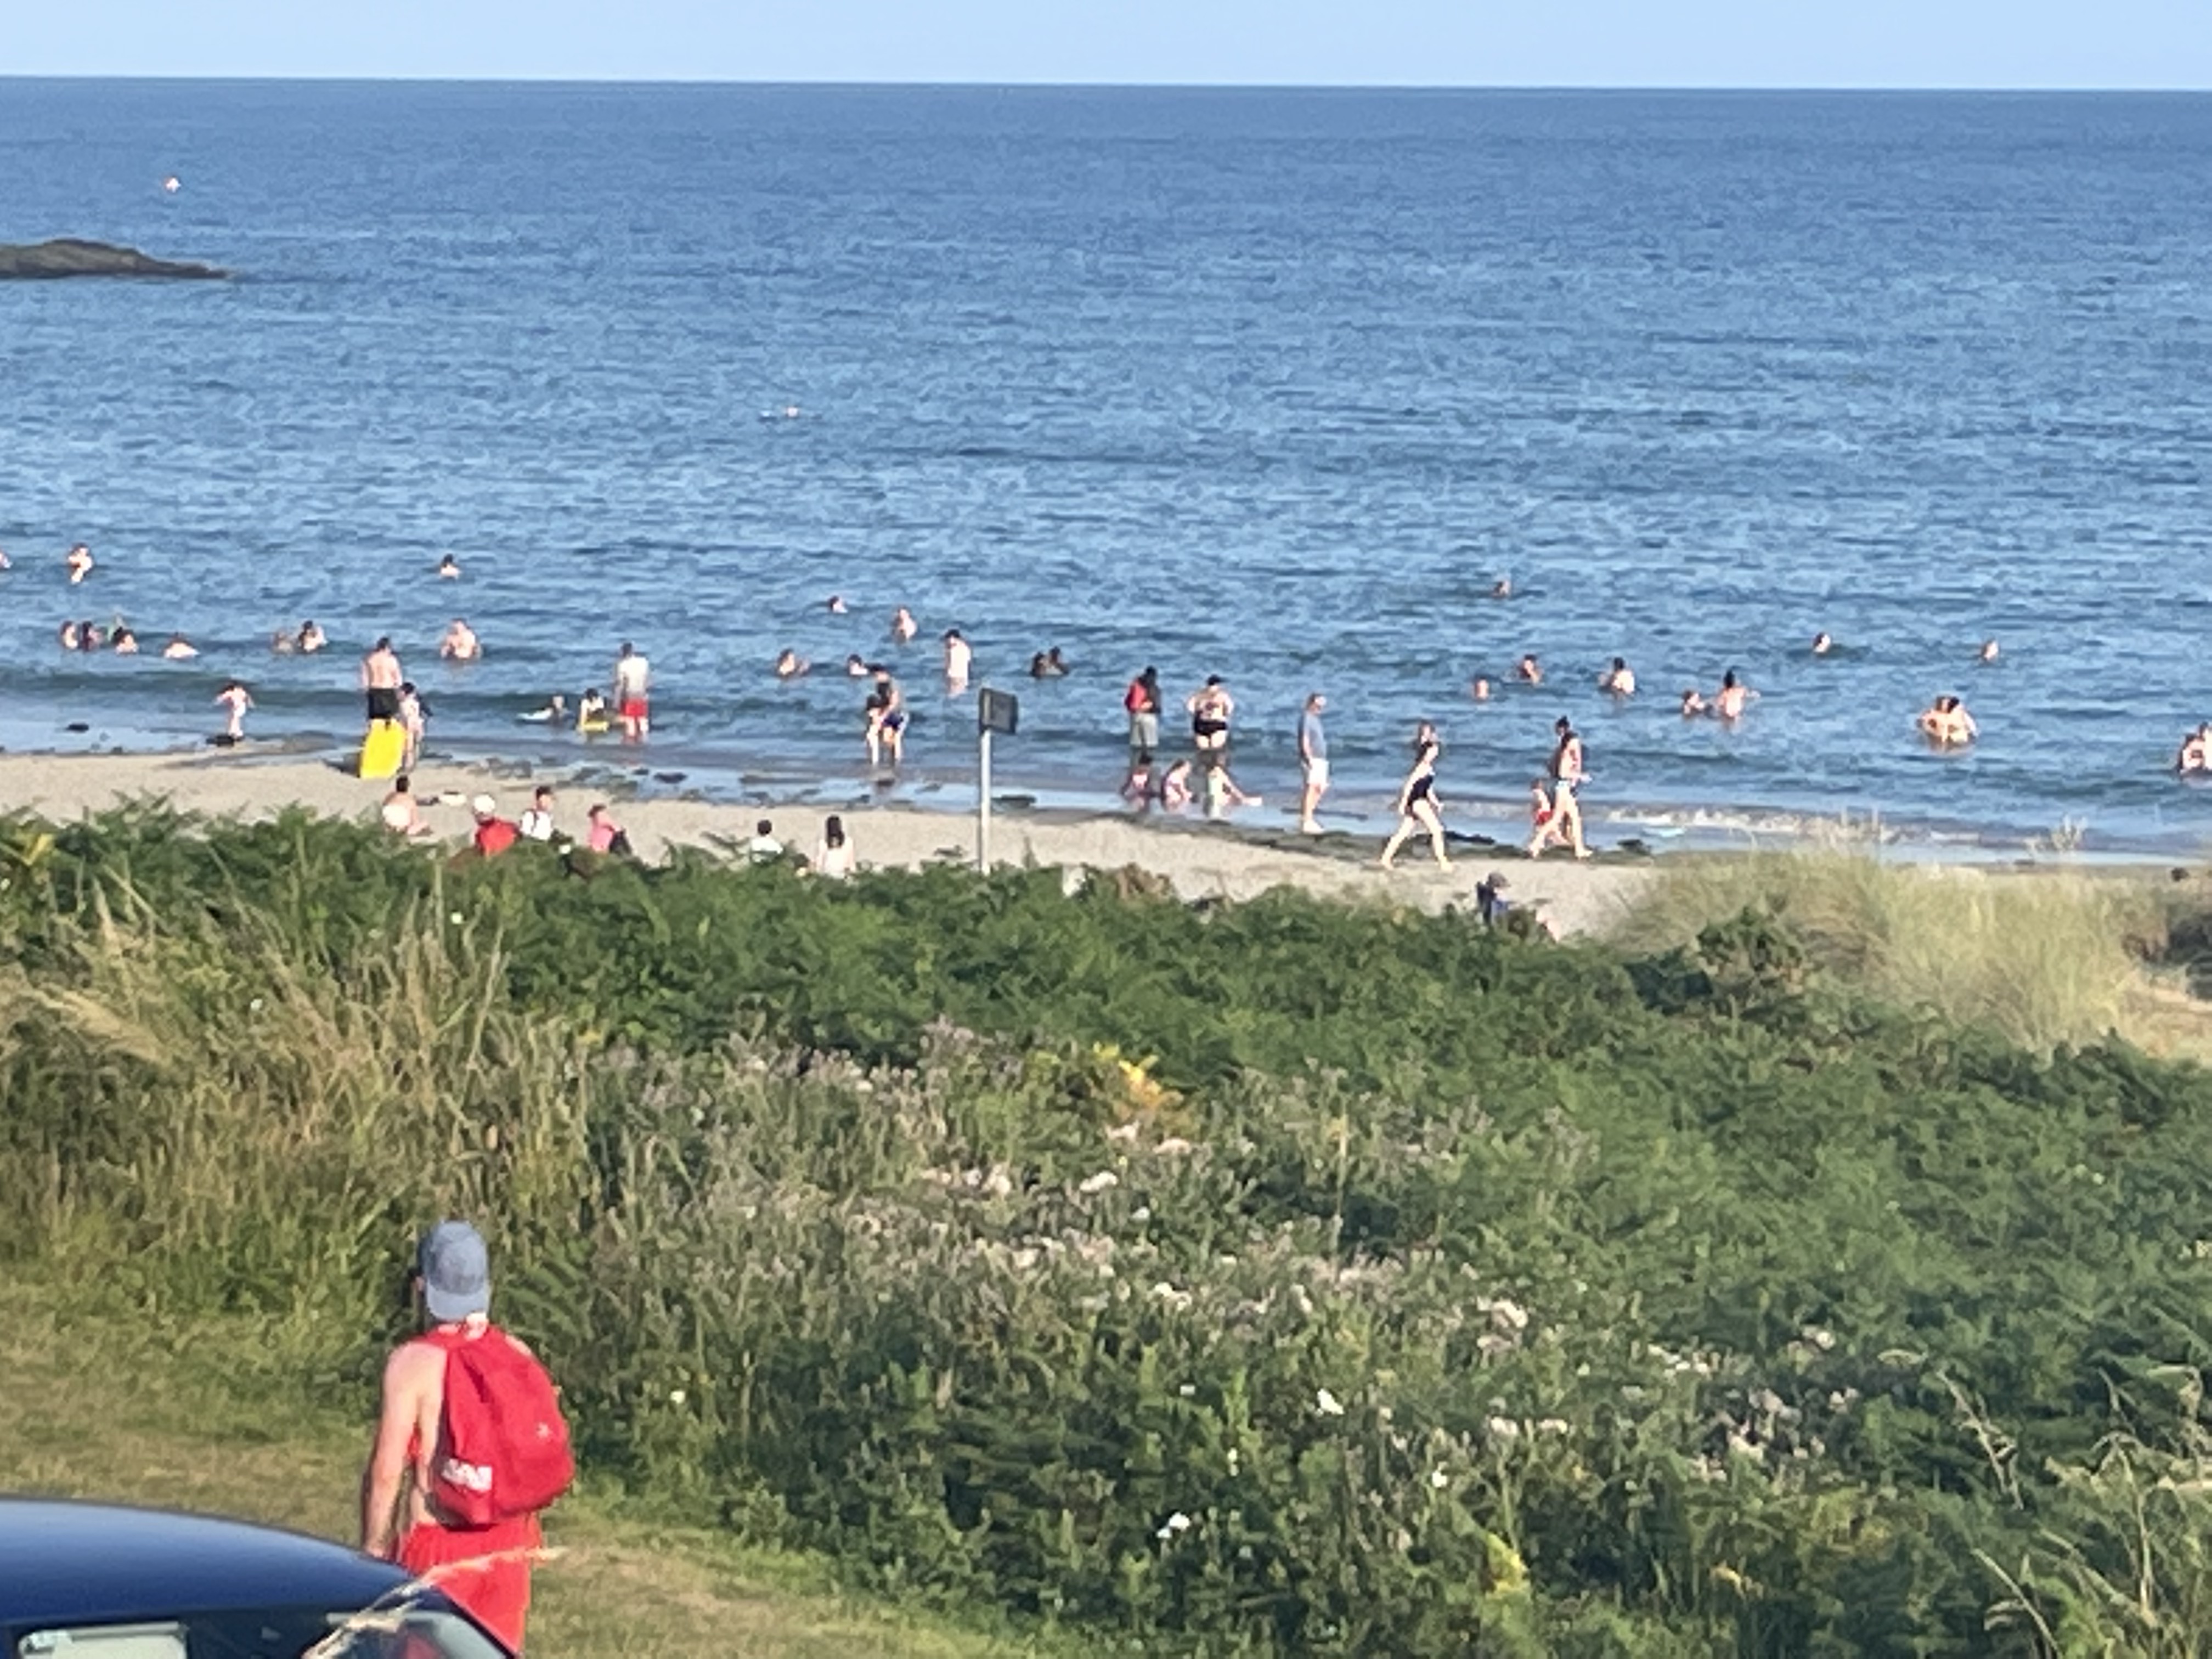
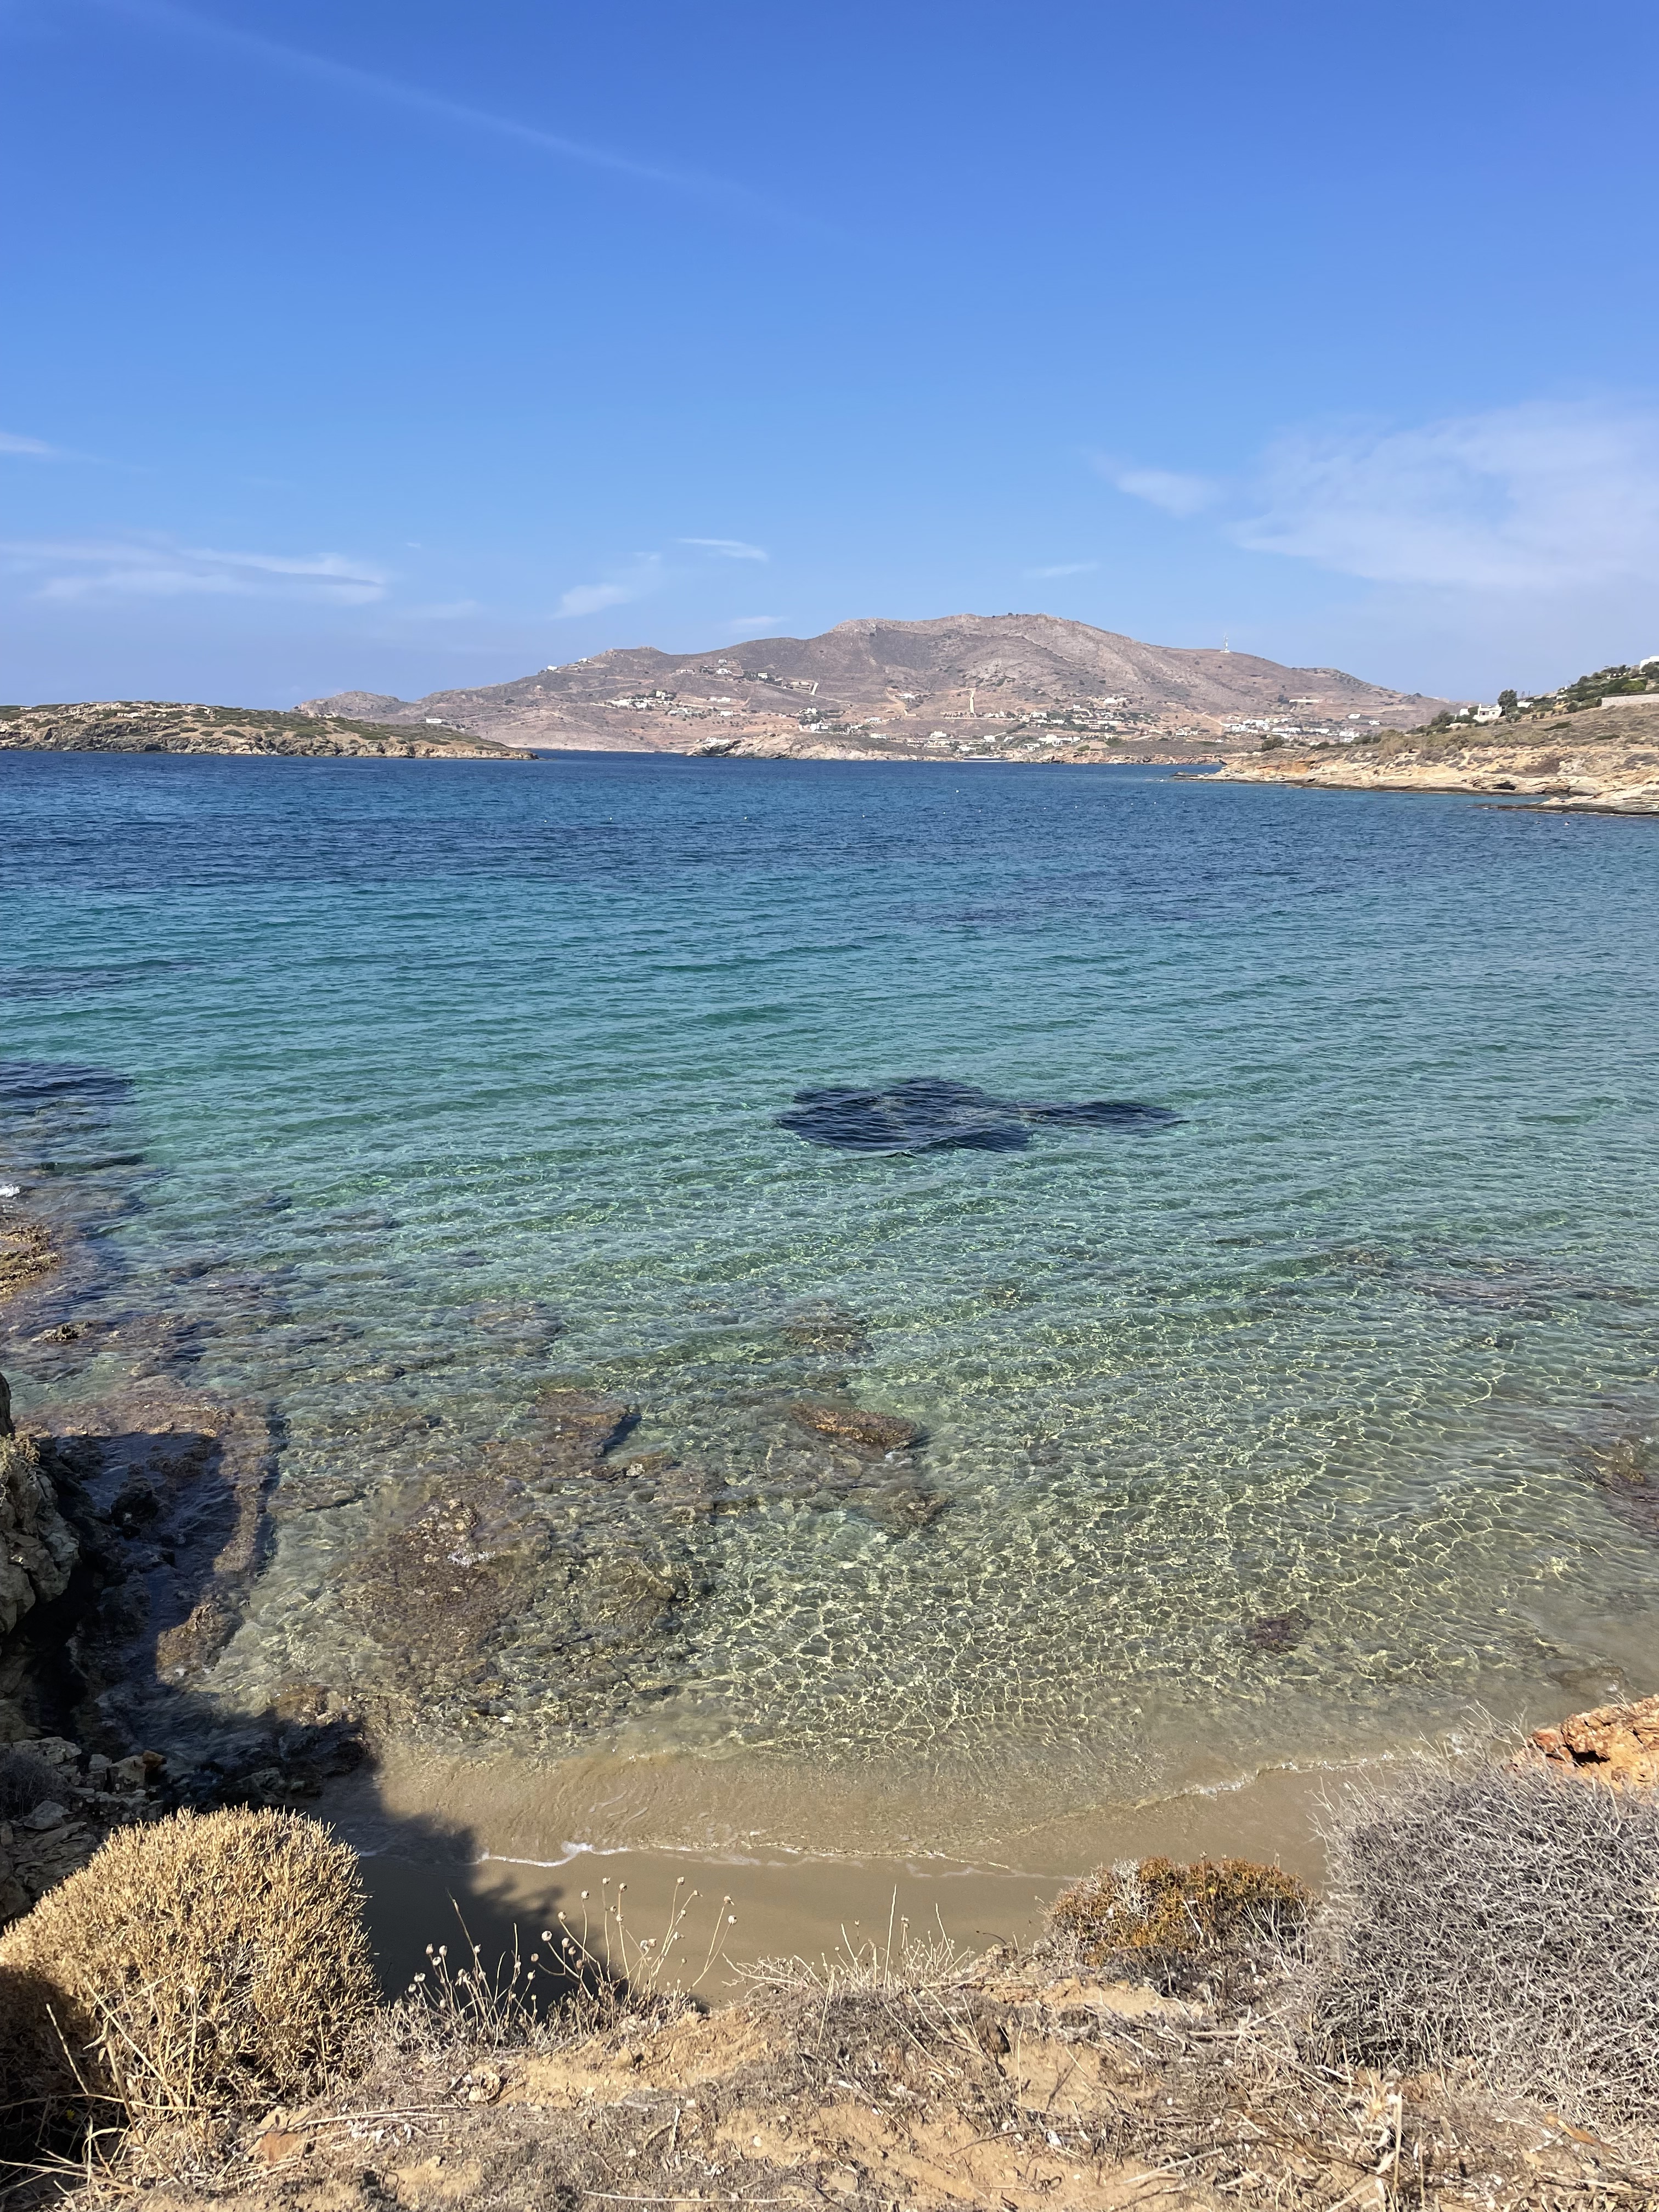
Perfect for a picnics. We try to pick one up before we head for the hills. They get tucked into our backpacks along with half of our wardrobe as you never know what you might need – jumper, sleeveless fleece and raincoat, which is for wind protection, not rain. We also throw in our togs and a towel in case we find a beach that we can clamber down to. The sea is pristine, pretty cool but still delightful if the sun is shining.

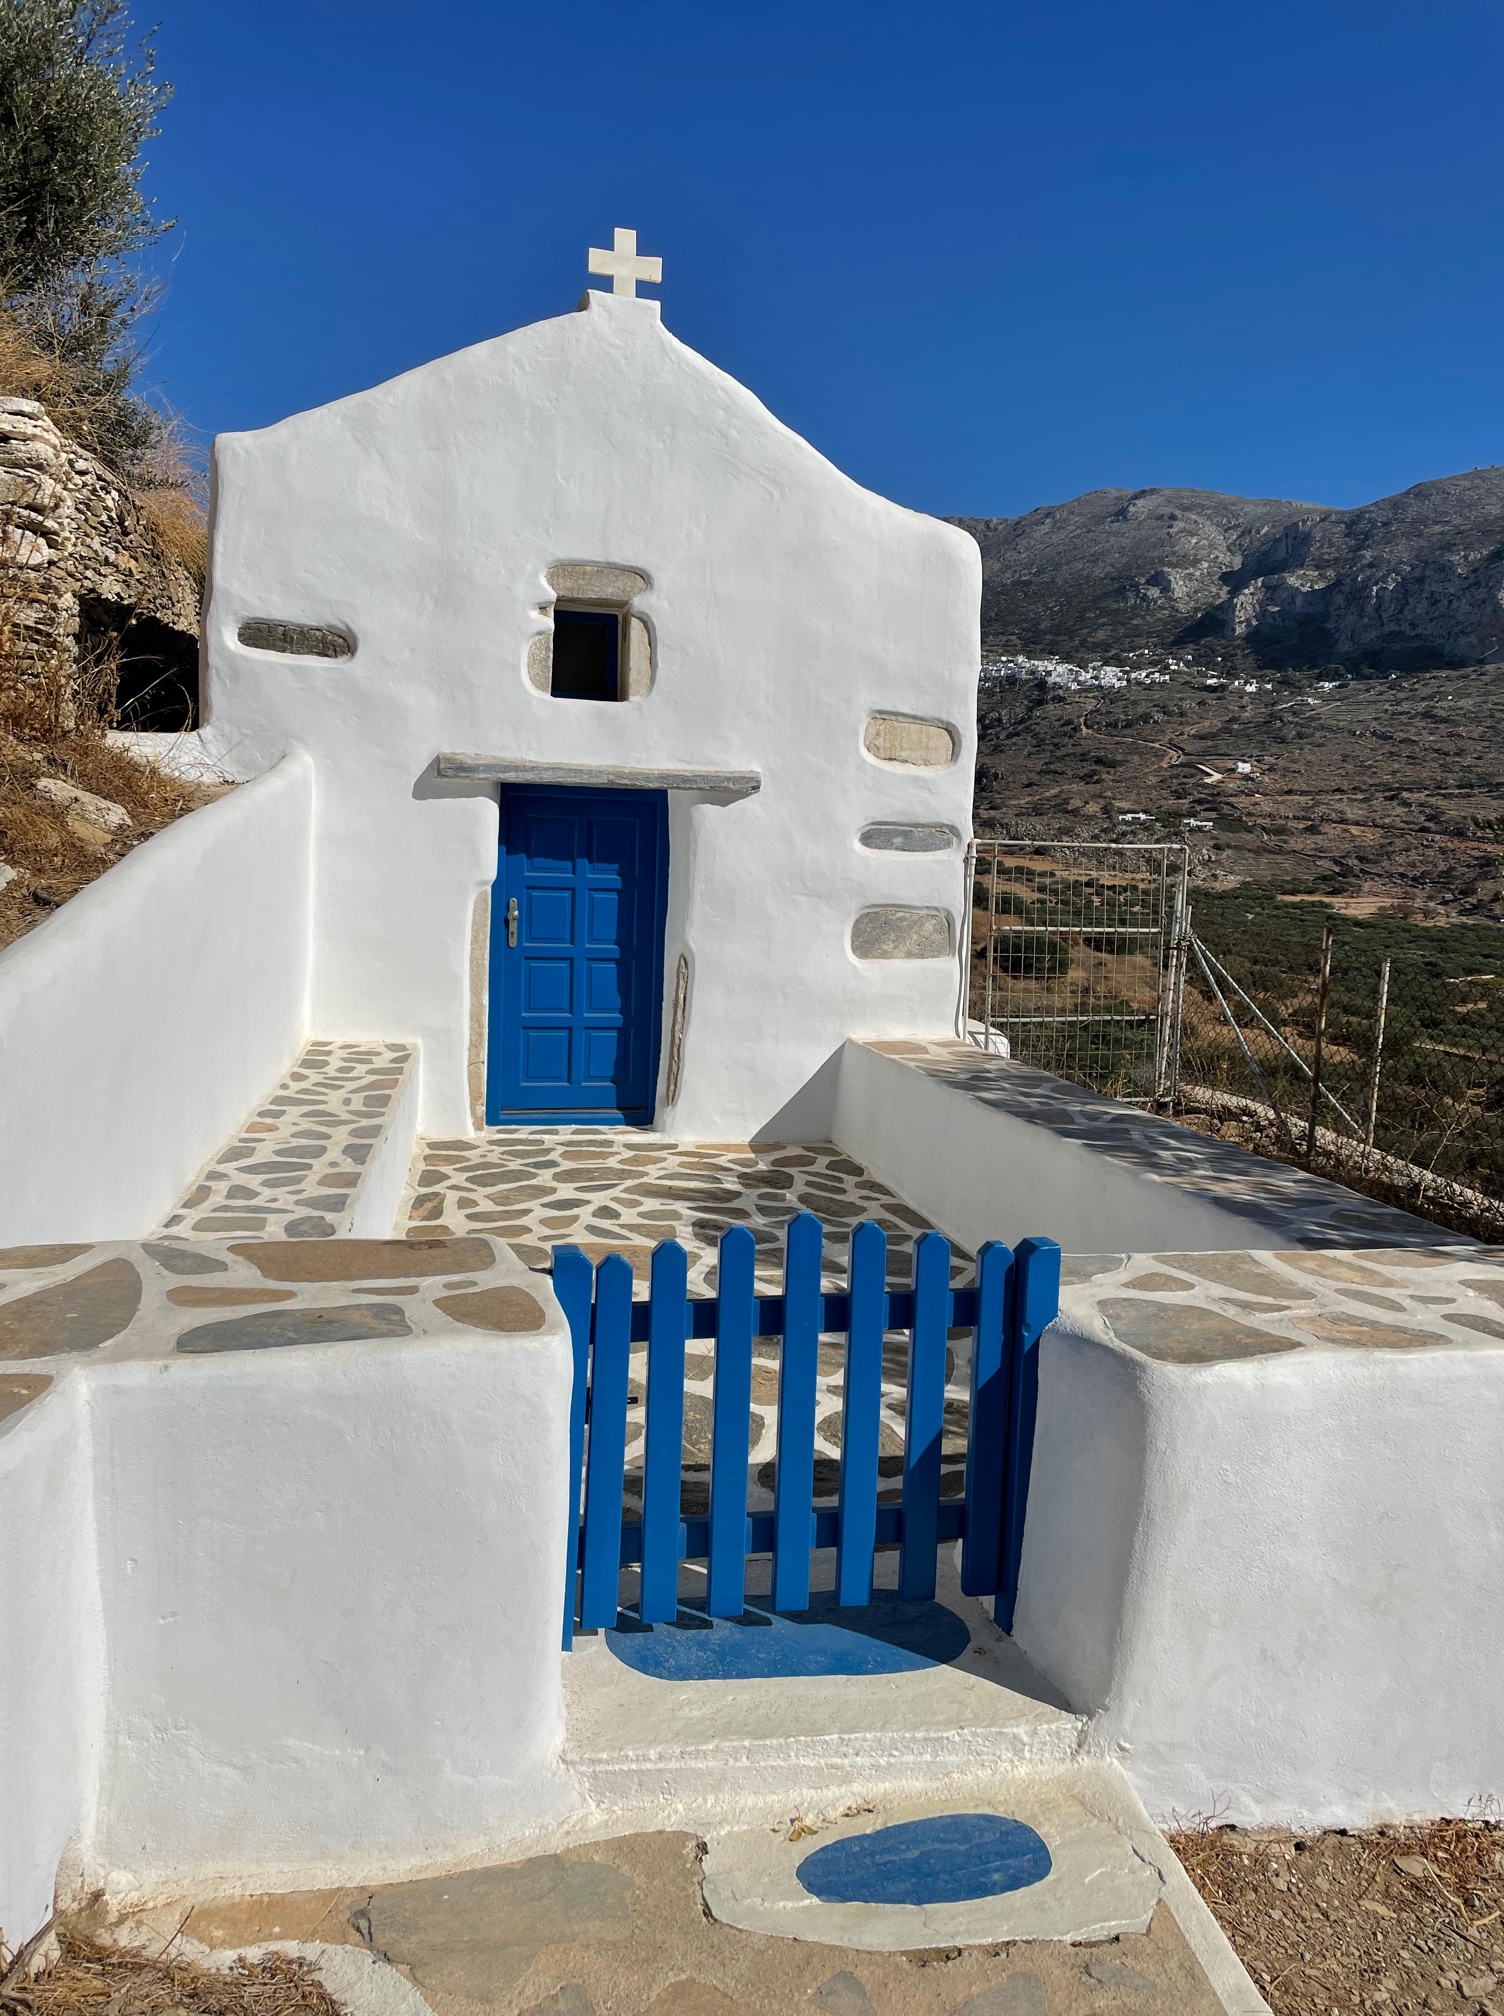
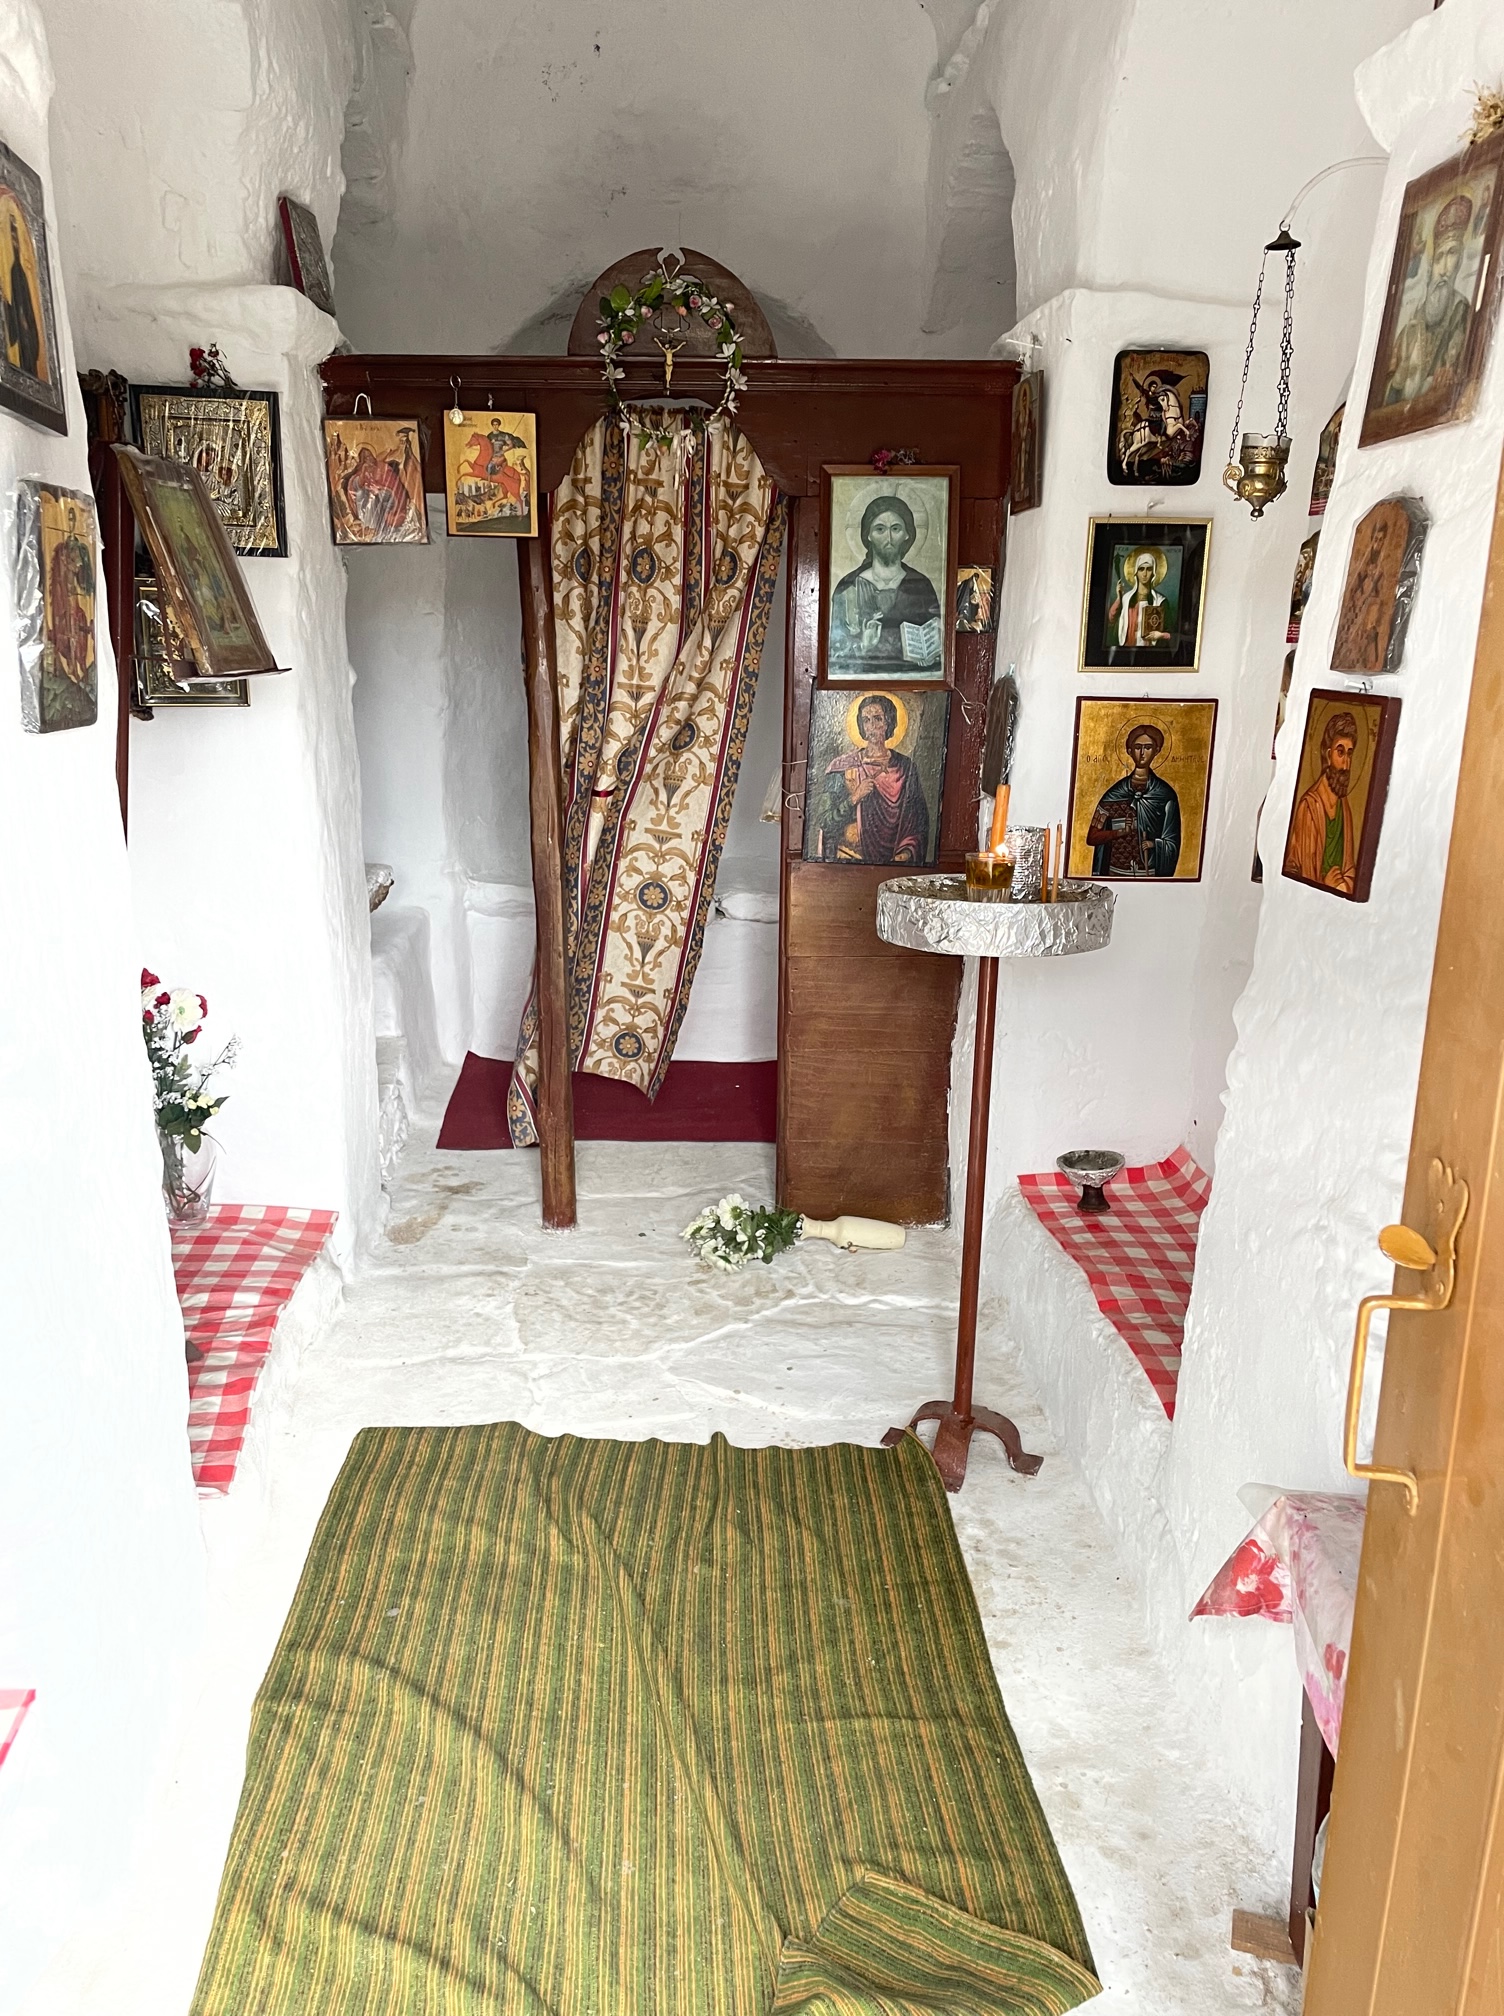
The churches are scattered about the islands, often on top of the highest thing in sight or in the middle of nowhere. They are immaculately maintained, painted pristine white and blue.  Some are unlocked and when we peep inside there are candles burning and beautiful pictures and icons.

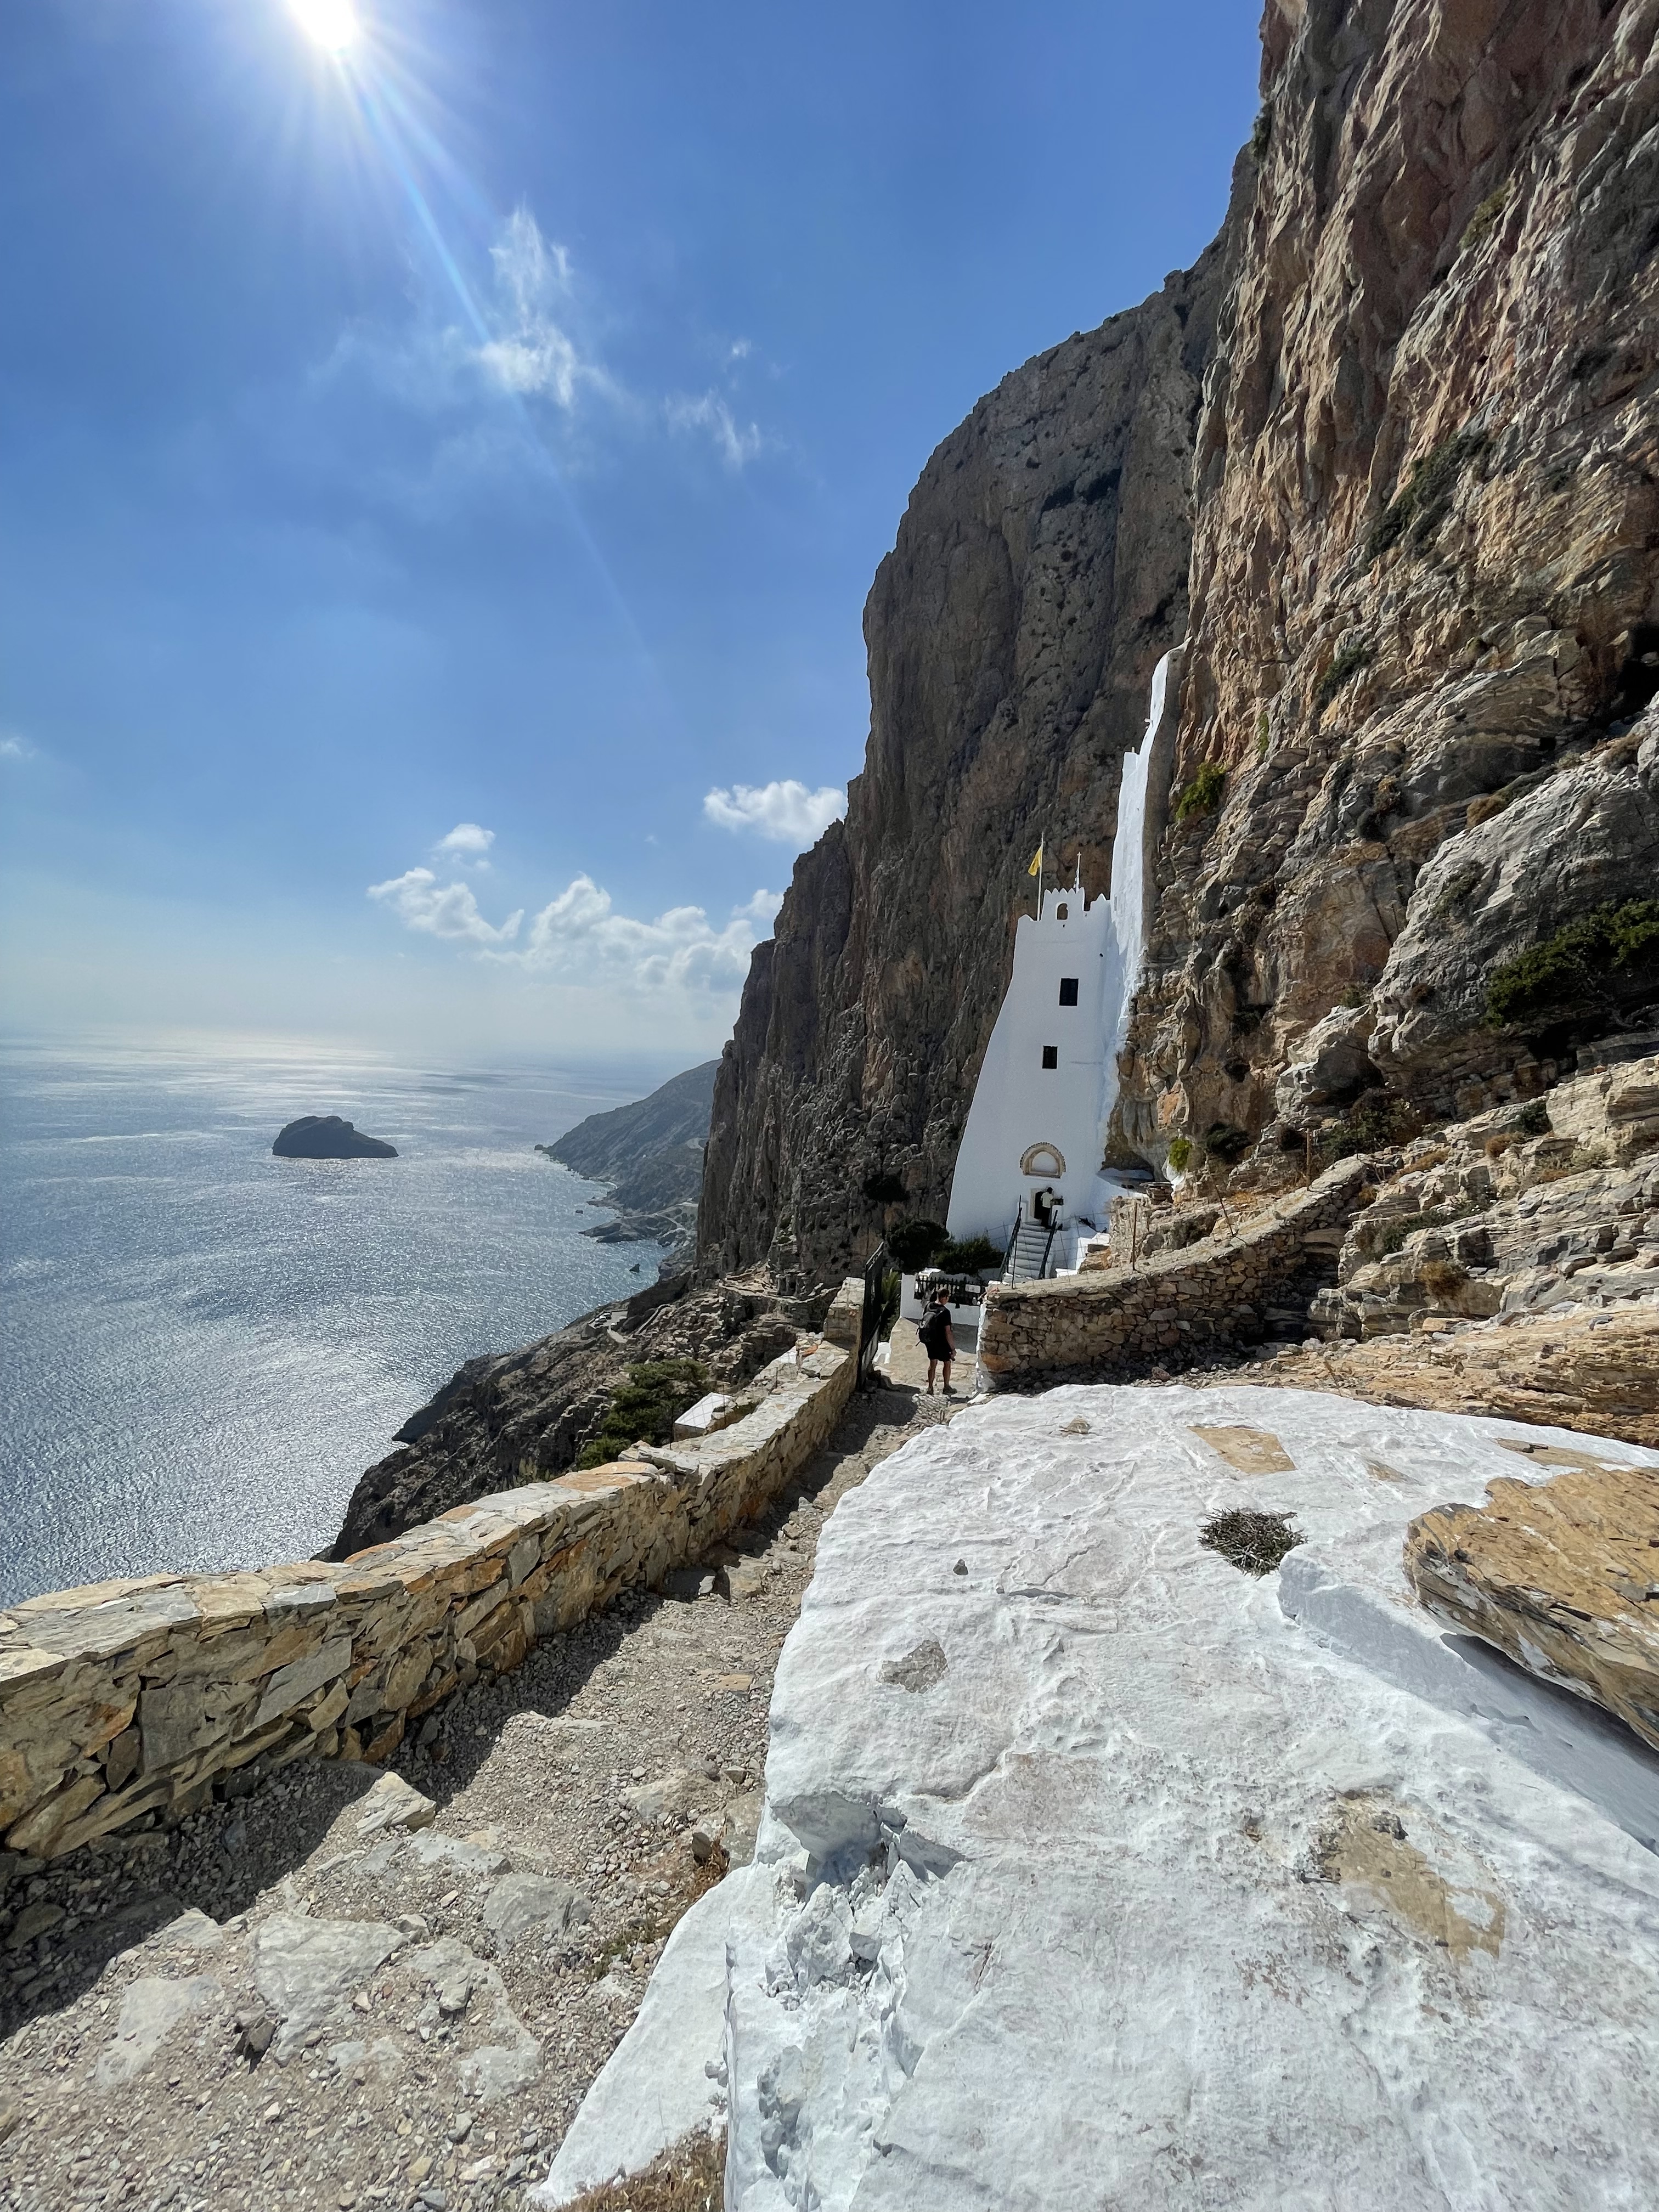
Today we came across a monastery that was built high up, hugging the cliffs.

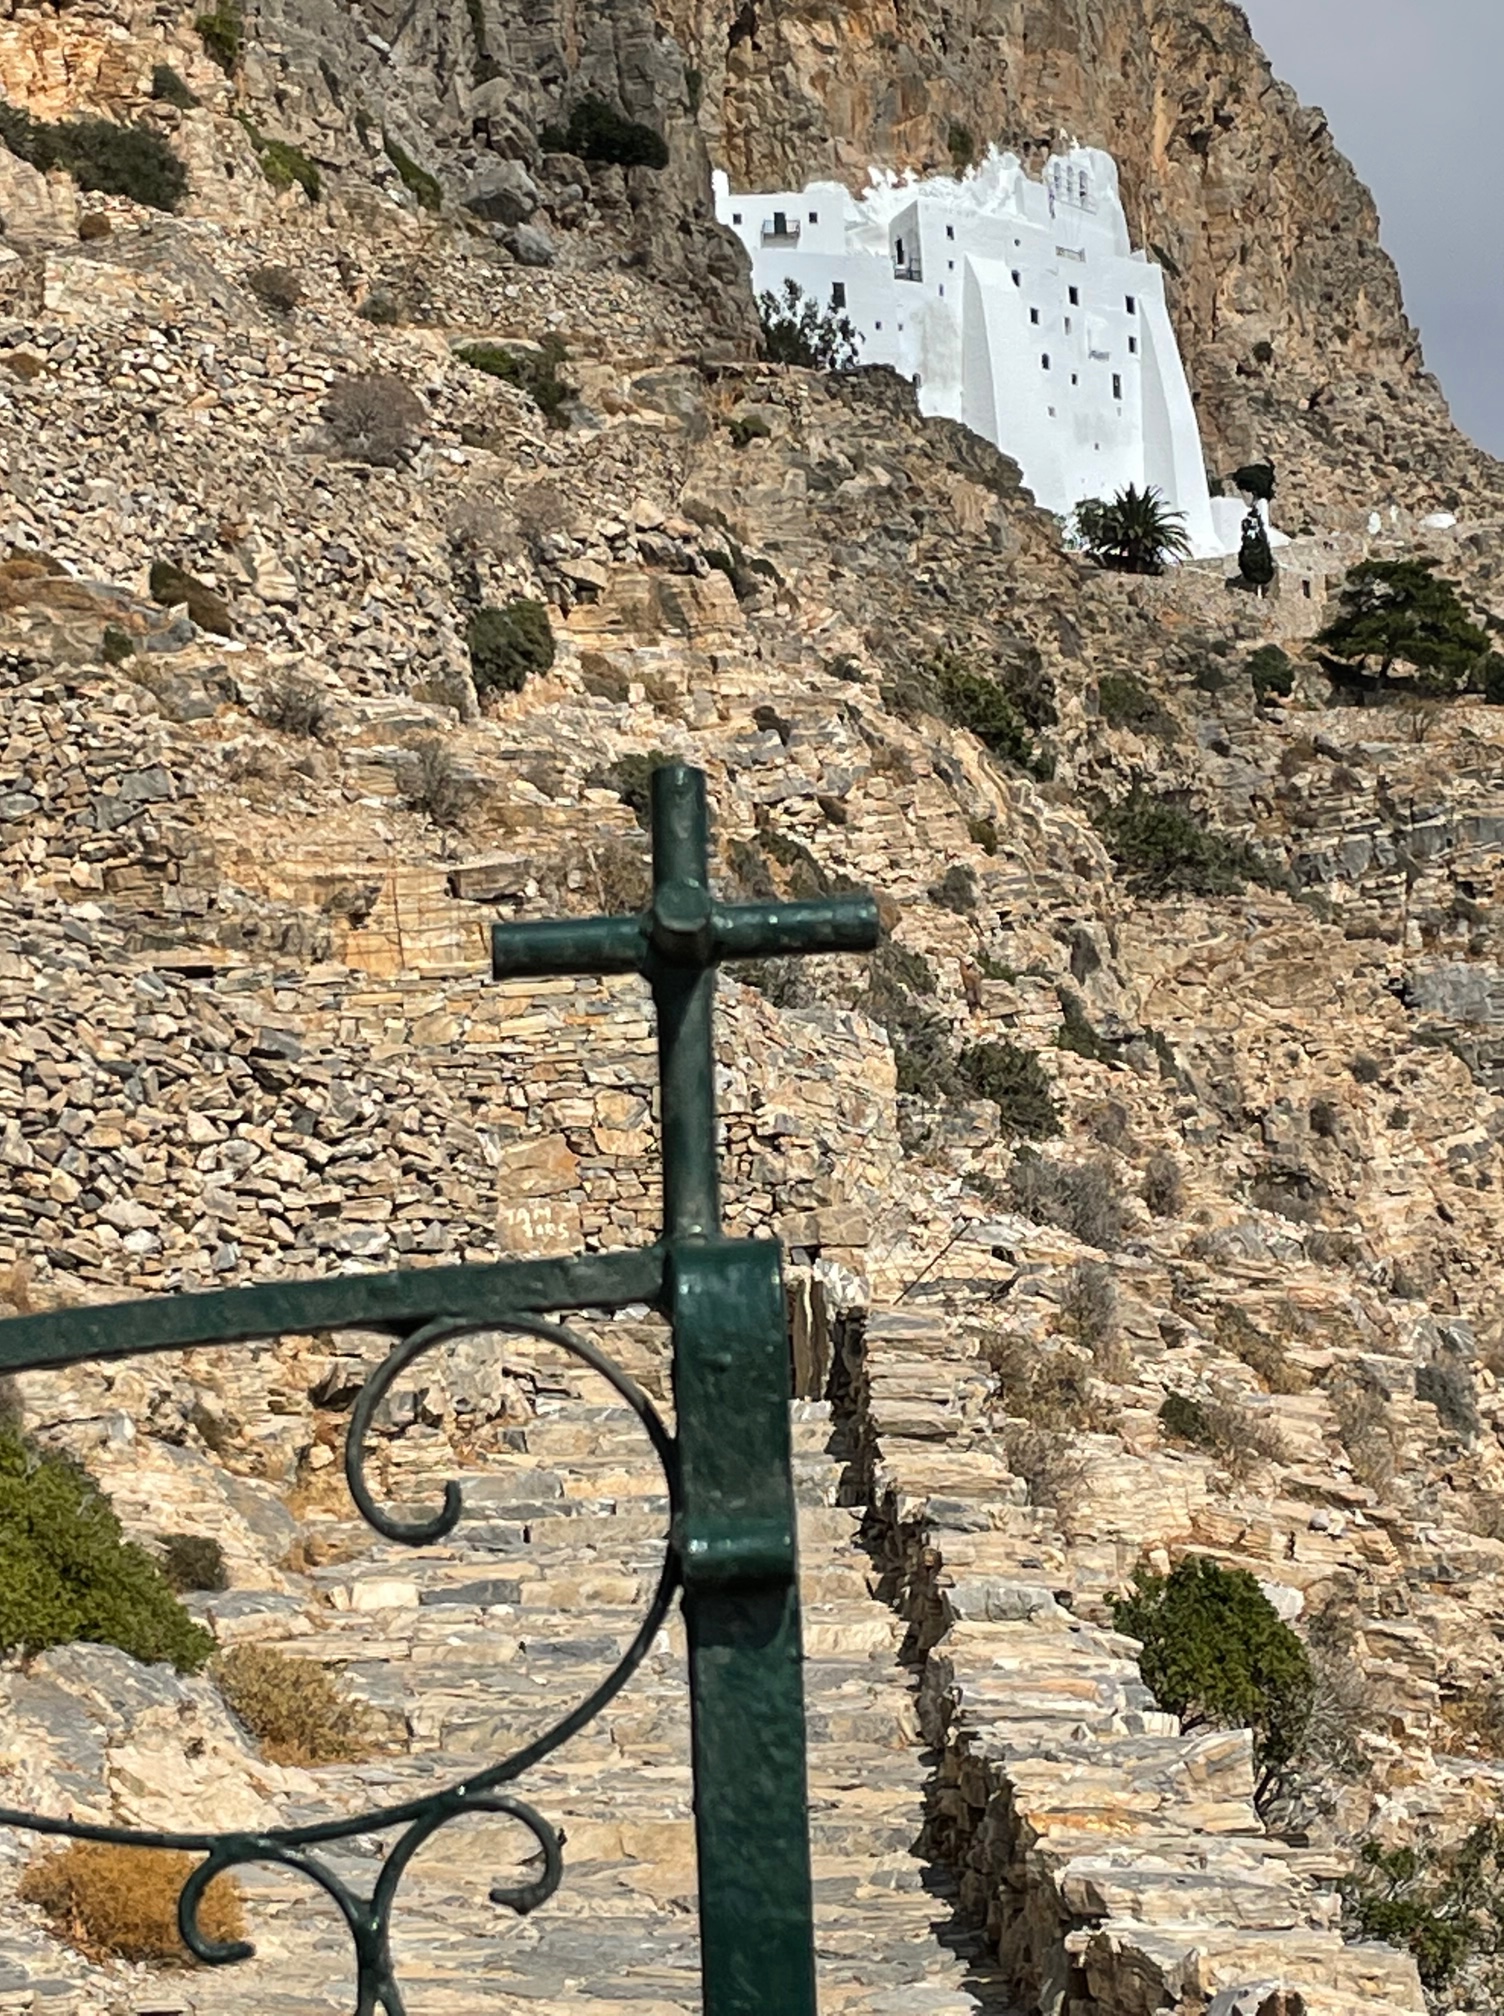
It was up several hundred steps and was manned by two monks, two volunteers and lots of cats. We were invited in, up lots of steps, to an amazing church overlooking the sea, which looks out to a sheer drop below. It would be a great location for the next Star Wars movie.

Apart from the aforementioned steps, pies and mini churches, each island has it’s own distinct personality. We’ve been having great fun exploring and getting spectacularly lost. The signposts are erratic and all in Greek which brings a new level of meaning to ‘it all sounds Greek to me”. It’s made me make a note to myself to learn the Greek alphabet. Wherever we go we make a point of learning how to say good morning, good evening, please and thank you. Counting is also an asset but there isn’t usually a problem with the alphabet.

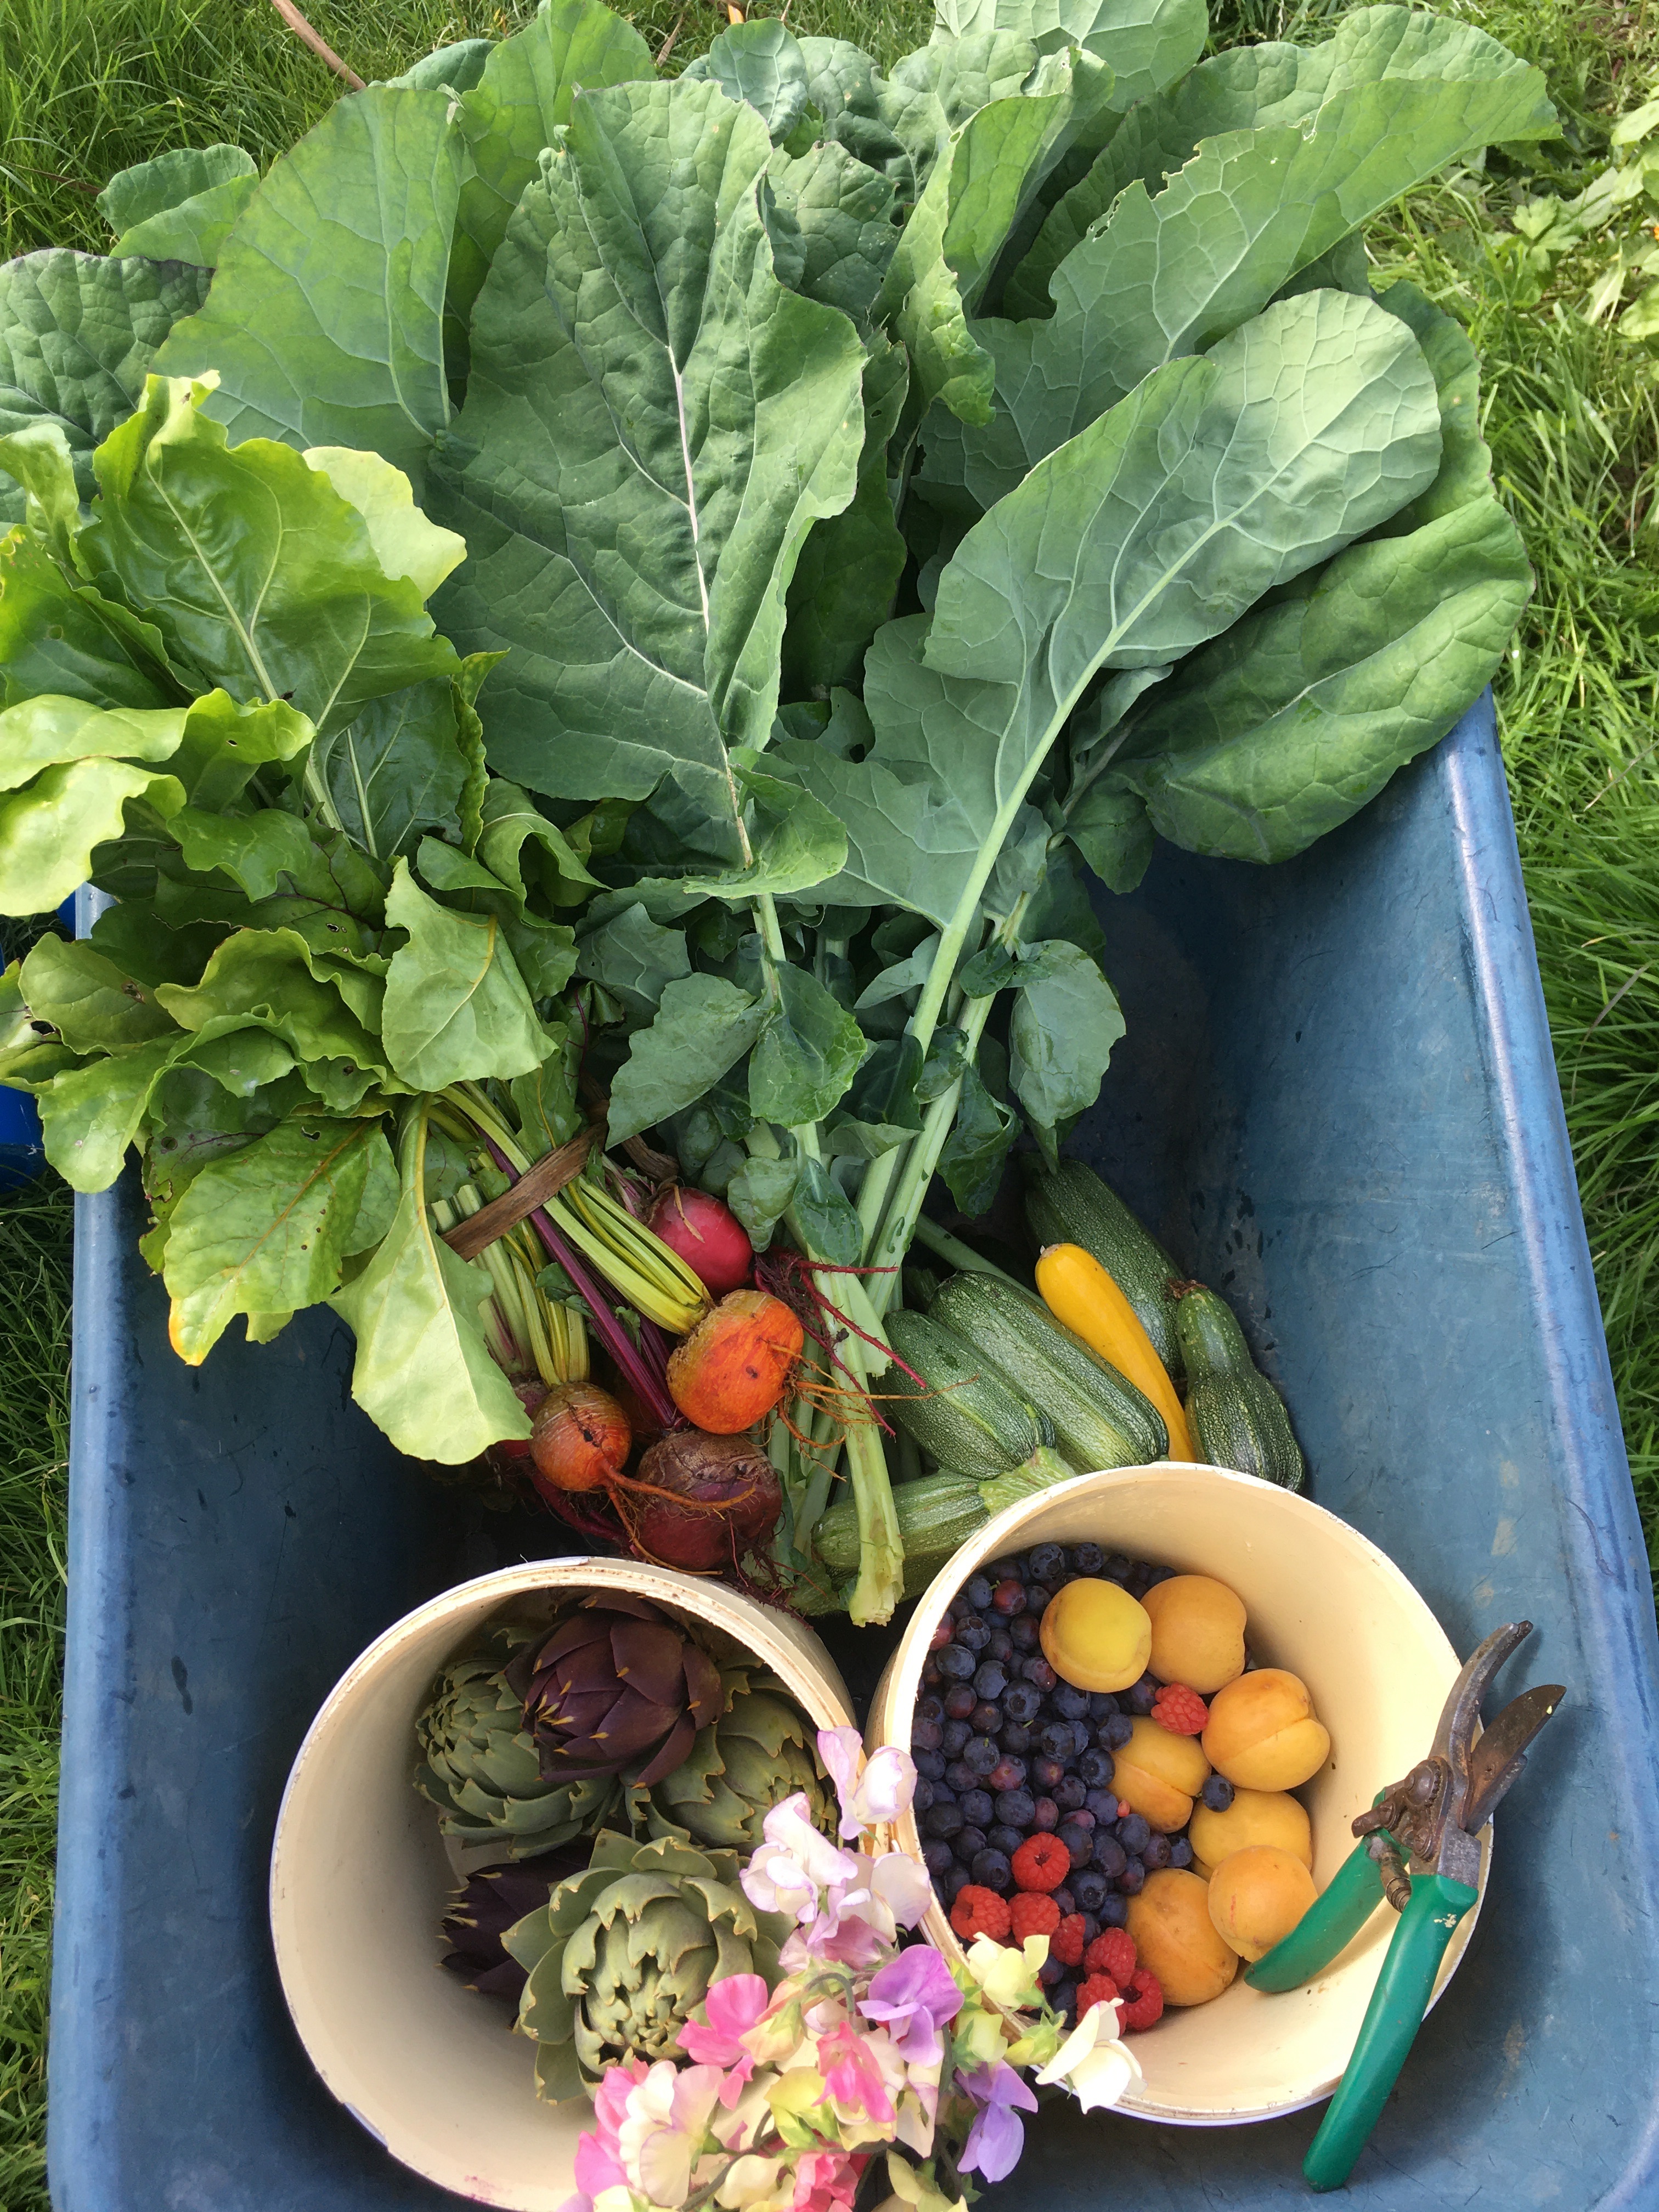
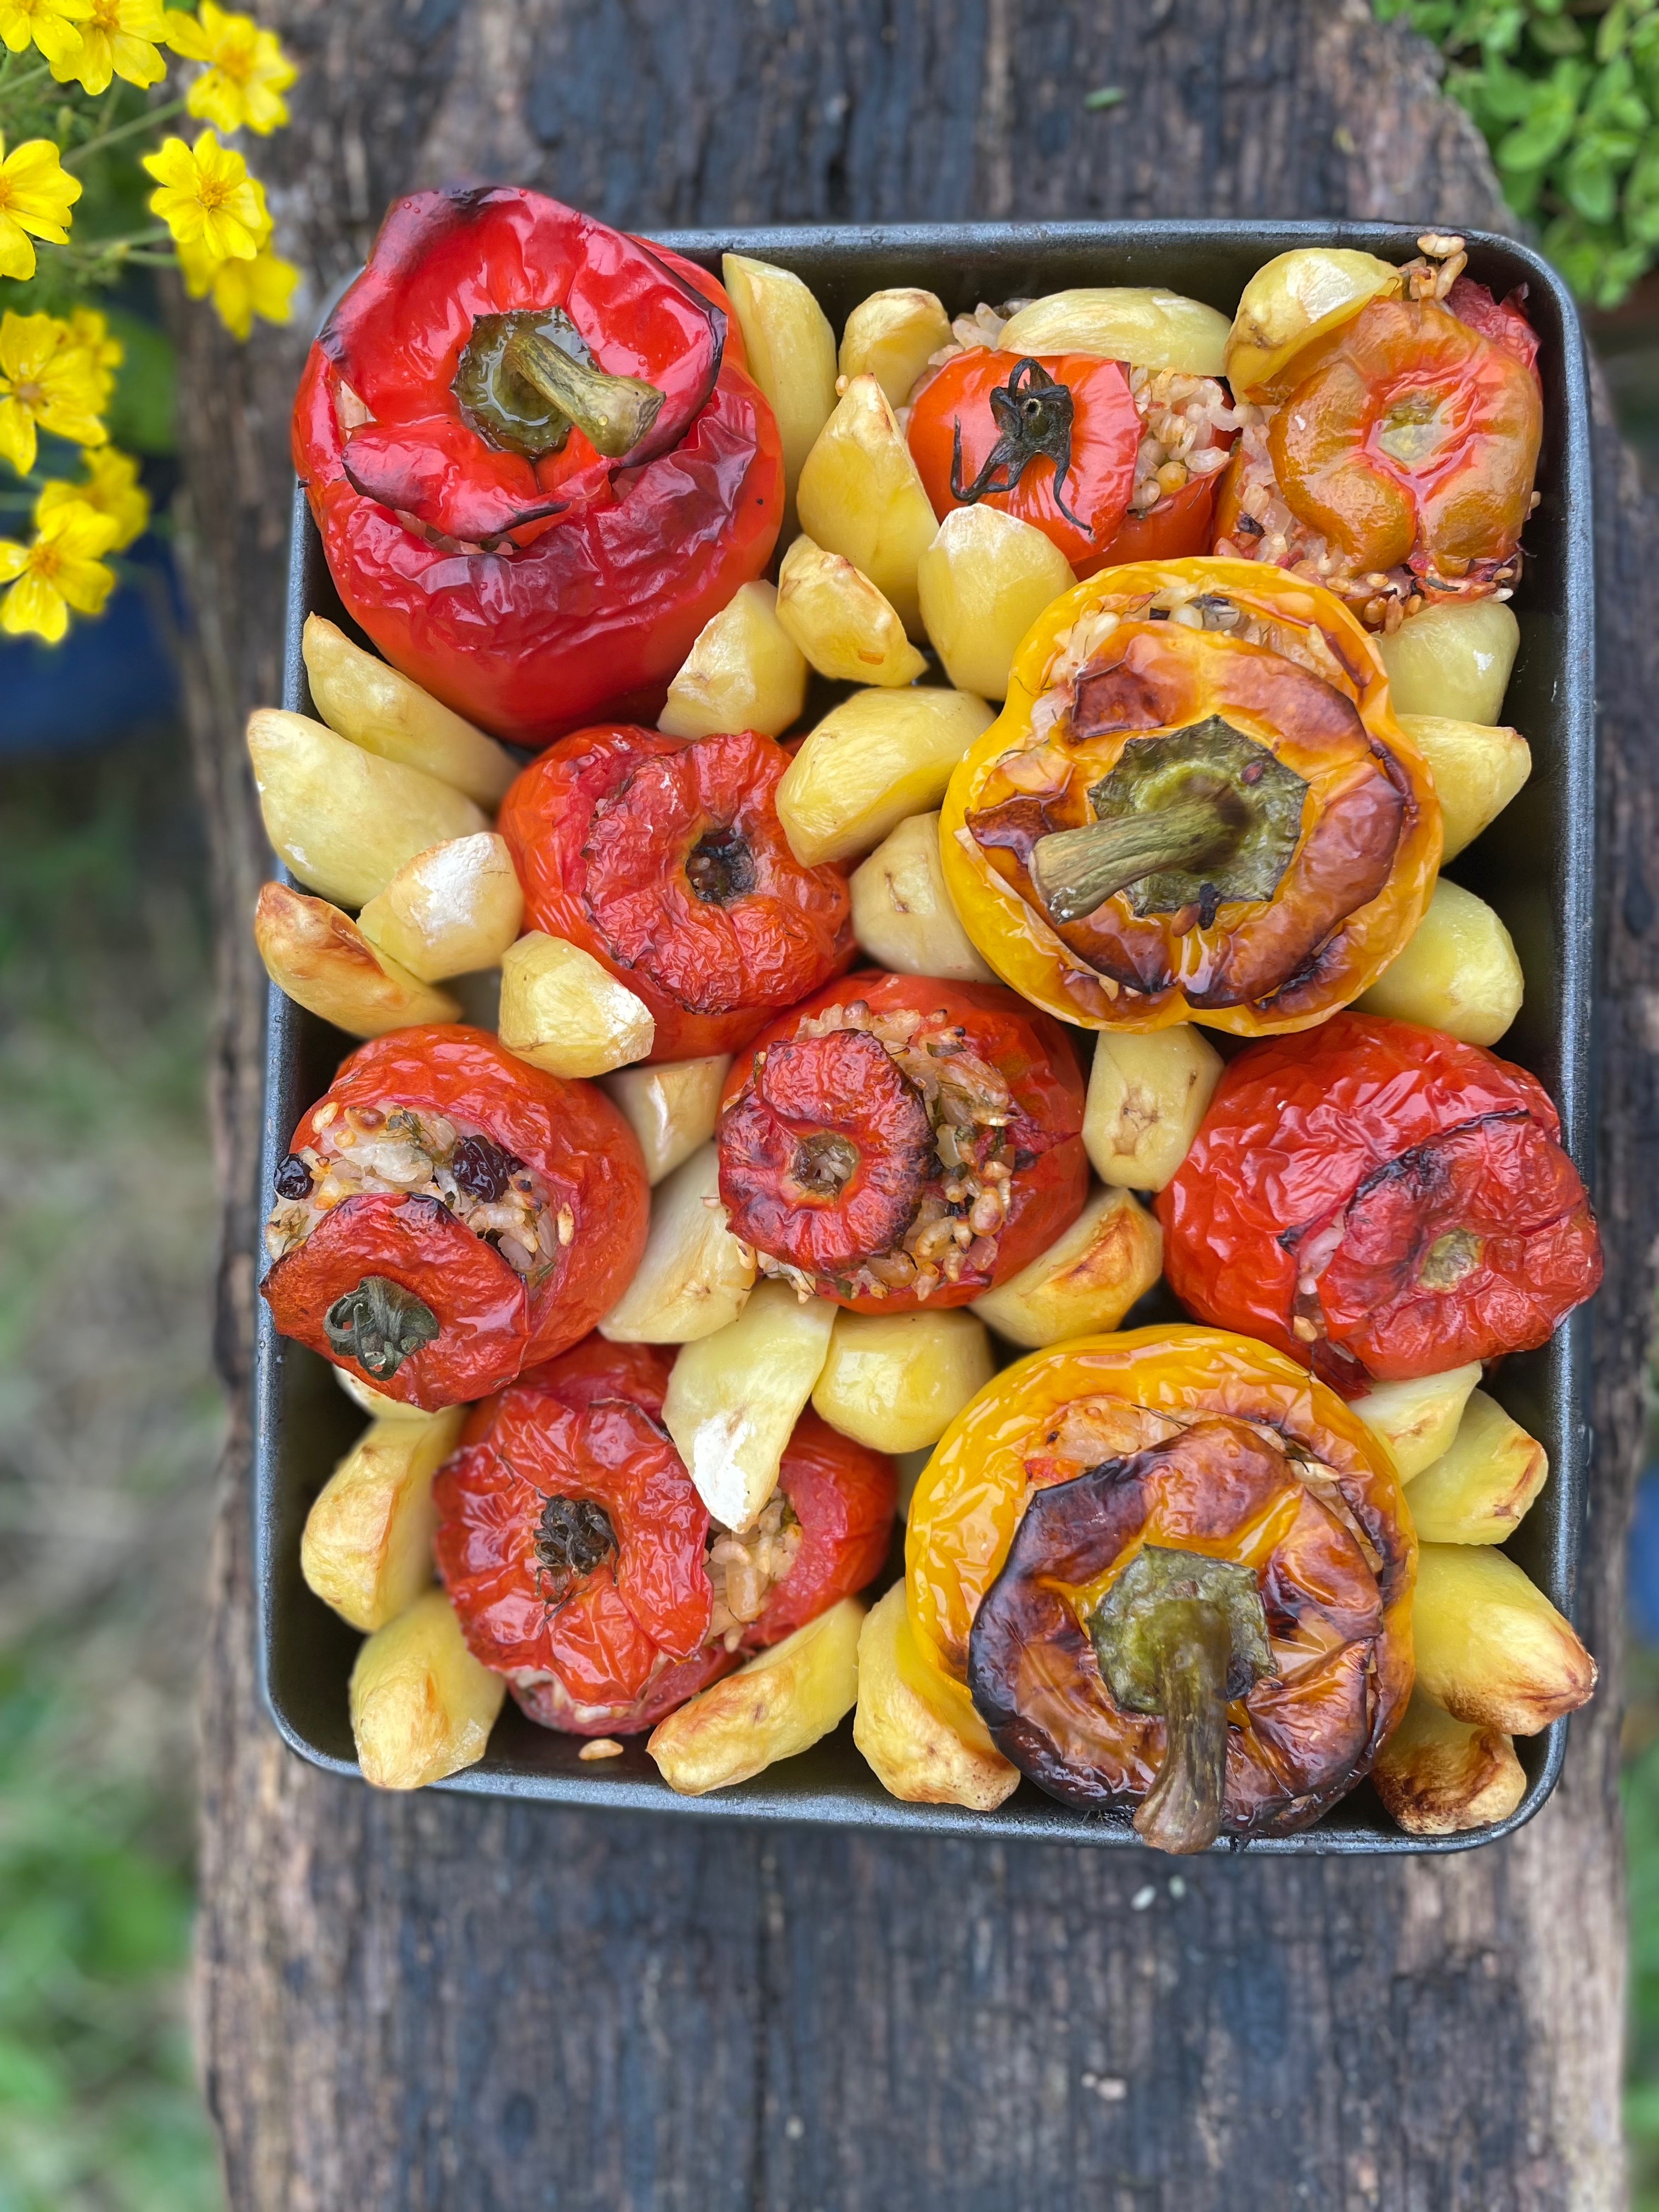
The islanders are very proud of their food, most of the ingredients used  are local or from neighbouring islands. There’s the bounty from the sea and the land with plenty of goats and sheep to produce the masses of cheese that are on offer.

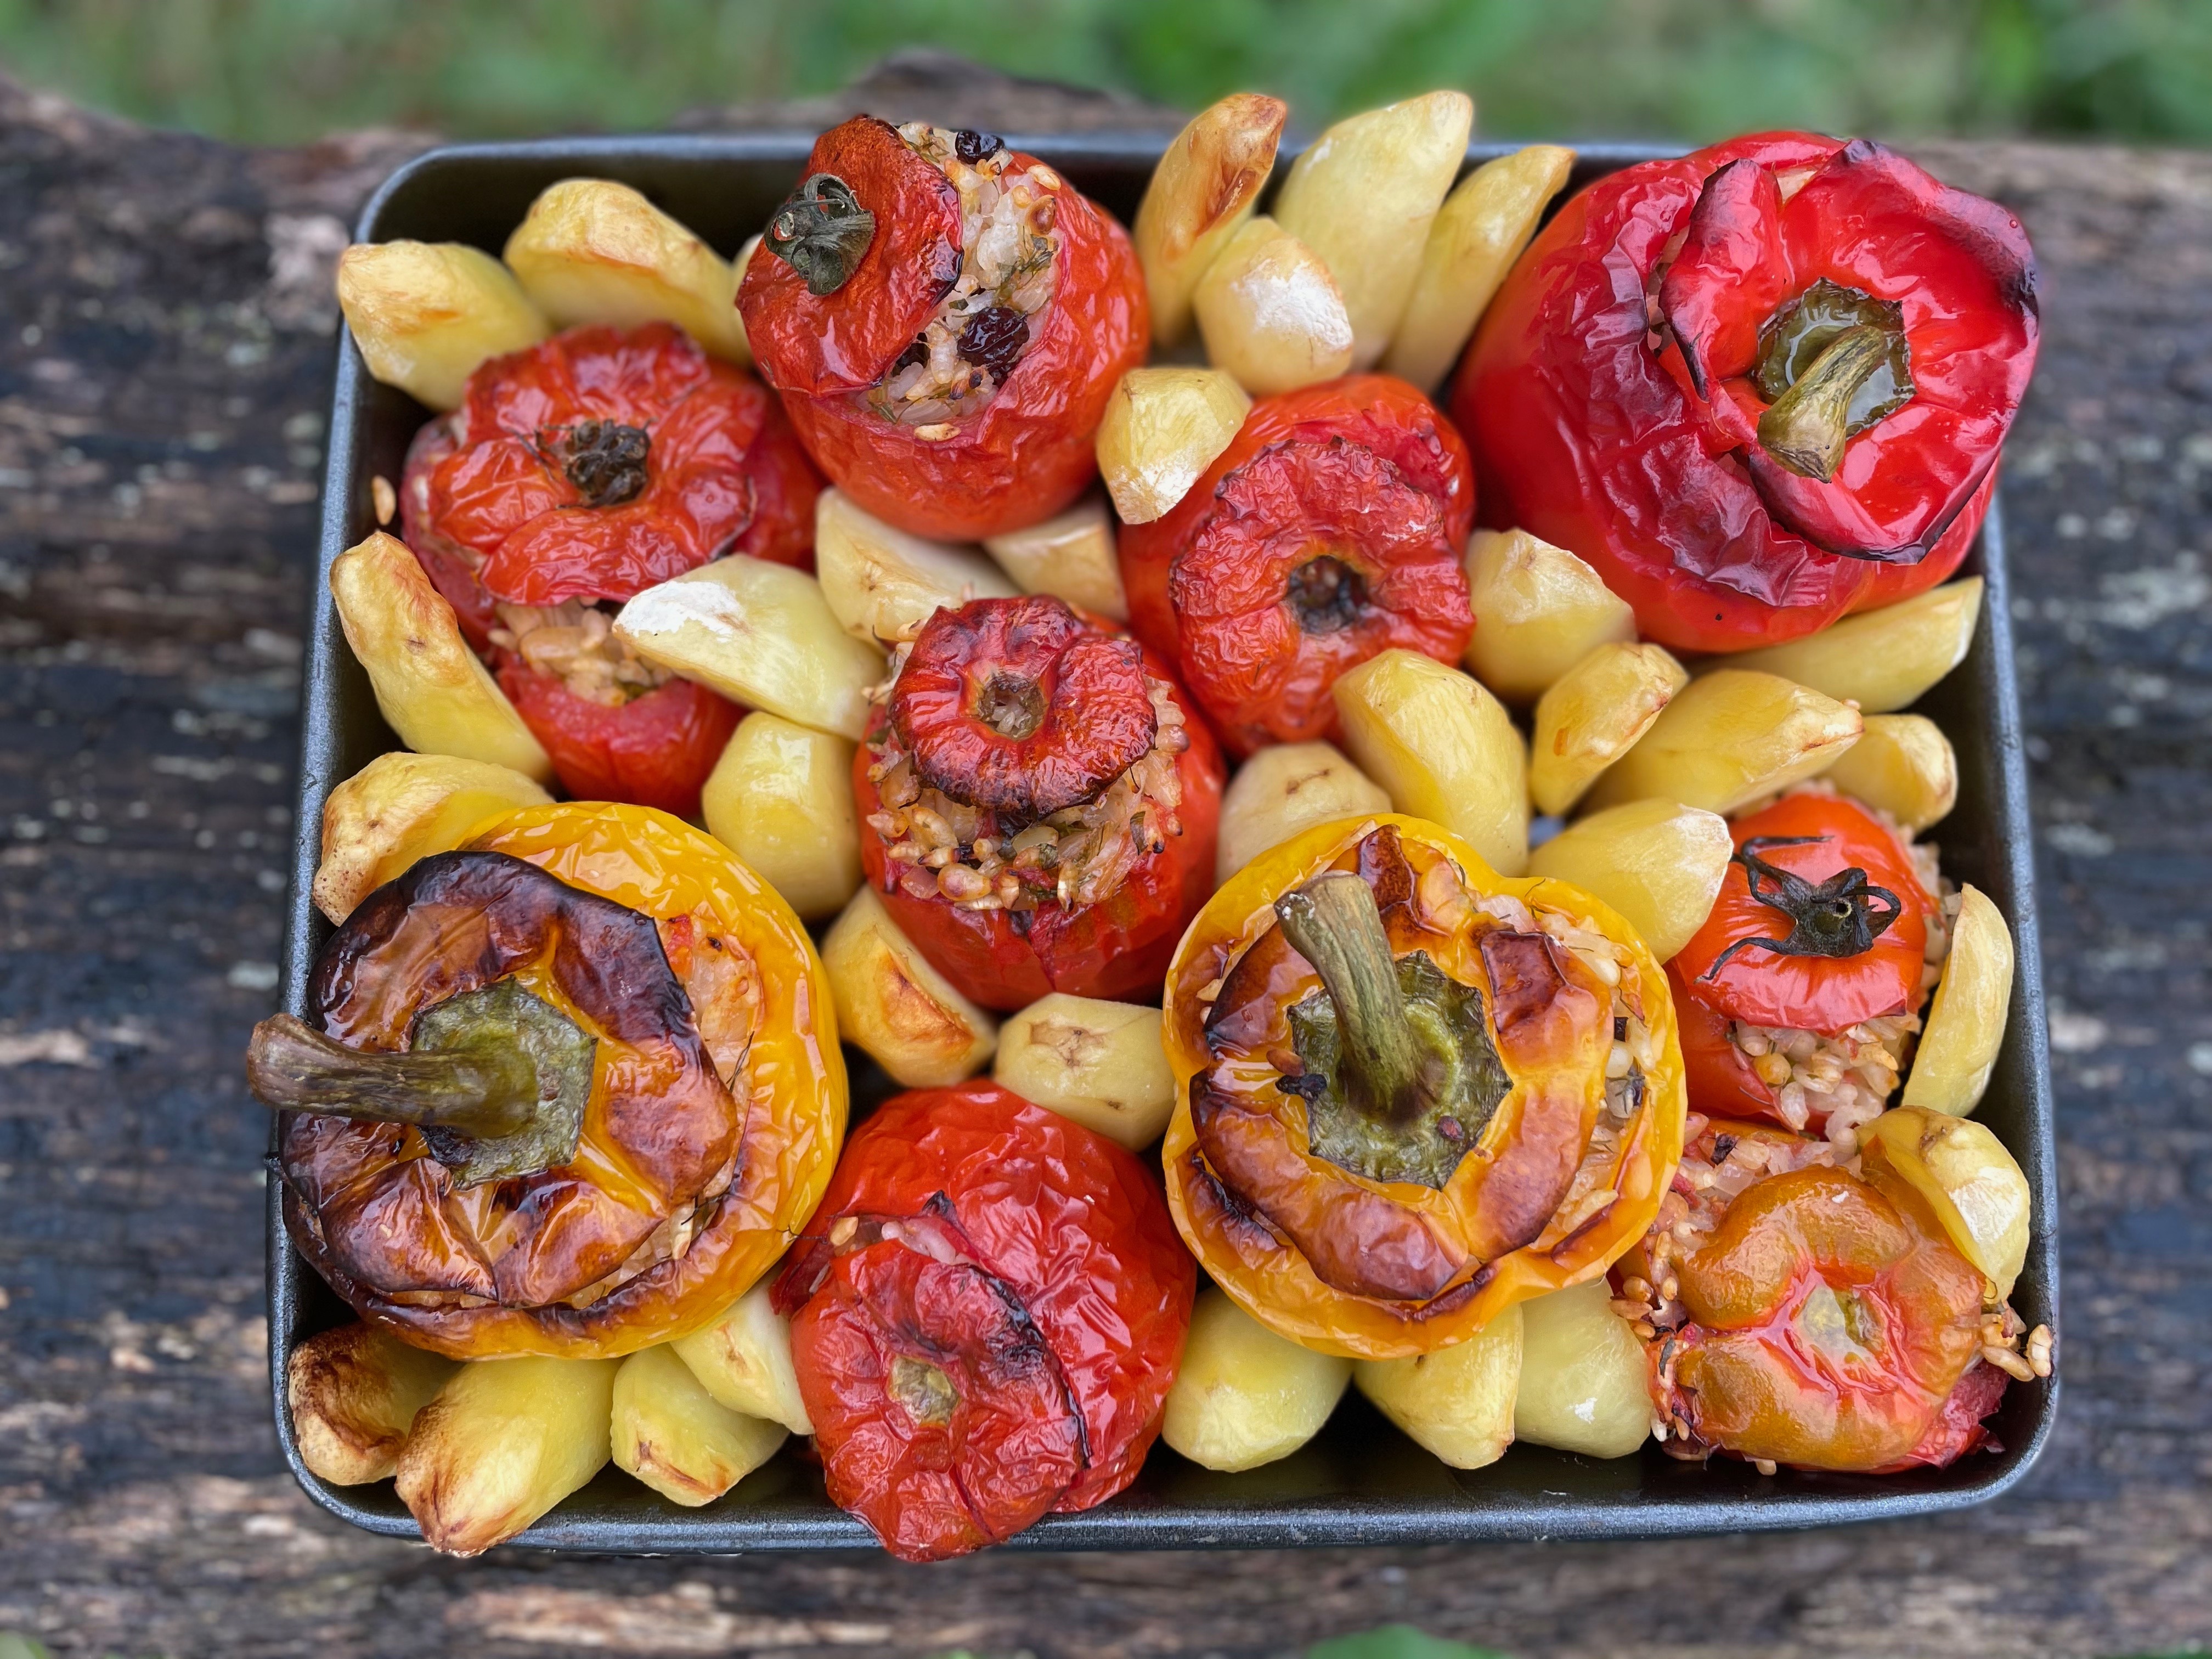
The menus in the tavernas are quite simple and comprise of mezze, salads, grilled meats (goat, lamb and rabbits) and fish.

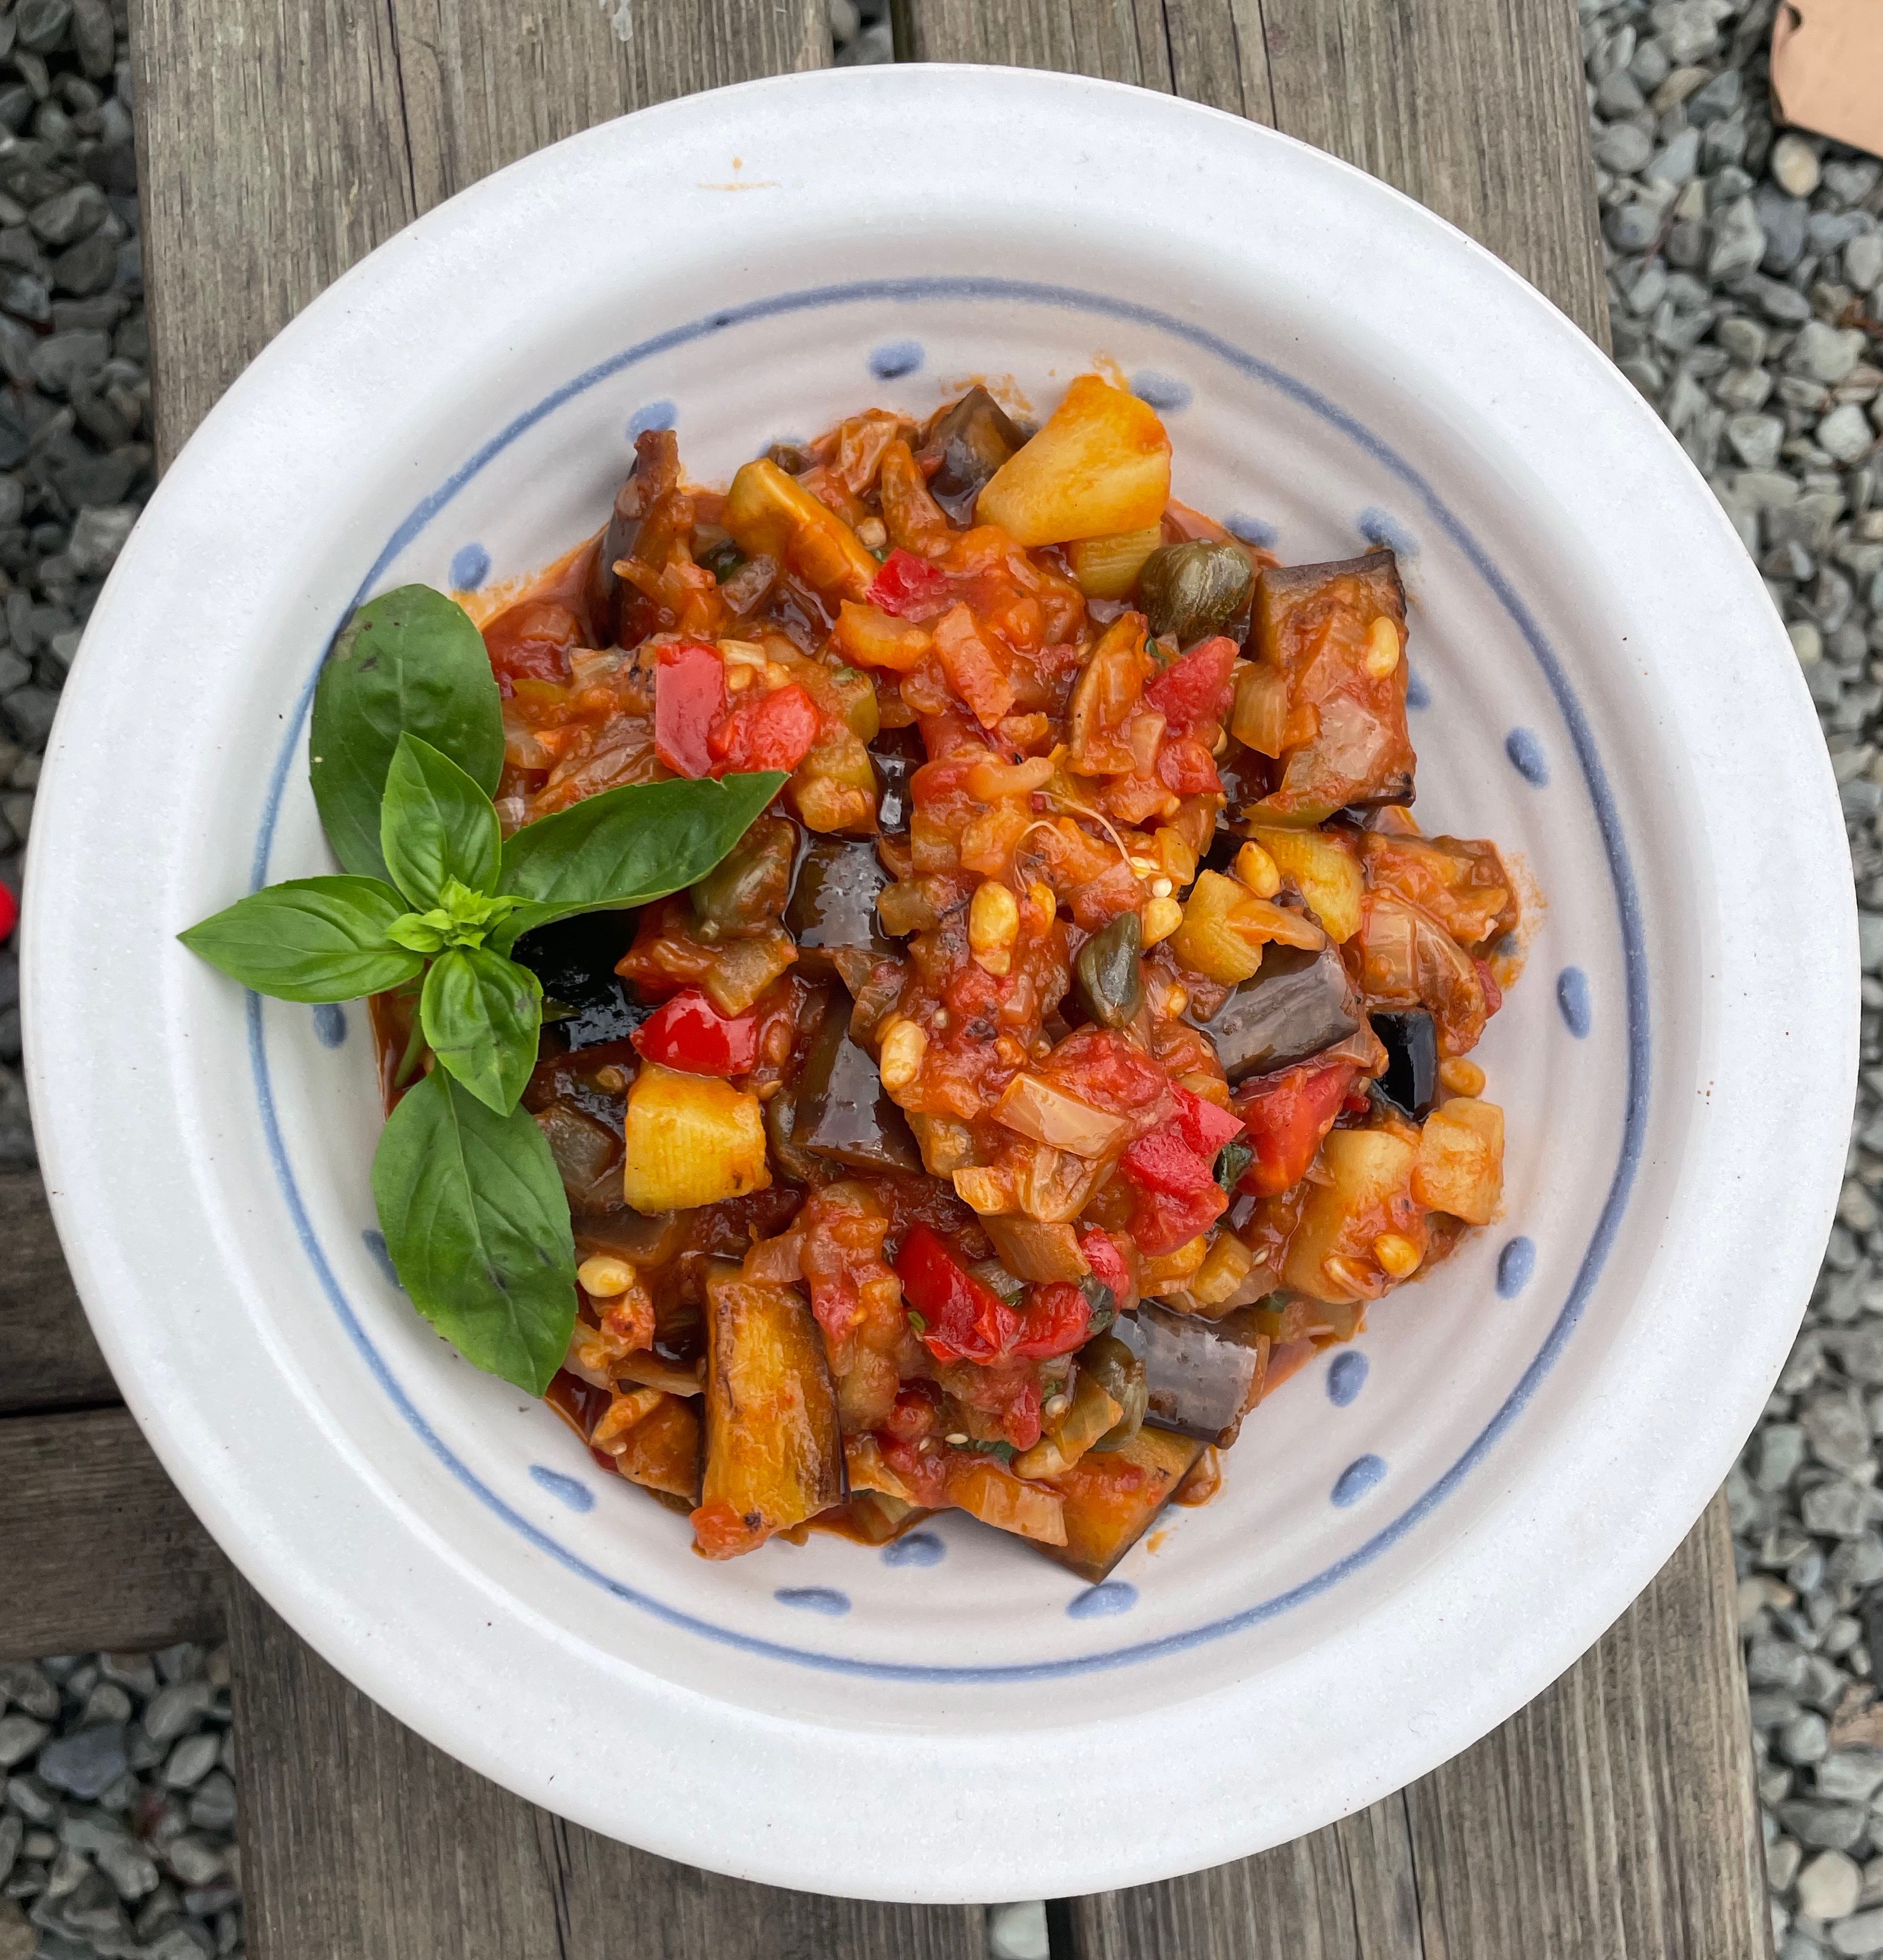
Mezze are made for sharing and mopping up with fresh bread. Aubergine, tzatziki, taramasalata, fava, hummus, beans etc., and then there are plenty of fritters – courgette fritters, fish fritters, cheese fritters and tomato fritters.

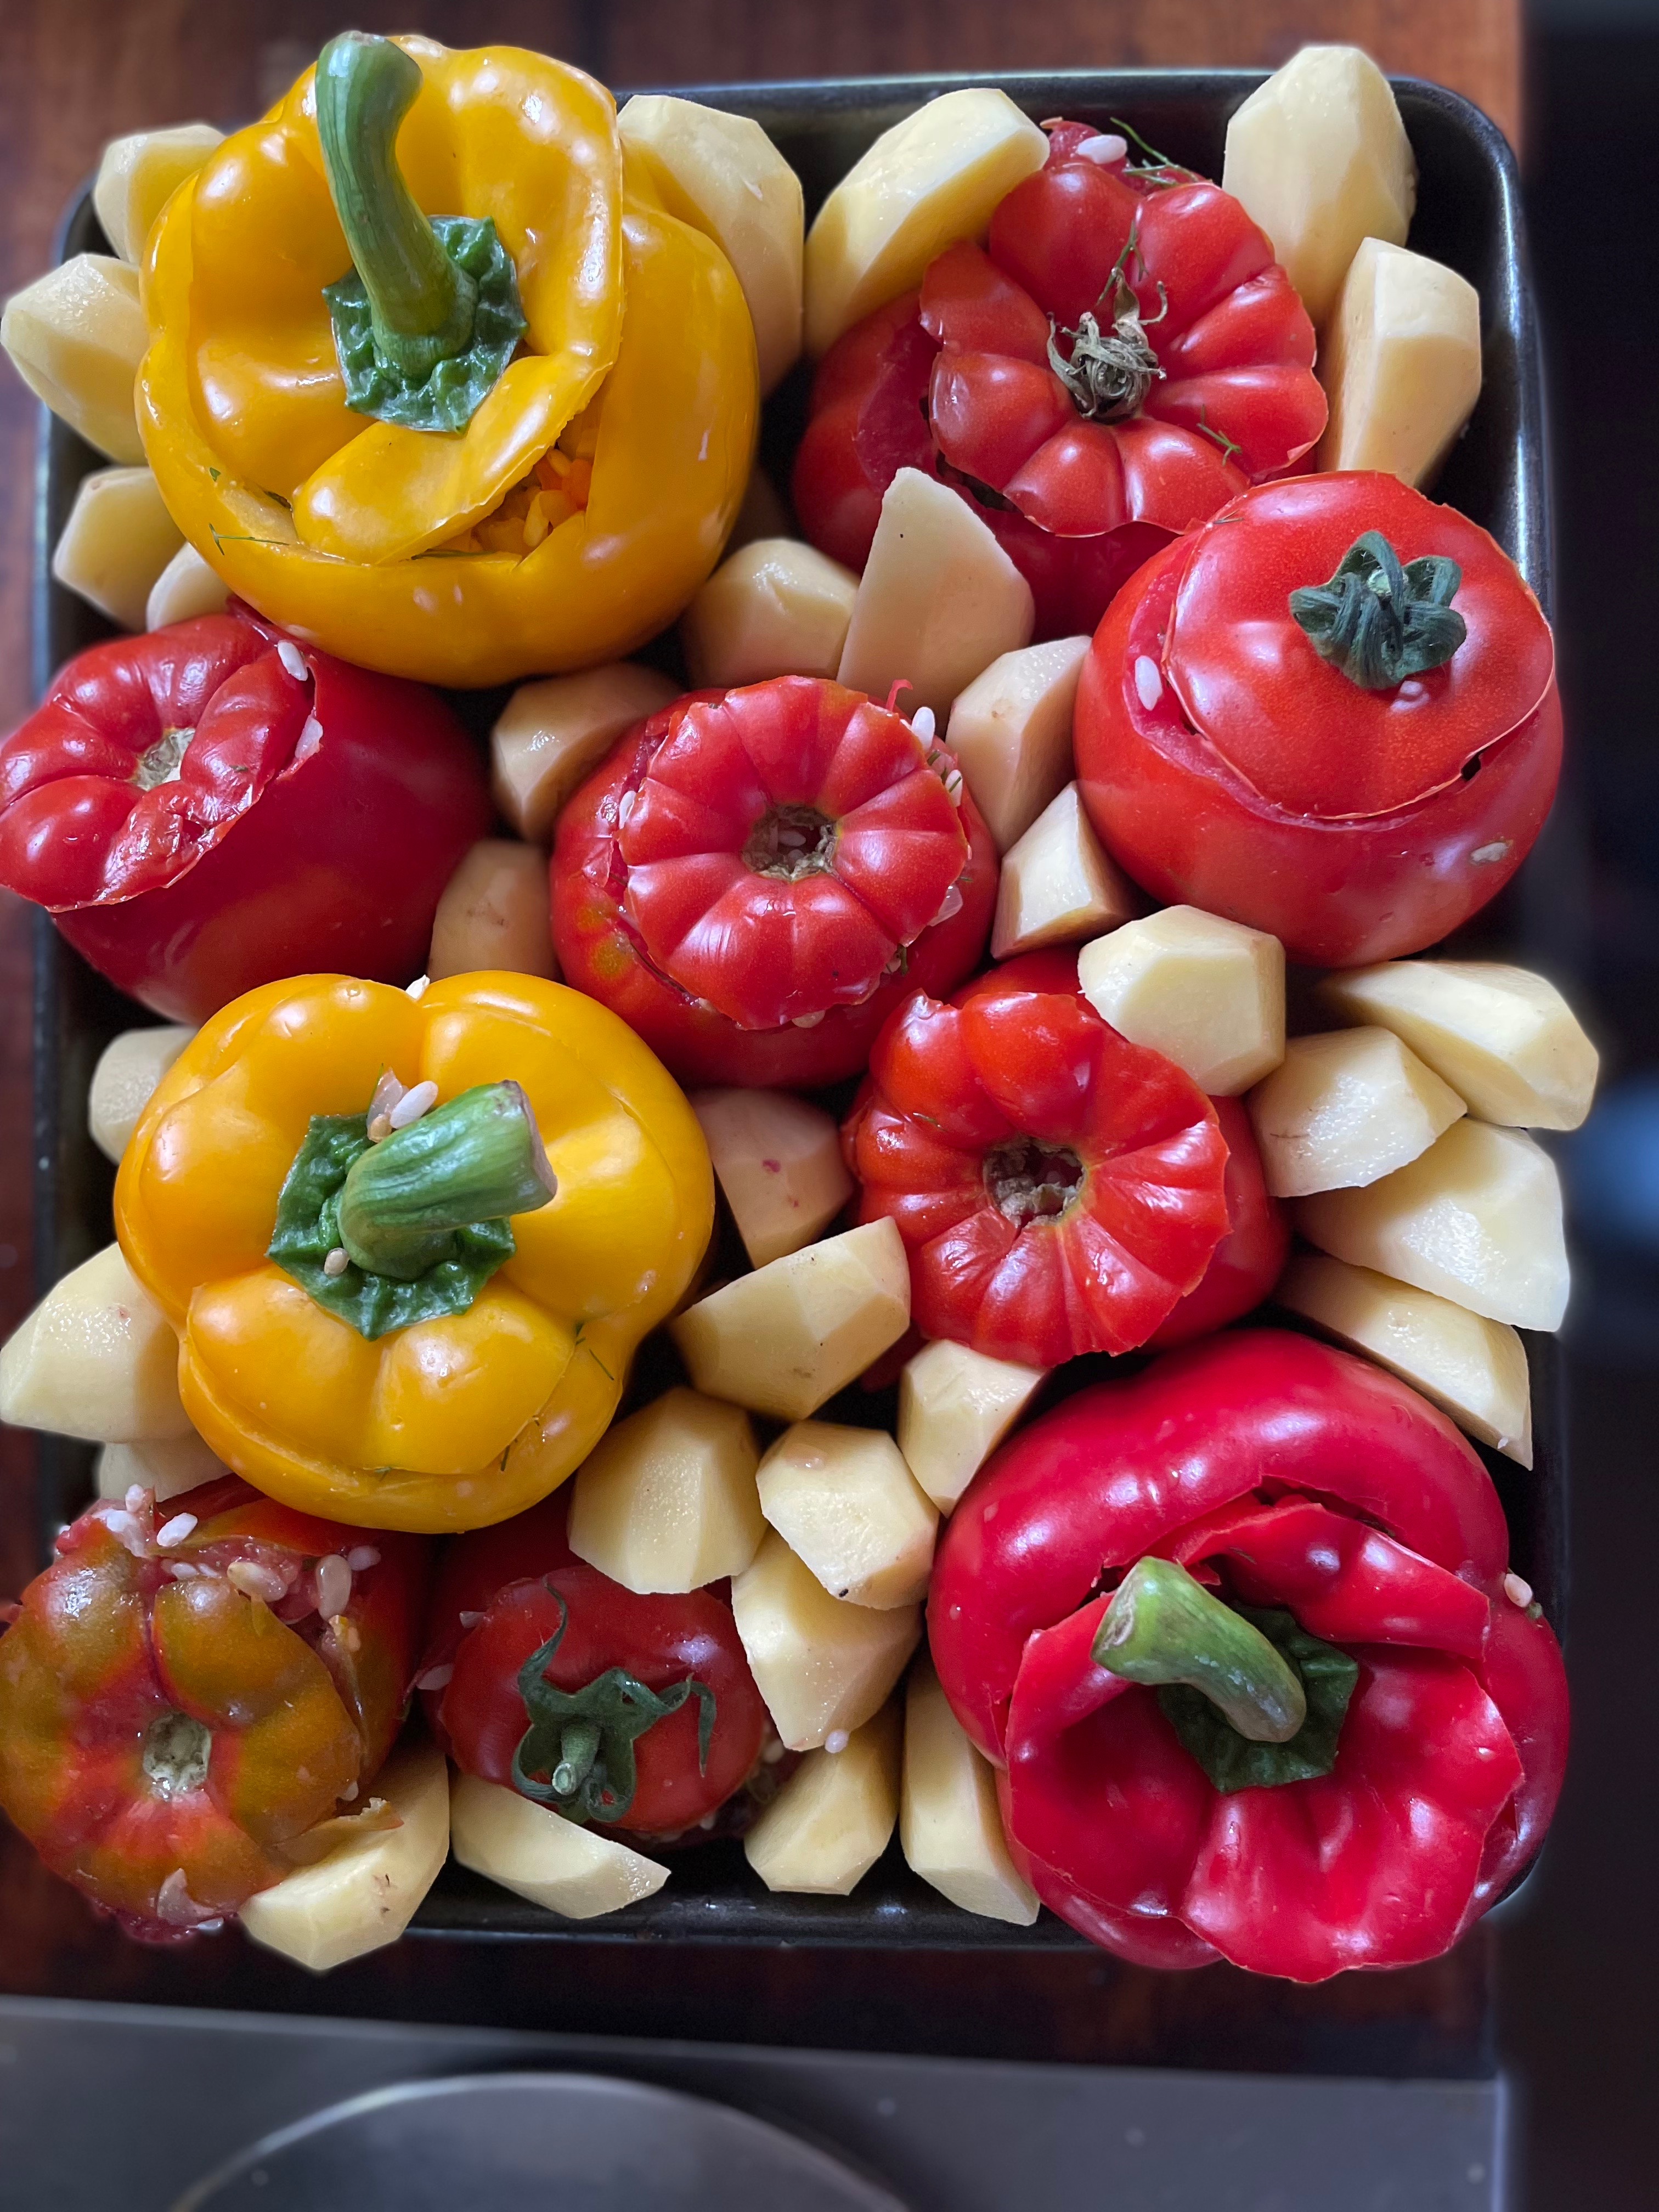
Here’s a recipe for tomato fritters. The island of Santorini seems to lay claim to this origin of this particular recipe but there are many variations. 

Our Greek friend Elisa reckons the fritters are best made with a mature Graviera, which she says is similar to mature Gruyere but most of the tavernas here use feta which is also much more accessible in Ireland so I’m using that too (sorry Elisa). They include lots of fresh herbs and are delicious served with tzatziki on the side.

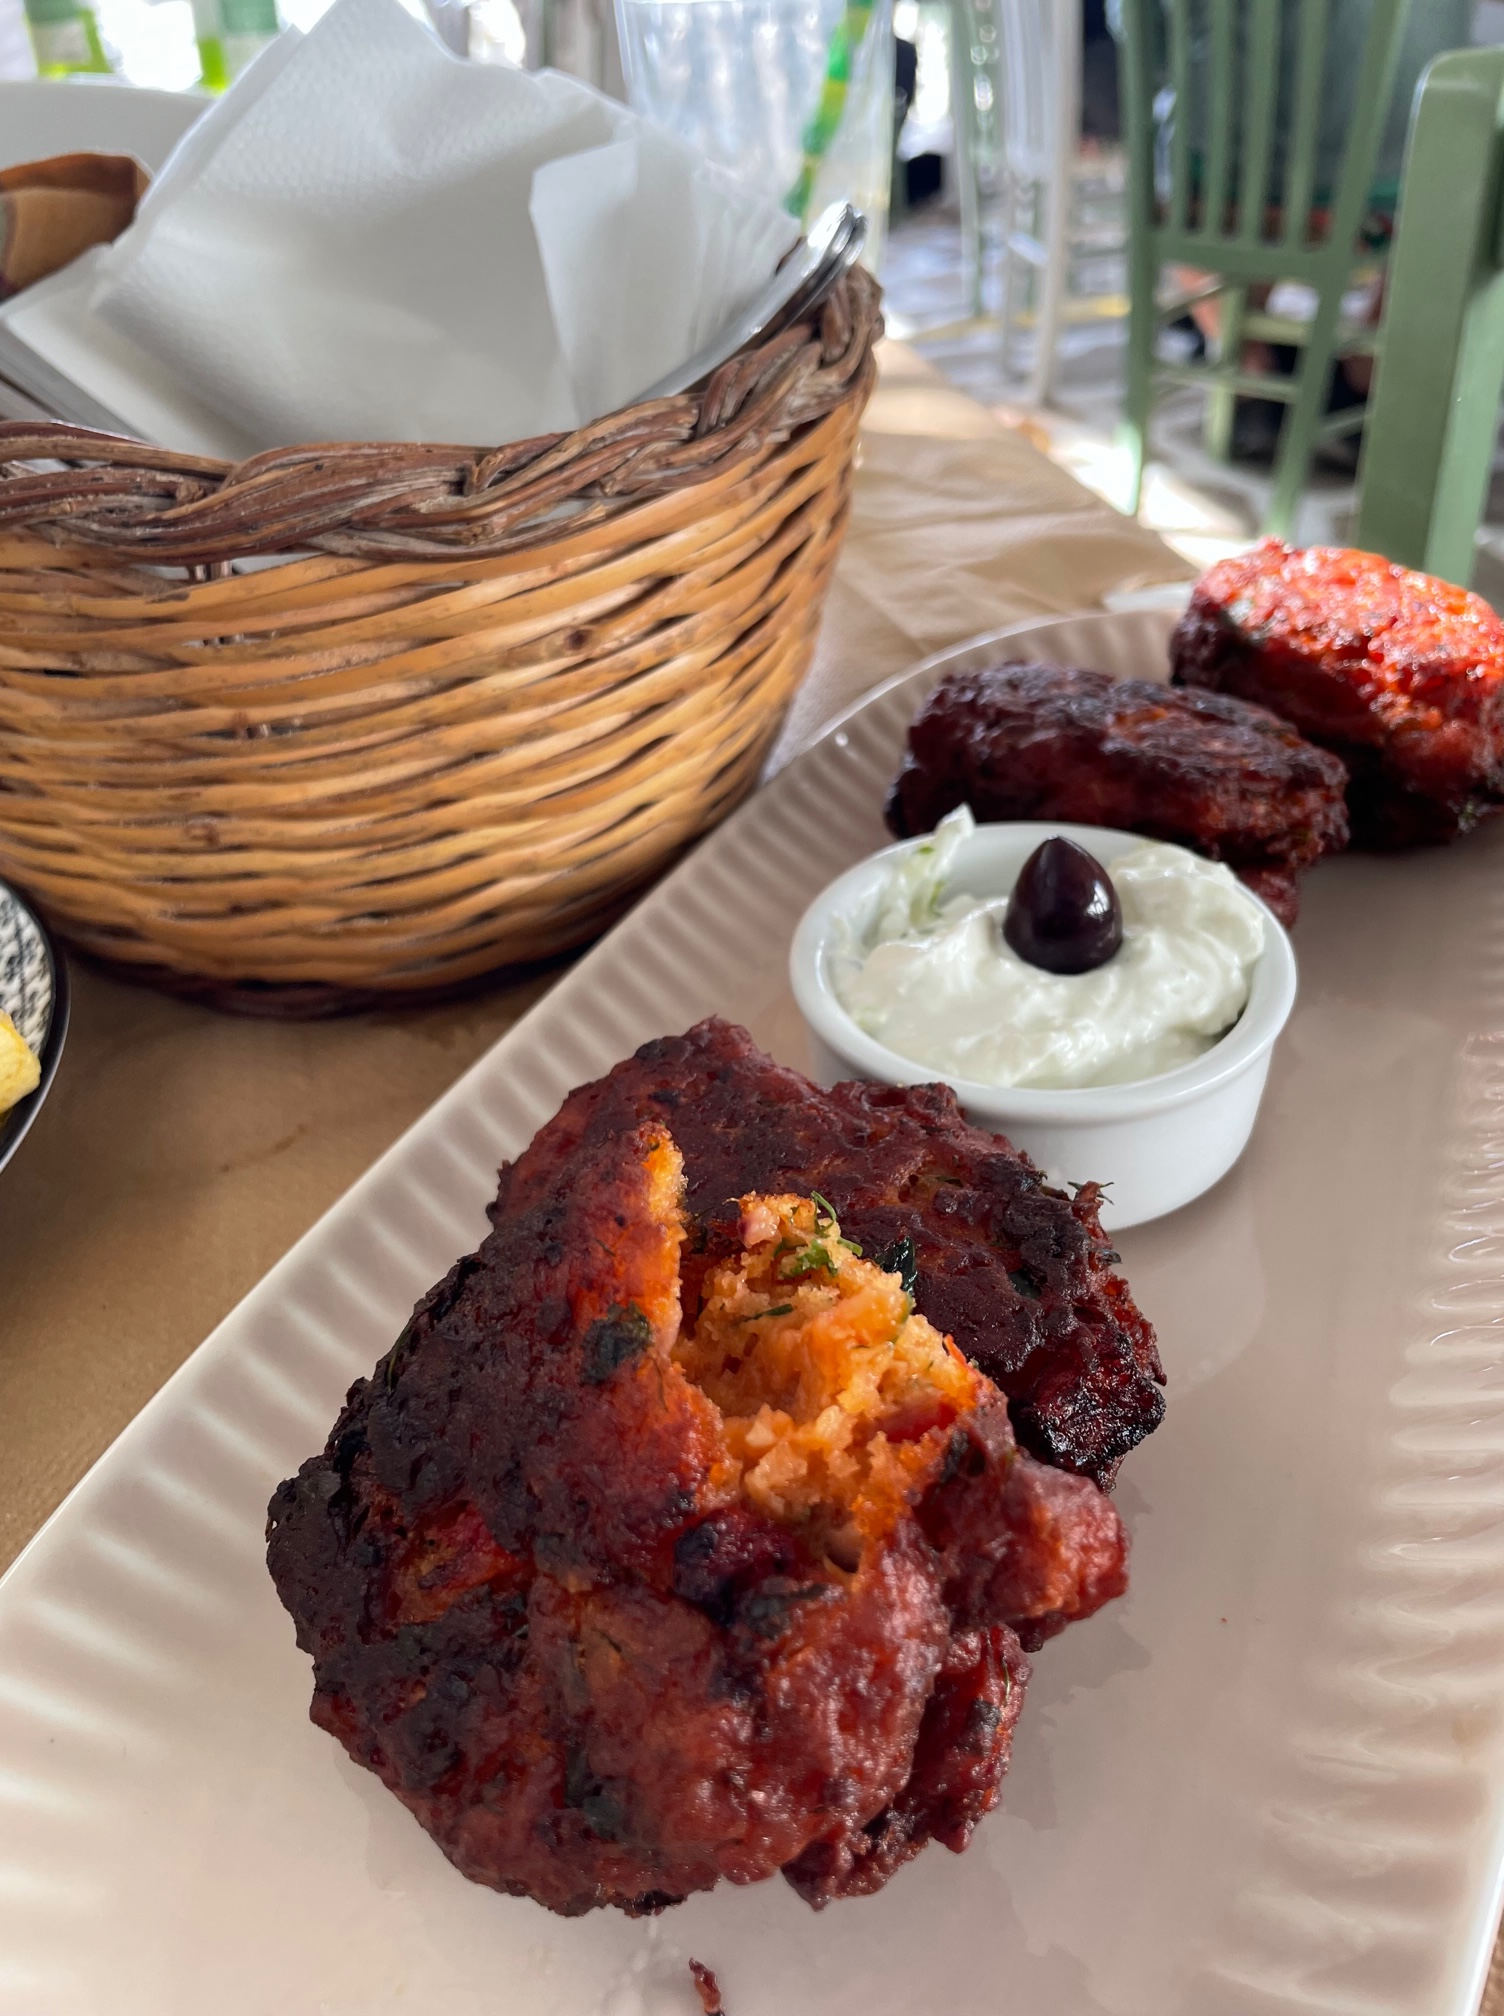
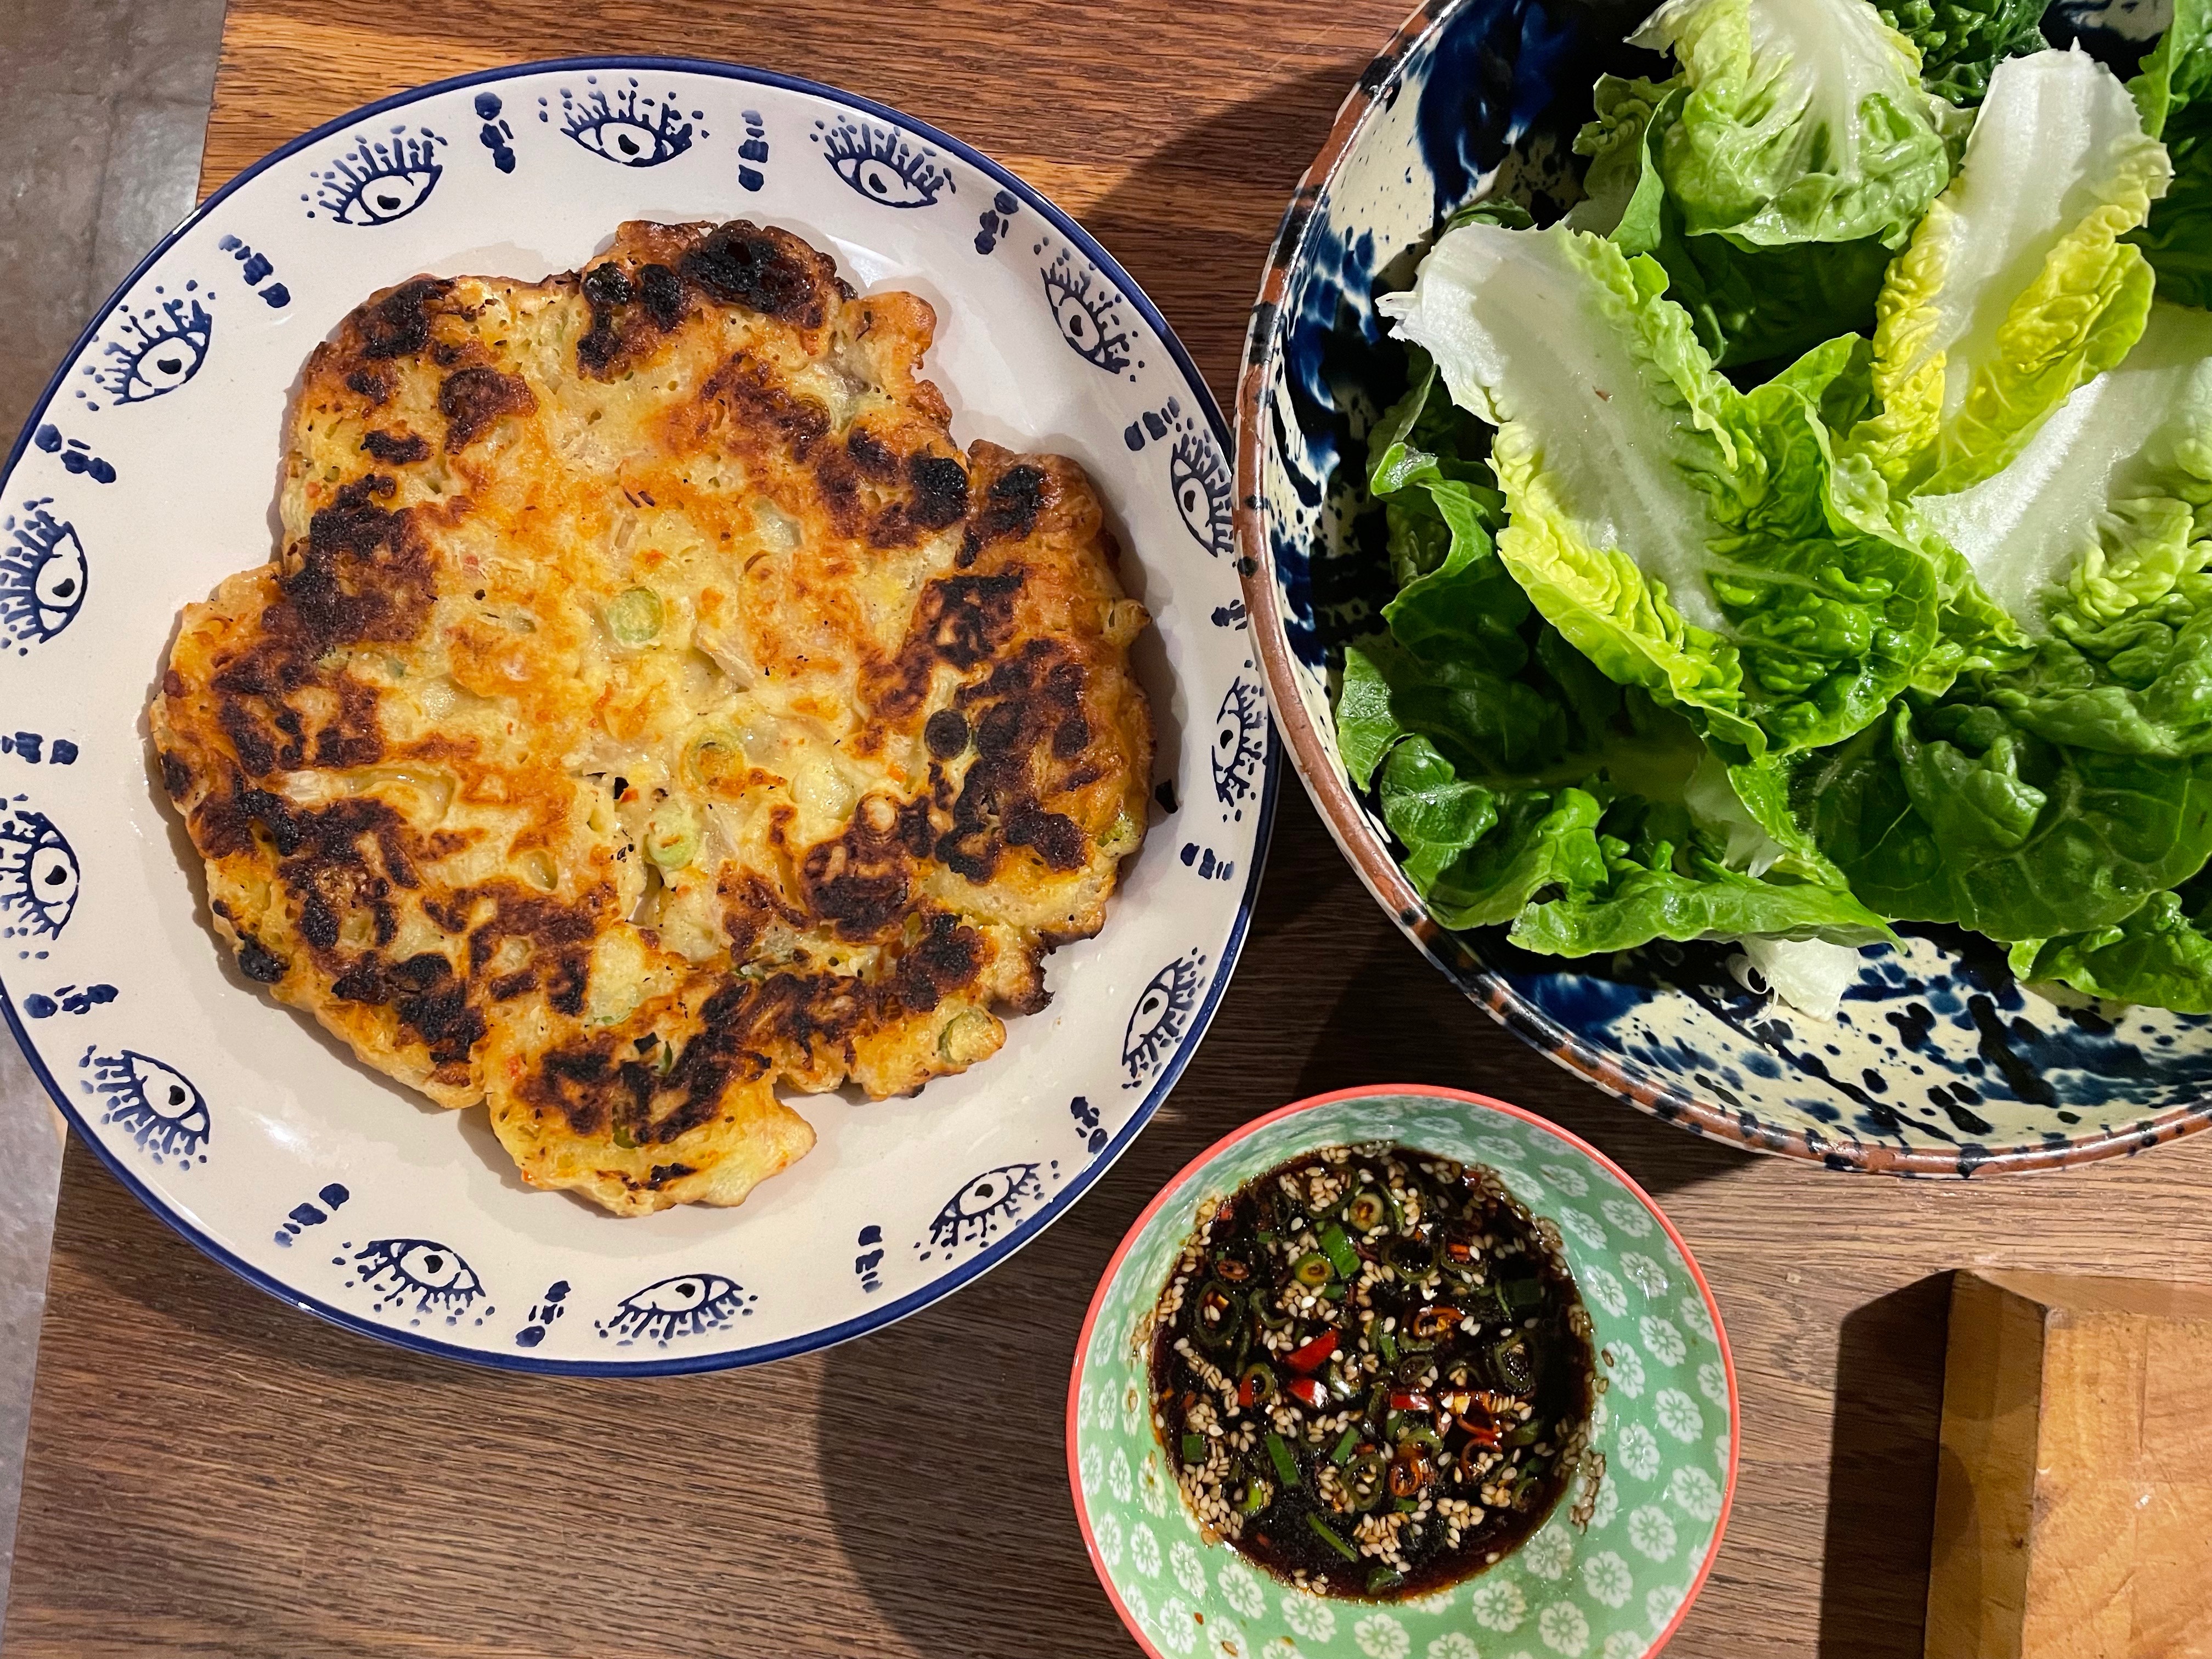
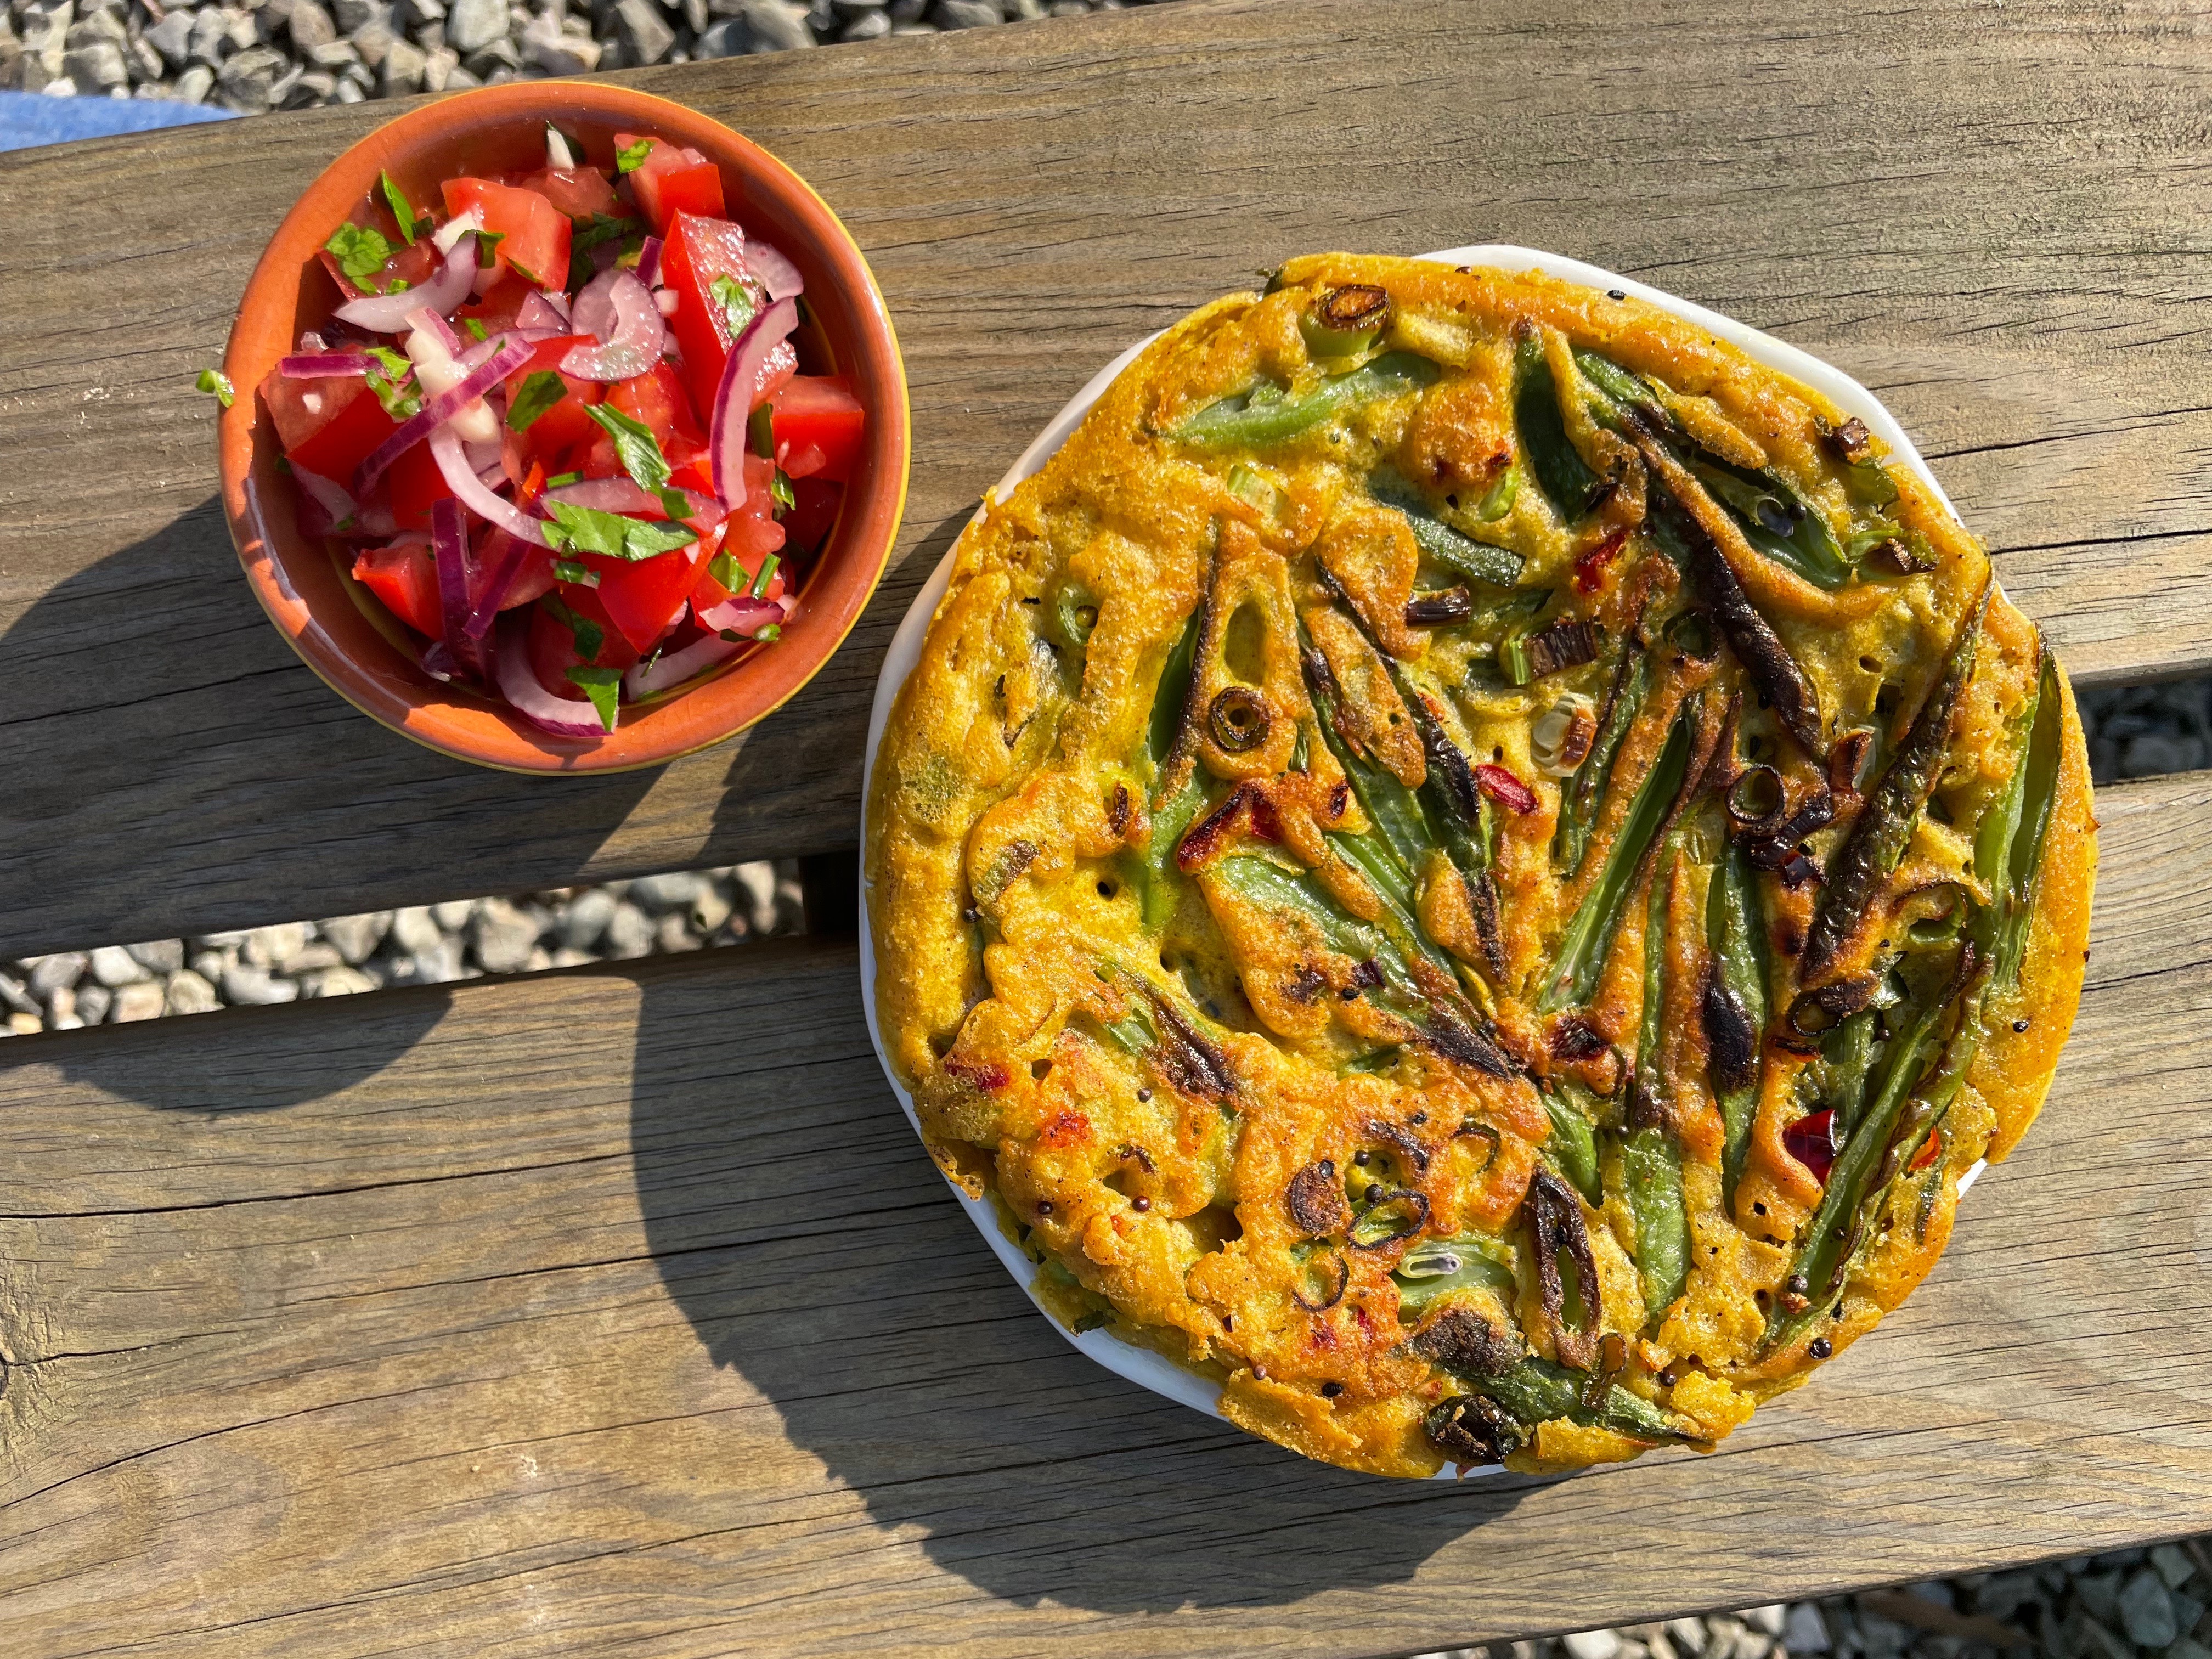
These fritters come in all shapes and sizes, anything from a small golf ball to a tennis ball and they are very difficult to photograph so please  excuse the dodgy photo. It’s a tennis ball sized fritter – eaten in the daylight on one of the days when we went off exploring without any pies!

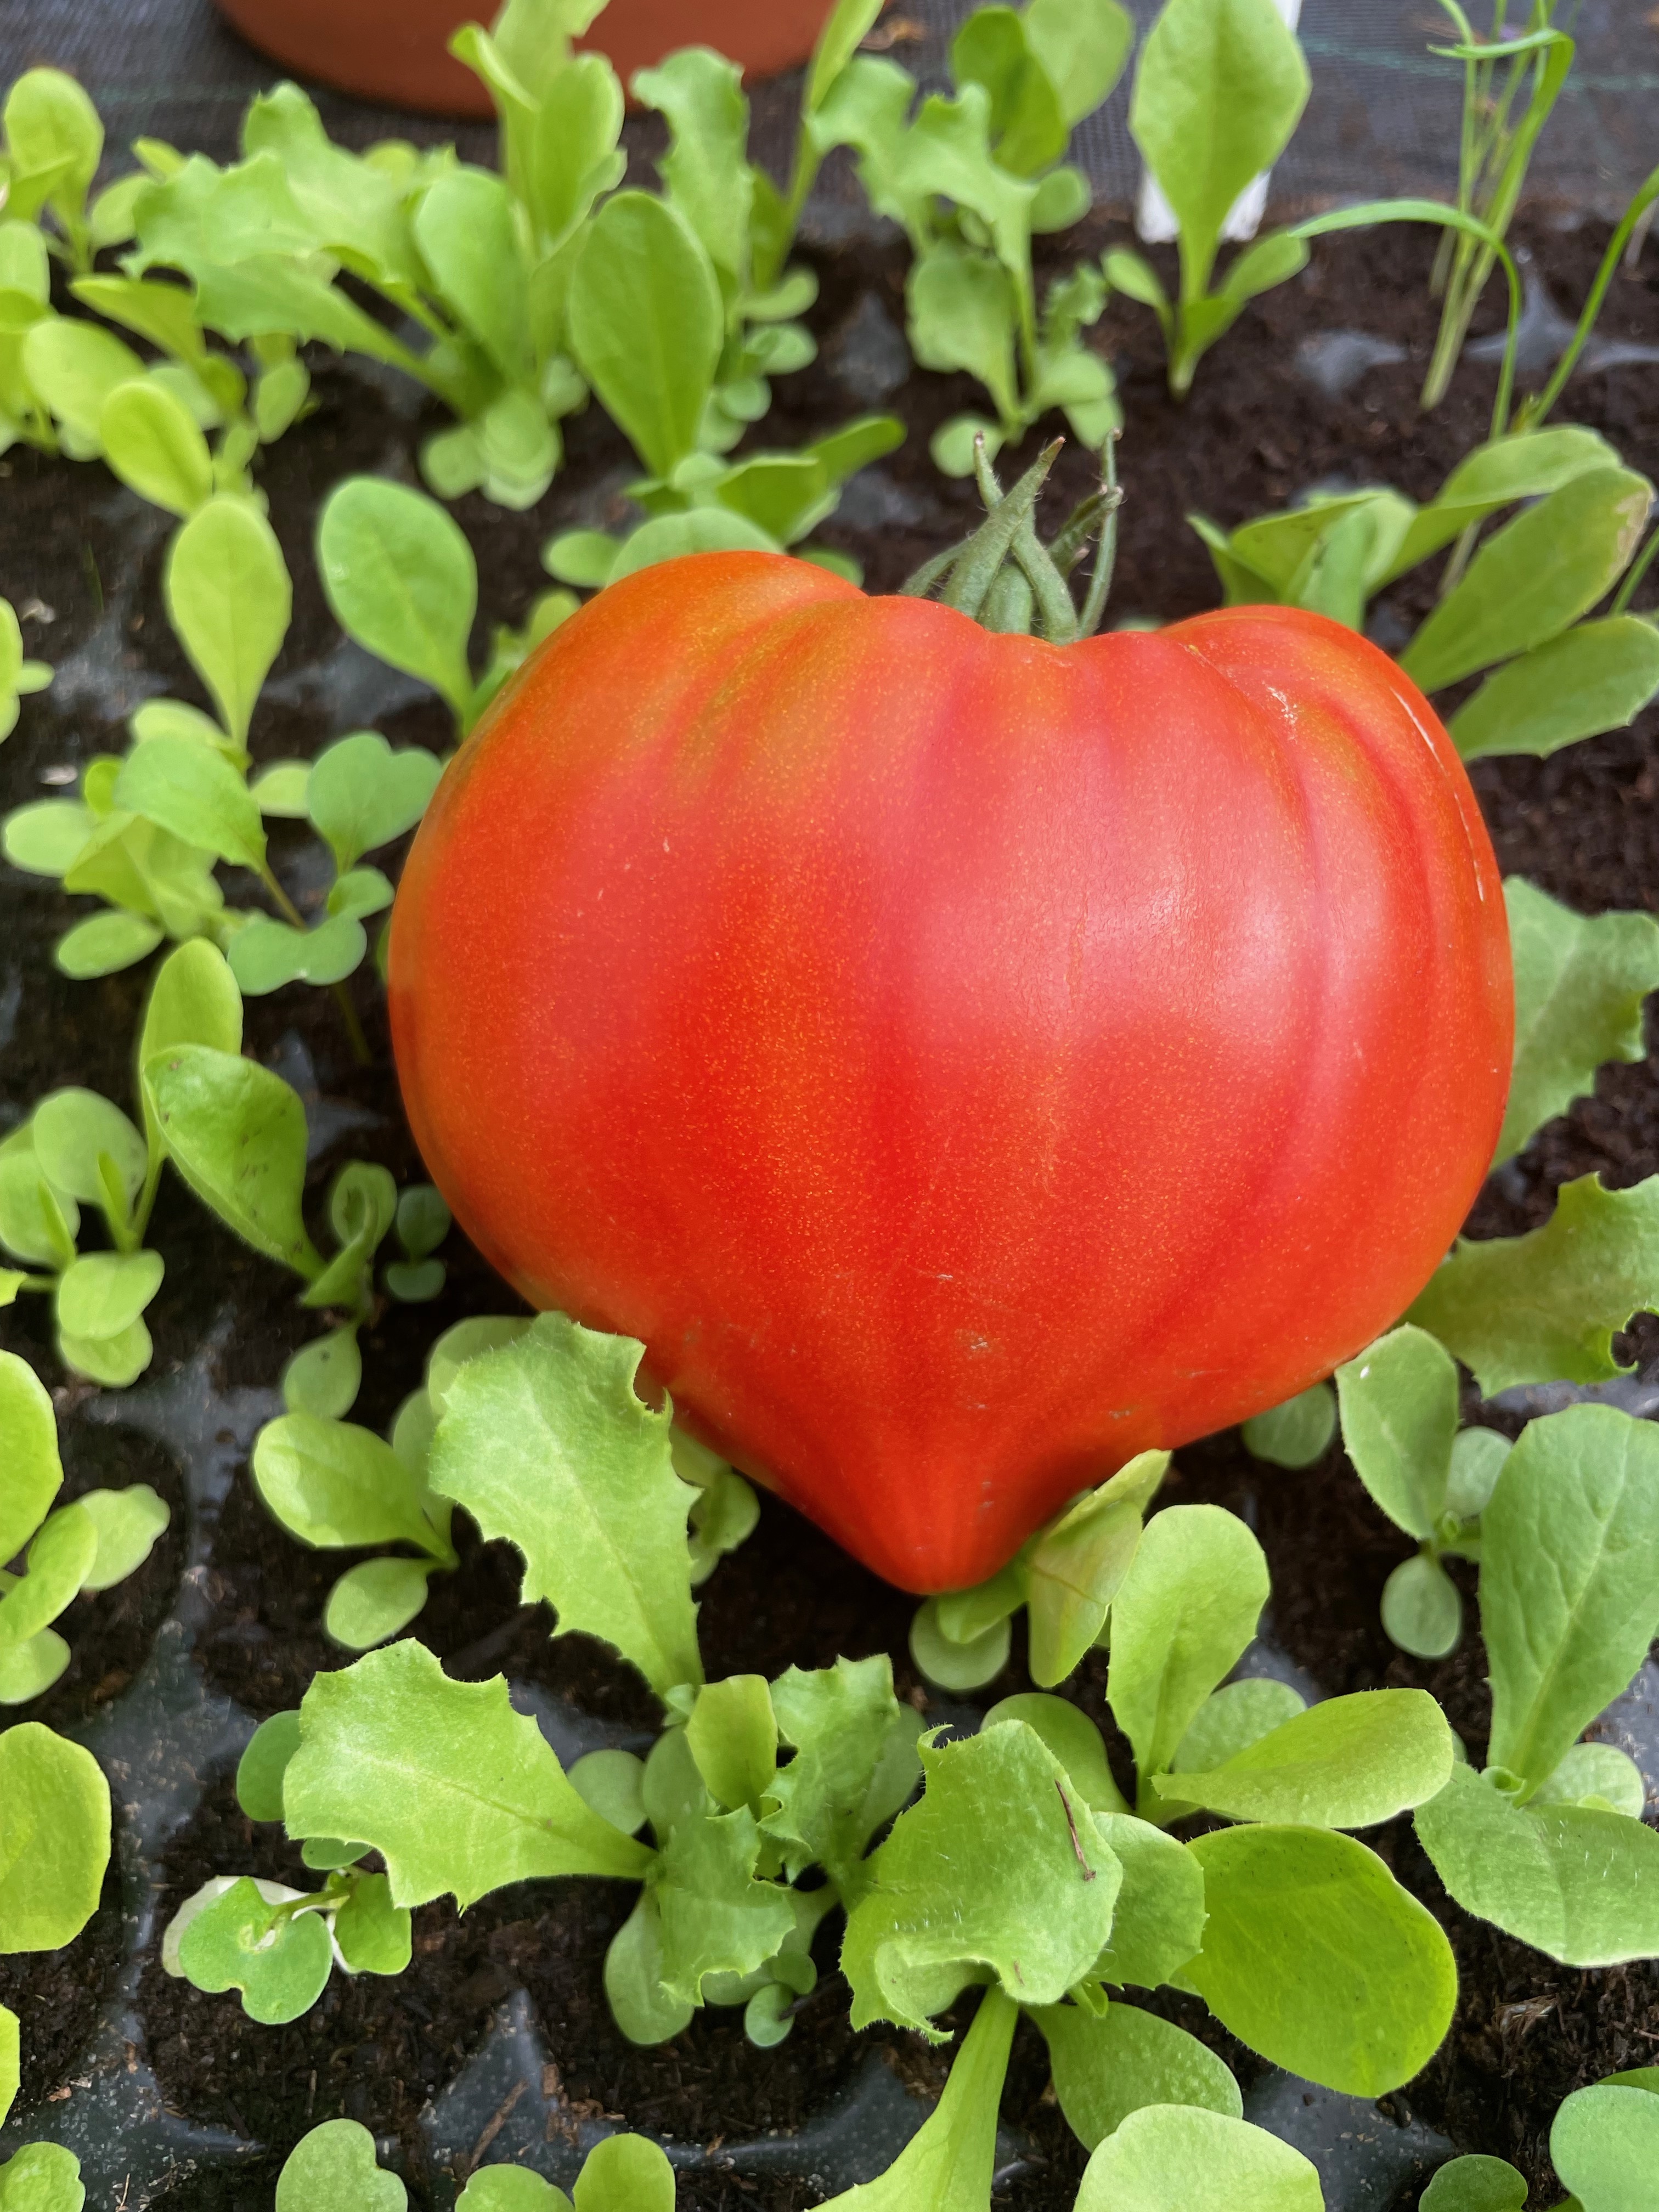
Use the ripest meatiest tomatoes that you can find.

Tomatokertedes – Greek Tomato Fritters

4 – 5 ripe tomatoes – about 450g

1 – 2 red onions

2 – 3 spring onions

1tbs chopped mint

1tsp dried oregano

2tsp chopped fresh thyme

1 egg

120g crumbled feta

120g flour

1 tsp baking powder

oil to fry

Cut the tomatoes in half and discard the seeds. Dice the flesh into small pieces, season with a little salt then put into a sieve over a bowl for 10-15 minutes. This will get rid of excess juices.

Peel and finely dice the onions then stir into the tomatoes. The tomato juice will soften the onion.

Put all the tomato/onion mix into a bowl together with the chopped herbs, crumbled feta and egg. Season with salt and pepper. Take it easy with salt as feta is already quite salty. Mix everything together.

Combine the flour and baking powder then begin to add to the tomato mix. You may not need it all, it depends on how wet your mix is. You are looking for a thick batter that will hold it’s shape in the pan. If it’s too wet add more flour.

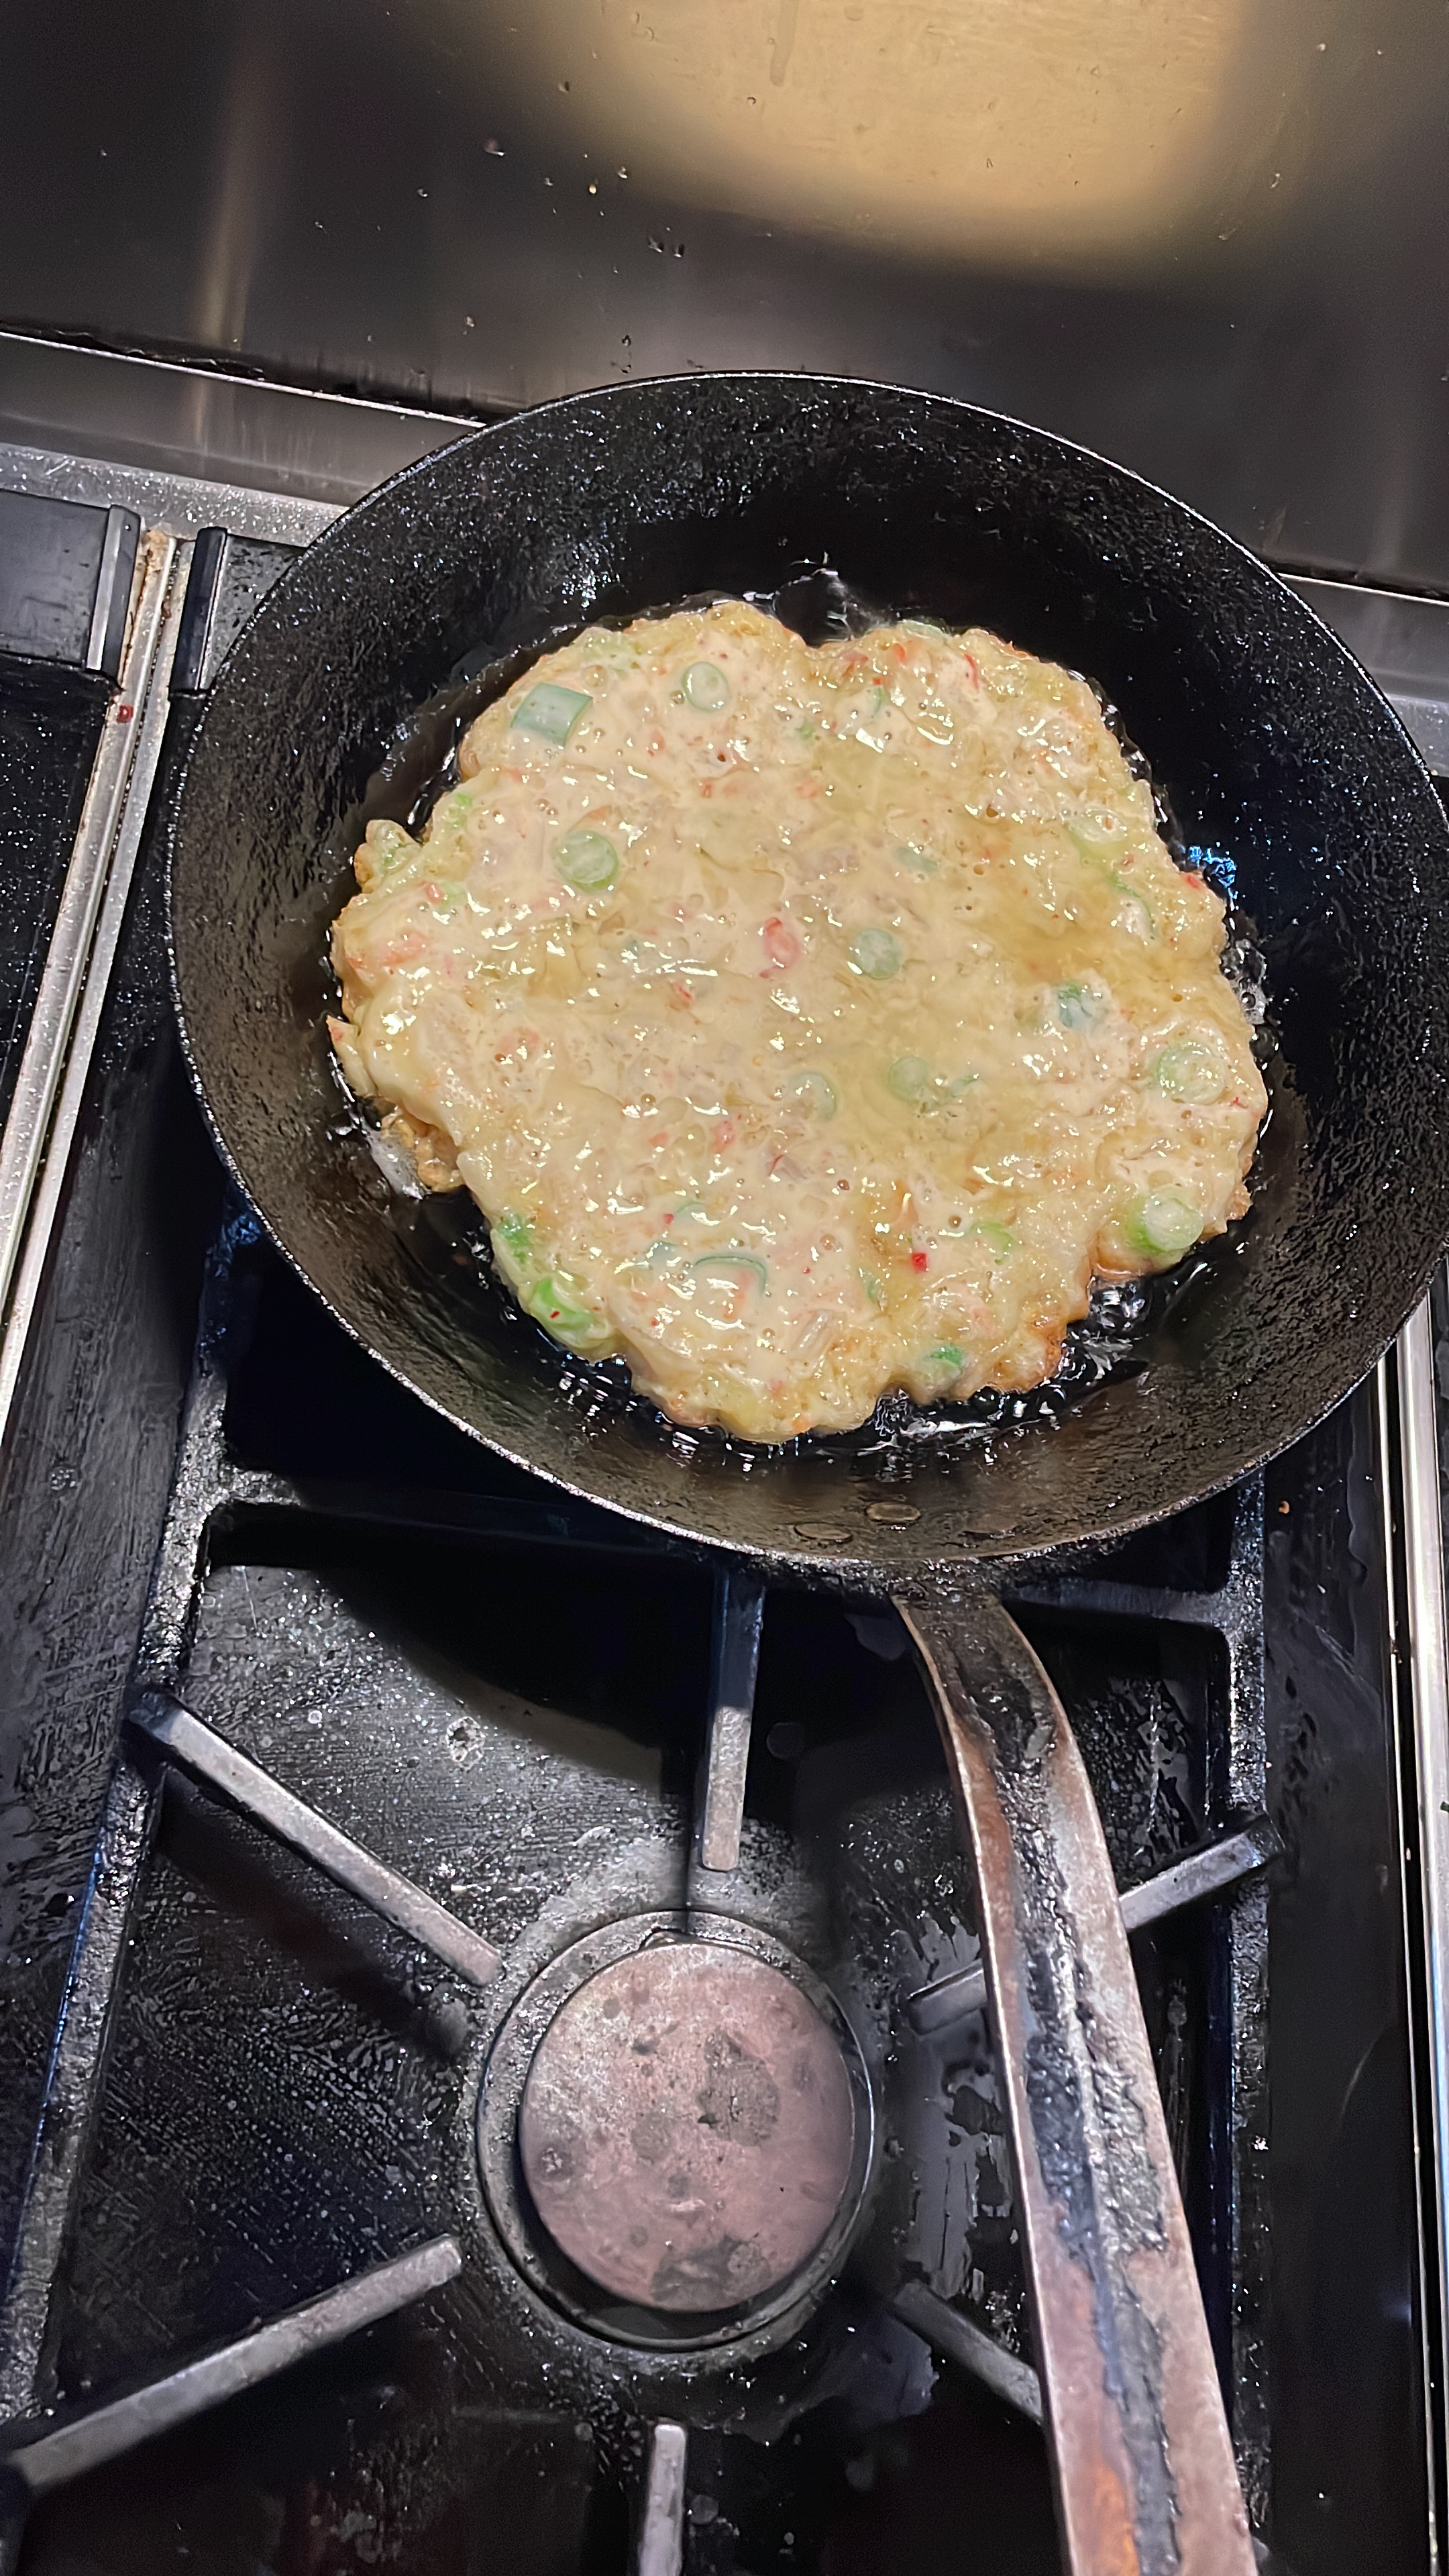
Put a frying pan on the heat and add enough oil to just cover the bottom.

When the oil is hot – not burning, add spoonfuls of the batter and encourage into a tidy shape. Cook on a medium heat for 2-3 minutes then flip the fritter and cook the otherside. Lift out onto a piece of kitchen paper to drain before putting onto a serving plate. 

Serve with a little tzatziki, Greek yoghurt or mayonnaise on the side.

Island greetings


The Great Quinoa Experiment

The great Quinoa experiment began back in the spring.  With all the talk about world food shortages we decided to experiment. We were curious how some of our pantry staples would grow here. 

It was a very domestic experiment. I bought the seeds in Skibbereen market from Brown Envelope Seeds. I had in fact only gone to buy quinoa seed but when I saw the oat and lentil seeds I got very excited and bought a packet of each. 

First we planted the seeds into seed compost in little modules. They all germinated no problem. The oats were very robust and the quinoa grew steadily. The lentils were more delicate with frondy leaves which were more of sprawl than upright so we planted half of the lentils in the tunnel and the rest on the experimental bed outside.

Once transplanted to their onward growing space the oats took off. It was hilarious, in no time at all there were a couple of sturdy rows of oats growing. It was a bit of a no brainer that the oats would thrive in this climate but when I eyed the healthy little crop up I realised I had only grown enough to make a bowl of porridge.

 The quinoa was very happy too. It shot up and enjoyed the weather, I reckon it thought it was in the Andes.

The lentils took their time. In fact the lentils that we planted inside keeled over and died but the lentils outside, once they had their roots established, quietly grew.

All three had the summer of their dreams, plenty of sunshine, intermittent rain and a watering service if needed which was very little as all three were quite happy with minimal water as they ripened. 

Finally the time to harvest arrived.

The oats were ready first. We cut them down, arranged them in bunches and hung then up to dry. They look beautiful, like something from a life style magazine, and I have to admit they are still there. I was thinking to crush the groats with a hydraulic car jack but haven’t been hungry enough to get around to that yet.

The lentils were next and we sat in the sunshine and picked through them – two lentils in each pod!

It was tedious but enjoyable, sitting outside chatting and sorting until we produced a medium sized bowl of velvety black lentils. They were very cute and very tasty.

The quinoa was harvested a little later then laid out to dry in the glasshouse. We turned it daily to make sure it didn’t go mouldy and as we had such great weather it dried well.

The next task was taking the quinoa seeds from the plant. I tried various techniques and in the end settled for a big metal bowl on my lap, teasing the seeds from the heads.

The quinoa seeds landed into the bowl with plenty of chaff which I tried to pick off – not very successfully. Google advised putting it into a bowl of water, which I did.

The chaff rose to the surface, I skimmed it off and then vigorously agitated the quinoa in the water before straining it through a sieve and repeating. There’s quite a process to clean quinoa as each piece is covered with saponins, which are toxic. Not toxic enough to kill us but enough to make them quite unpalatable. I left it soaking overnight, then rinsed it again, agitating well, then repeated, soaking again overnight. 

We were on day three of quinoa cleaning at this stage and my curiosity was exceeding my patience so I rinsed and drained the quinoa one final time then laid it out on clean t-towels to dry. 

So far, so good. It looked like the real thing. 

Next it was time to try cooking it. It took a long time to cook. Ordinarily quinoa is cooked in twelve to fifteen minutes but mine was cooked for at least forty minutes and still retained a healthy nuttiness, which I decided was how it was meant to be – the brain can be very fickle at times.  

The final test was the taste test and I have to report that it was absolutely vile. So bad that I had to spit it out and hang my mouth under a running tap. To be sure that it was as bad as I experienced I employed a couple of unsuspecting guinea pigs and in no time at all everyone was running around the kitchen in horror.

We threw the rest of the cleaned quinoa into the chickens, together with the quinoa that we hadn’t yet sorted but the chickens weren’t having anything to do with it. They’ve obviously got good survival genes and we headed of on holiday to Greece!


Think Pink

Berlin in early summer is full of Horse Chestnut trees in blossom. Some of the trees are immense – as tall as five storey buildings, and when the wind blows the pink blossoms come down like confetti, falling everywhere, sometimes landing into the glasses of the people drinking on the terraces and relaxing on river banks. It’s not drinking in a drunken way, just social. The weather has warmed up and everyone’s out. There are little bottle shops around the neighbourhoods which sell a huge selection of beers, soft drinks and snacks and it’s perfectly acceptable to consume them pretty much anywhere. People drink beers and other people pick the bottles up and get the deposit back. It all works very well.

Amongst the selection of beers that are consumed are pink drinks.

Rhubarb spritzers, lemonades and cocktails, all totally delicious.

I checked out how to make rhubarb cordial – the base for all these confections, and I feel like I have discovered a perfect use for rhubarb.

We have a healthy rhubarb patch in our garden and each year, after our initial rhubarb tart enthusiasm it ends up languishing unless I have jam making fit.

Rhubarb cordial is easier to make than tarts, crumbles or jam, the only vaguely complicated part of the process is straining the mix. It can be poured directly through a sieve  but I prefer to line the sieve with a piece of muslin. This ensures a beautiful clean pink juice, no stray bits of fruit etc. which might sneak through a sieve. This is not  a difficult step although it may entail a trip to your local haberdasher to buy a piece of muslin.

The grandchildren love the pink lemonade – rhubarb cordial plus sparkling or tap water, in fact we all do and it’s fun to add to a favourite tipple especially served chilled.

Rhubarb Cordial

500g rhubarb (stems removed)

350mls water

350g sugar

1 orange, zest and juice

1 lemon, zest and juice

2 slices fresh ginger

Muslin

string

Put the water and sugar into a pan. Bring to the boil then turn to a simmer.

Wash the lemon and orange well then pare the peel of the fruits with a small knife or a vegetable peeler. A vegetable peeler works best as it doesn’t cut through to the pith but if you don’t have suitable peeler just use a knife.

Cut two or three slices of ginger, no need to peel.

Put the lemon and orange peel and the pieces of ginger into the sugar syrup and continue to simmer.

Wash the rhubarb well. Discard the leaves and the other end. There’s no need to peel especially as you need the pink skin to colour the cordial. Cut the rhubarb into 1cm pieces, add to the sugar syrup and bring everything to the boil. Turn to a low simmer and cook for 25 – 30 minutes, until the rhubarb has disintegrated.

Leave to cool then strain using either of the following methods. 

A) Just straining

Put a fine meshed sieve over a bowl that is large enough to collect the juice – without sitting in the  juice as it strains. Pour the cooked rhubarb in and leave to strain for an hour  – better a little longer if you have the patience. Don’t poke or squeeze otherwise the cordial will become cloudy

 B) Using a piece of muslin to line the sieve; Cut a piece of muslin so that it’s large enough to sit in your                   sieve/colander and drape over the sides. 

Organise somewhere to hang the muslin bag. I use an upside down stool but  a large saucepan with a wooden spoon across the top to suspend the bag works too. 

Wet the piece of muslin under the tap then squeeze it out and drape it over the colander/sieve – wetting the cloth helps to keep it in place and encourages the juice to flow through., then pour in the cooked rhubarb.

Pull the four corners of the muslin together then gather up so that the rhubarb is contained without squeezing and secure with a piece of string. The string needs to be long enough to tie onto the bars of the stool or the wooden spoon over the saucepan with the bag hanging above a bowl to collect the juice. Leave for an hour or longer if you’re not in a hurry.

This method gives maximum extraction as the weight of the fruit pushes the juice through. Don’t squeeze the bag or the juice will become cloudy.

Put the finished cordial into clean bottles or a large jar and store in the fridge.

Perfect for sunny days!


After the Storm Spicy Pancakes

Three storms in a week left our garden in tatters. Lettercollum –  Leitir Colm in Irish, doesn’t translate as windy hillside for nothing.

We had to use the chainsaw to cut our way out the morning after storm Eunice rocked by and any previous complacency that we had about the imminent arrival of an early crop of spinach and chard vanished when Eunice whisked the plastic off of the tunnel. It was left flapping in the wind like wet washing which mixed in with the debris of the uprooted tree and broken fruit cages made sad viewing.

Luckily the glasshouse is secure and is a comfortable refuge. There’s a kettle on the bench, teabags and a small stash of snacks. All mod cons.

The propagator is cranked up and I am slowly sowing seeds. The next crop of spinach and chard are in the seed trays as are the tomatoes, aubergines and chillies – no sign of them yet but it is early days. I have sown salad, rocket and herb seeds in the tunnel that’s still standing and the rocket true to it’s name has shot up. Another growing season is on the move.

Exciting times – one way or the other.

With the spinach on hold we’ve been enjoying Kimchi.

Kimchi is a spicy fermented Korean cabbage dish, like an Asian sauerkraut. It’s made by salting and spicing cabbages that are then allowed to ferment with wild cultures. It’s very much part of the Korean food culture. 

Fermented foods are full of probiotics which in turn are good for our gut health and immune systems. I reckon our immune systems could do with a boost after two years of covid/covid avoidance.

One of my favourite ways to eat kimchi is a kimchi pancake, known as Kimchijeong.

Kimchijeong are very easy to prepare as is kimchi if you have the time. For those of us who don’t there’s the perfect solution- open a jar! We use a locally produced Kimchi that is made by the Cultured Food Company. Not as spicy as Korean kimchi it is perhaps better tuned to the Irish palate and one jar of this kimchi fits the recipe perfectly.

With Shrove Tuesday imminently arriving this recipe for pancakes will be like an Asian mini break. 

Crispy on the outside, juicy on the inside these pancakes are addictive. Serve with little gem lettuce leaves and dipping sauce on the side, they are guaranteed to be hoovered up.

This recipe makes four medium pancakes that are designed to be shared. 

Serves 2-4 – depending on appetite!

Kimchi Pancakes – Kimchijeong

150g standard flour

75g white rice flour

½ tsp salt

1 large egg

1 x 300g jar of kimchi

Juice from the jar of kimchi (about 6tbs)

4 spring onions, finely chopped 

1/2tsp chilli flakes (optional)

250mls cold sparkling water

100mls vegetable oil for frying

Dipping Sauce

2tbs soya sauce/tamari

2tbs rice vinegar 

1 tsp toasted sesame oil

1tsp sugar

1 tsp sesame seeds

1tbs finely chopped spring onion greens

1 fresh chilli, finely chopped or ½ tsp Korean chilli flakes

Little gem salad leaves or similar for serving

First make the dipping sauce. Lightly toast the sesame seeds in a dry frying pan until they take little colour and become fragrant. Tip into a small bowl, add all the other ingredients then stir together and put aside.

Wash the salad leaves.

Drain the jar of kimchi, reserving the liquid.

Chop the kimchi quite small.

Whisk the egg, fizzy water and kimchi juices together then whisk in the flour, rice flour, salt and chilli or chilli flakes. Stir in the chopped kimchi and spring onions.

Heat a non-stick frying pan and add roughly 2tbs oil. Add one quarter of the mix, spreading it out with the back of a wooden spoon.

Fry the pancake on a medium high heat for 2-3 minutes until a golden crust forms then using a spatula carefully flip the pancake over and cook the other side. Add a little more oil around the sides. This might seem like a lot of oil but it’s the oil that makes the pancake crispy so don’t skip this step. You should see the oil bubbling around, but not over, the pancake.

Flip the pancake one more  time and cook for a further minute or two then again on the other side. Slip the pancake onto a plate then cut like a pizza for sharing. Repeat the process 3 more times.

Put the dipping sauce, lettuce leaves and pancake on the table then tuck in. Break off pieces of the pancake, wrap in a lettuce leaf then dunk in the dipping sauce.

Delicious!


Garden Gratin

Jerusalem artichokes are easy to grow, they’re part of the sunflower family and are very undemanding on the gardening front. Pop the tubers into the ground and after that they pretty much look after themselves.

We grew Jerusalem artichokes last year and then forgot about them until last week when I went on an exploratory dig and discovered lots of knobbly roundish roots. They were in great condition and there are plenty of them. It’s presented the dilemma of what two do with them. Luckily they don’t all need to be eaten at once , they look quite comfortable in the bucket, muddy but dry, and will hopefully sit for a while whist we eat them up.

First up I made a gratin. I mixed some with potatoes, spinach, leeks and Tallegio cheese. This was adelightful combo, creamy, cheesy and very tasty with the sautéed leeks and spinach layered through and perfect eating for this weeks wet and wild weather. We ate the gratin after a beetroot and blood orange salad which is why the plate is pink.

One of the properties of Jerusalem artichokes is that they have a high content of inulin. Inulin has lots of dietary bonuses; plenty of fibre which in turn is helpful in managing diabetes, constipation and general gut health but they really should come with a warning. These powerful vegetables have great flavour but are also very windy. All that fibre causes mighty flatulence. Our duvet almost hit the ceiling when we went to bed. I guess it’s the type of vegetable to be only eaten with close family or friends – they aren’t known as fartichokes for nothing. Apparently if you eat them little and often you can override this side affect so I guess we need to proceed through the stash and see what happens.

The gratin was delicious!

Garden Gratin

600g potatoes

600g jerusalem artichokes

1tbs olive oil

250g fresh spinach

2-3 leeks

25g butter

a small bunch of thyme

300mls cream

250g Tallegio cheese

salt and pepper

Peel the potatoes and artichokes then slice very thinly. Put them into a big bowl. Drizzle over little olive oil, season with salt and pepper and add the thyme. Toss well .

Clean the leeks then slice small. Wash the spinach and trim any big stalks. Put a saucepan with little butter on the heat, add the leeks and when it begins to sizzle turn the heat low and cover with a lid. Shake very couple of minutes until the leeks soften then stir in the spinach. Cover again with the lid and cook for 2-3 minutes until the spinach has wilted down. Season with salt and pepper.

Pre heat the oven 190c

Rub a little butter or olive oil around a gratin dish put in a layer of half the potatoes and artichokes then add the spinach and leeks. Break the tallgio into small pieces and distribute over the top then layer up the remaining potatoes and artichokes.

Put the cream into a small saucepan and bring too the boil. Pour the cream over the vegetables. Cover the gratin dish with a piece off aluminium foil then bake for 50 minutes. Remove the foil and bake for another 15-20 minutes or until the top of the gratin is golden.

Allow to sit for 10 minutes before eating. The ideal amount of time to consume a salad.


Marvellous Leeks

It’s like there is a switch in the middle of January which kicks everything into action again. Those few more minutes of extra daylight  give out a message that even our geriatric chickens respond to. Suddenly we have eggs and all the green things in the garden perk up. 

We have plenty to eat in our garden. Not a great deal of choice but we do have lots of kale, cabbage, brussels sprouts and winter salad. We have a mighty crop of leeks too with long white stems that we are very proud of and we’re still munching our way through last year’s pumpkin harvest. 

The spinach and chard will begin to grow again in the tunnel soon and providing there isn’t a big freeze we’ll be picking outside by the end of March.  

We have enjoyed many wintery feasts of soups, stews and gratins often complemented by the fresh crunch of slaw and our imagination and memories are always on the go wondering how else we can cook these ingredients.

One dish that we resurrected is Poireaux al la Greque. 

This long forgotten recipe was from a time when we worked in a restaurant in Belgium. It was a fairly fancy bistro which served leeks braised in white wine with coriander seeds, olive oil and lemons. The cooked leeks were then split down the centre and served with a line of creamy pink tuna piped down the middle. I could always live without the tuna part – which was simply tuna, mayo and tomato puree to make it go pink, but I did enjoy the leeks. 

To celebrate our marvellous leeks I began to play with the recipe again and we ate them piled on top of mash – any mash will do but I used carrots, celeriac and potatoes all buzzed to a puree with a generous amount of butter – served with crispy caramelised lentils strewn over the top.

This way of cooking the leeks elevates them to star status. They can be eaten with the combination that we had or can be simply served as a starter or alongside chicken or fish using the braising liquid as a sauce.

Poireaux a la Greque

6 leeks

1 large glass white wine

2tbs olive oil

½ lemon

1 tsp coriander seeds

Salt and pepper

First clean the leeks. Trim the ends, cut off the green part – put the greens aside for something else – you could use them in a soup or stew. Rinse the white part of the leeks under the tap, shake dry then line them up in the bottom of a large saucepan that has a lid.

Pour over the white wine, it should come roughly half way up the leeks. Drizzle over the olive oil, sprinkle over the coriander then squeeze over the lemon juice. Put the squeezed lemon in with the leeks. Season with salt and black pepper. Put the pot on the heat and when it comes to the boil cover with a lid, reduce the heat, then gently simmer for 30 minutes.

To serve, strip off the very outer layer of each leek, lay on a plate or over mash then spoon a little cooking liquid over or around. 

Crispy Caramelised Lentils

125g lentils

20g butter*

1 tbs olive oil

1tbs light muscovado sugar

2tsps white wine vinegar

Salt.

Put the lentils into small saucepan, cover with at least twice the volume of water then bring to the boil. Turn the heat to low so that they are simmering gently then cover with a lid. Cook for 15-20 minutes or until the lentils are tender – try a few to check.

Drain the lentils, rinse under the cold tap then shake dry.

Put a small frying pan on the heat. Add the butter and olive oil and when it foams up stir in the lentils. Season with a little salt. Cook on a high heat stirring until the lentils begin to colour. Add the muscovado sugar and white wine vinegar. Mix well then continue to cook and shake until crispy.

* If you would like to make this dish vegan omit the butter and use a little more olive oil


Carrot Power!

Another Christmas has slipped gently by and here we are in 2022.

As always I enjoyed Xmas. I love that business takes a break and there’s time to enjoy family and friends, even if it means meeting outside to avoid the dreaded virus. We shared lots of family dinners, taking turns to cook, trying new recipes and perfecting old ones.

I was thinking what did I eat that stood out on my taste memory, we ate so much. Amongst the many dinners, some elaborate and some simple, were roasted carrots. 

I know! Roasted carrots, they sound so mundane but cooked properly roasted carrots retain their bite and at the same time transform into melt in your mouth sweetness. Once roasted there are so many options to include them in or to accompany dishes. 

Our roasted carrot moment came about when there was very little in the vegetable basket and to be quite honest there were no great expectations. We roast carrots regularly, usually in a medley of roasted vegetables but this time, partly due to necessity we roasted them solo in chunks.

Roasting all root vegetables enhances their flavour. The dry heat of the oven releases the water in the vegetable which shooshes off as steam releasing the natural sugars which caramelise and bring about a great depth of flavour.

It’s important to know when preparing this dish that the vegetables are going to shrink, taking the water out will set this in motion – the opposite from pumping food full of water to plump it up. What looks like an alarming amount of carrots will finish up about half the volume and if you can’t eat them all they are excellent added to salads or soups the next day.

Carrots grow in Ireland, they’re local, sustainable and a great colour. Colour in January is always a bonus, grey days need colourful food. The brighter the vegetables are the more antioxidants and serotonin within. All of these factors will help us to keep us well and positive. My mum always told us to eat up our carrots because they would help us see in the dark which could be another bonus.

Here’s a roasted carrot recipe combo that we enjoyed. 

Roasted Carrots, Lentils and Pumpkin Seed Salsa

700g carrots

1tsp fennel seeds

30mls olive oil

Salt and black pepper 

1 tsp honey

200g puy lentils

I red onion

1-2 stems celery

1 leek, white part only

50mls olive oil

Salt and pepper

1 tbs of your best balsamic vinegar

50g pumpkin seeds

2 cloves garlic

½ preserved lemon

25mls olive oil

Salt

Pre heat oven 190c

Peel the carrots and chop into chunks, roughly 3-4cms. I like to chop on the diagonal as this gives bigger sides to caramelise – it also looks more interesting.

Put the carrots into a large bowl, drizzle over a little olive oil, add the fennel seeds, some salt and cracked black pepper then toss them all together. The carrots should be lightly coated in oil. Tip the carrots onto a large roasting tray – they need to be in a single layer otherwise they will braise rather than roast. Set the timer for 30 minutes then remove the tray from the oven and toss everything again, cook for a further 20 minutes. Finally take the tray out again, drizzle a small amount of honey over the carrots – not more than 1tsp, then toss the carrots once more. Roast for a further 10-15 minutes.

To prepare the lentils peel and chop the onion, dice the celery and the white part of the leek. Heat a pan. Add the olive oil and the vegetables. Season with a little salt then cook on a medium heat until the vegetables begin to melt down.

Stir in the lentils then cover with 500mls water. Bring to the boil then cover with a lid and turn to simmer.

Cook for 35-40 minutes or until the lentils are tender. Taste to check. Season with salt and pepper then stir in 1 tbs of your best balsamic vinegar, this will brighten the dish up.

To make the pumpkin salsa toast the pumpkin seeds gently in a dry pan on a low heat. They will begin to crackle and pop so keep an eye on them and don’t let them brown. When the popping subsides tip them out of the pan to prevent them from cooking further. Peel and roughly chop the garlic and roughly chop the preserved lemon. Put all the ingredients into a jug and buzz with a hand held blender or buzz in a food processor. Taste and season with a little salt and thin with a little water if it is too thick to pour.

To serve put the lentils into a shallow bowl or onto a plate, heap some carrots on top and drizzle over some pumpkin seed salsa.  Excellent eaten with potato wedges – which can be roasting at the same time as the carrots.

Enjoy!


Sweet Aubergine

The garden is beginning to look a little woolly now that it’s the end of September, the apples and pears are falling from the trees and the courgettes have slowed so much that they have become a valuable commodity again. Even the beans are beginning to be defeated with the drop in temperature but to be honest we have eaten so many beans that it’s time for a change. The pumpkins are dragging their feet a bit which, considering we had quite a lot of days over 18c this summer, is strange but no doubt they will have caught up by the end of next month. There has been enough rain for them to continue  to grow.

We have a great crop of aubergines in the tunnel which partner well with the ripe tomatoes. Both are technically fruits and members of the nightshade family and as they generally grow in harmony with each other they turn up together in a lot of recipes.

I have been making Caponata, a Sicilian dish, which is like a sweet and sour version of ratatouille. It’s one of those recipes with lots of variations and secret family twists. Some recipes include raisins or sultanas and some peppers and courgettes. It’s a very flexible recipe so use what you have and what you enjoy. I’ve added a pear from our ancient gnarly pear tree which produces very hard fruit. It’s not traditional but I think it’s an interesting addition.

Caponata can be eaten warm with meat and fish, as a side vegetable, stirred through pasta or on bruschetta (toast rubbed with garlic and olive oil). It’s one of these dishes that gets better as it sits so if you have time to make it ahead and can leave it for some hours so much the better.

For this recipe you need to find yourself a beautiful bright aubergine that’s nice and taut, avoid any that are  soft as they will have been picked some time ago.

Caponata

1 aubergine 

1 onion

mls olive oil

3 stems celery

1 hard pear

3-4 lrg ripe tomatoes or 1 can tomatoes

2 tbs capers

3tbs golden sultanas

2 -3 tbs pitted green olives

20g pine nuts

3tbs good red wine vinegar or balsamic 

1-2 tsp sugar

Handful fresh basil

Salt and pepper

Dice the aubergine into 2cm cubes, toss with a little salt and put aside for 15 minutes. 

Soak the capers in a small bowl of water to remove excess salt then drain. 

Peel and chop the onion, heat a medium pot, add enough olive oil to cover the bottom and stir in the onion. Cook on a medium heat. Chop the celery small and add to the onions, Season with a little salt then leave it to gently sizzle away without browning. Peel and chop the pear and stir in. Cook the vegetables for ten minutes, until they begin to melt down.

If you are using fresh tomatoes cut them in half then grate them on the coarse side of the grater over a bowl. If you using a can roughly chop the tomatoes.  Stir the tomatoes into the pot, increase the heat and when it’s bubbling away turn to simmer. Season with a little salt and pepper.

Take a handful of the aubergines and squeeze them to remove excess water. Do this to all the aubergines. Put a frying pan onto the heat, add enough olive oil to just cover the bottom of the pan and add the aubergine. Toss well then cook over a high heat for a few minutes, until the aubergine takes a little colour. You might need to do this in two batches. Add the fried aubergine into the pot then stir in the sultanas, olives, capers, vinegar and sugar. Leave to gently simmer for 15-20 minutes stirring occasionally. 

Heat a small pan and gently toast the pine nuts then stir into the Caponata.

Chop the basil, add, then check the seasoning – it probably won’t need any more salt as the olives and capers look after that department. 

Take off the heat and leave to rest before eating.

Enjoy the last of the summer’s harvest, we’ll be eating cabbages soon!


The Magic of Beans

I’m a bit of a bean freak and each year we grow a variety of beans in our garden. French beans, borlotti beans, angel beans, coca beans, dwarf beans…. and most years each of these produces enough beans for us to enjoy but no way overwhelm us but the runner beans exceed all expectations. They love the Irish climate.

Picking them is like magic. You walk one way along the row, picking beans until you think you’ve got them all then you turn around and walk back the other way and they reappear. Next thing you have a bucketful. 

When I was a kid we ate a lot of runner beans simply cooked as a side vegetable. This would go on for weeks. Lots of beans and no variation in cooking method. I like runner beans but they did lose their appeal.

We now cook them in many different ways but the preparation always has to begin with stringing the beans. There is a ‘string’ on either side of a runner bean which needs to be removed. My mum used to do this with a paring knife which is effective but a vegetable peeler is faster and more fun. Just top and tail the bean then zip down each side with a vegetable peeler and the string falls away.

Here’s a recipe for pancakes that I found in my odd recipe file when searching for runner bean ideas. It’s adapted from a recipe by Claire Thompson which was in the Guardian years ago. The pancakes have a definite Asian hum and make an easy and tasty treat which I’d happily eat for breakfast, lunch or dinner. I made this recipe early one morning to check it out and it was like having breakfast in India.

Runner Bean Pancakes

350g runner beans

170g gram flour

300mls chilled sparkling water

1tsp salt

1tsp turmeric

1tsp garam masala

1-2 chillies

2-3 cloves garlic

4 spring onions

1tsp nigella seeds

1tsp black mustard seeds

Oil to fry

Put a large pot of water to boil. Add a little salt

String the beans then slice thinly on the diagonal. When the water boils add the beans then cook for 2 minutes. Drain and refresh the beans in cold water to stop them from cooking further then drain and put aside.

Peel and chop the garlic and chop the chillies.

Chop the spring onions. Keep a few green bits aside for the garnish

Sift the gram flour, turmeric and garam masala into a bowl then  stir in the salt and the sparkling water 

Heat a small frying pan, add little oil, ¼ tsp mustard seeds and ¼ tsp nigella seeds then enough enough runner beans to cover the bottom of the pan. Cook on a medium high heat for two minutes then add ¼ of the chopped garlic, ¼ of the spring onions and ¼ of the chillies. Cook for 2 minutes more then pour over enough batter to just cover the beans. Put a few extra beans in any gaps. Cook on a medium heat for 3  minutes or until lightly browned then flip the pancake. The easiest way to flip this pancake is to hold the pan with dry tea towel, put a small plate on top of the pancake then flip it over onto the plate then slip the pancake back into the pan. Cook the other side until golden then put on one side. Repeat  the procedure 3 more times.

Delicious hot or cold with fresh tomato salsa on the side

Fresh Tomato and Chilli Salsa

2 big ripe tomatoes

1 small red onion

1-2 chillies

Juice ½ lemon

A small bunch fresh coriander

Salt

Cut the tomato in half and remove most of the seeds then dice quite small

Peel the onion and chop very finely

Peel and chop the garlic finely

Chop the coriander.

Put all the ingredients into a bowl. Mix gently and season with a little salt


Welcome Bounty

The Azores High brought great excitement and good weather to West Cork in July. For ten days it was like living in the Mediterranean. The beaches were packed and the sea full of people bobbing about, a rare and delightful sight. Families were moving in with plastic bathtubs full of picnic and kit and I felt I had been transported to another country. It began to feel the norm to get up and put my shorts on at every opportunity until the day the rain returned.

Inchydony beach at 8 o’clock in the evening

The culmination of the heatwave with the torrential rain was welcomed by gardeners and farmers alike and the courgettes sighed a breath of relief. For a vegetable that has a sunny reputation it needs a lot of water to happily produce. I have lived here for so long that I really should not be surprised about this nor how late it is before they arrive in abundance. And I must concede that everything seems happier with a little less heat and more water. I’d happily stand in the sunshine watering the garden but it’s not the same as a good dump of rain. All in all the garden is good, first sunshine and then rain seems to have done the trick, it’s all looking very green and happy

August brings home gardeners to the ultimate eat everything you have grown moment. After patiently waiting, weeding and watering there’s a rush on the ripening front. Peas, beans, kales, salads, fennel, beetroots, spuds, tomatoes, cucumbers, onions, apricots, raspberries, blueberries. We’re drowning in some kind of food nirvana!

Here is a recipe from our friend Elisa of Syros in Greece which we enjoy this time of the year. 

Gemista, which means ‘filled with’ in Greek, are ripe vegetables stuffed with rice and herbs then baked with potato wedges and olive oil. Tomatoes, peppers and courgettes all enjoy this treatment. It’s an ideal recipe to make for sharing, perfect for a big family dinner or entertaining. Once the vegetable preparation is done the dish goes into the oven for an hour, then comes to out relax for at least 30 minutes before serving. In Greece this dish is not served hot. Letting everything sit allows the juices to settle and flavours develop.

The tomatoes are very important in this recipe as it’s the juice of the tomato that cooks the rice. Big fat tomatoes are the ones to look out for. It doesn’t matter if they are misshapen or ugly as long as they are big. If you don’t grow your own or have a friend or relative that might share some with you try the farmers markets, failing that the supermarkets sell big tomatoes. As a general rule the more local the tomato, the tastier it will be.

This recipe makes enough for six hungry people but is easy to scale back if you would like to make less

Gemista – Stuffed Tomatoes and Peppers

6 large ripe tomatoes

6 small bell peppers

6 onions

12tbs arborio rice

50g pine nuts

50g currants

150mls olive oil

bunch parsley

bunch of mint

6 medium/large waxy potatoes

Cut the tops off the tomatoes with a small sharp knife and scoop out the seeds and the flesh with a spoon without tearing the tomato. Put the tomato tops and the empty tomatoes aside.

Roughly chop the flesh and seeds, keeping all the juices as far as possible then put into a bowl. 

Cut the tops from the peppers, take out the seeds then put the peppers and tops aside

Peel and finely chop the onions. Heat a large frying pan, add enough oil to generously cover the bottom and when it’s hot add the onions. Cook on a medium heat, without browning, until the onions soften. Season with a little salt. Add the pine nuts and currants, cook for a couple of minutes more then add the rice, tomato juice and flesh and season with salt and pepper. Take off the heat. Chop the herbs and stir in then leave to cool.

Pre heat the oven 180c

Fill the tomatoes and peppers loosely with the mix and put the tops back on.

Place in an oven proof baking tray with high sides that will accommodate the vegetables snuggly.

Peel the potatoes and cut into wedges. Jam these in between the tomatoes and peppers. Drizzle everything generously with olive oil.

Bake for about 1 hour, until the tomatoes and peppers are soft and lightly charred.

Leave them to relax for 30 minutes before serving.