Category Archives: eggs

After the Storm Spicy Pancakes

Three storms in a week left our garden in tatters. Lettercollum –  Leitir Colm in Irish, doesn’t translate as windy hillside for nothing.

We had to use the chainsaw to cut our way out the morning after storm Eunice rocked by and any previous complacency that we had about the imminent arrival of an early crop of spinach and chard vanished when Eunice whisked the plastic off of the tunnel. It was left flapping in the wind like wet washing which mixed in with the debris of the uprooted tree and broken fruit cages made sad viewing.

Luckily the glasshouse is secure and is a comfortable refuge. There’s a kettle on the bench, teabags and a small stash of snacks. All mod cons.

The propagator is cranked up and I am slowly sowing seeds. The next crop of spinach and chard are in the seed trays as are the tomatoes, aubergines and chillies – no sign of them yet but it is early days. I have sown salad, rocket and herb seeds in the tunnel that’s still standing and the rocket true to it’s name has shot up. Another growing season is on the move.

Exciting times – one way or the other.

With the spinach on hold we’ve been enjoying Kimchi.

Kimchi is a spicy fermented Korean cabbage dish, like an Asian sauerkraut. It’s made by salting and spicing cabbages that are then allowed to ferment with wild cultures. It’s very much part of the Korean food culture. 

Fermented foods are full of probiotics which in turn are good for our gut health and immune systems. I reckon our immune systems could do with a boost after two years of covid/covid avoidance.

One of my favourite ways to eat kimchi is a kimchi pancake, known as Kimchijeong.

Kimchijeong are very easy to prepare as is kimchi if you have the time. For those of us who don’t there’s the perfect solution- open a jar! We use a locally produced Kimchi that is made by the Cultured Food Company. Not as spicy as Korean kimchi it is perhaps better tuned to the Irish palate and one jar of this kimchi fits the recipe perfectly.

With Shrove Tuesday imminently arriving this recipe for pancakes will be like an Asian mini break. 

Crispy on the outside, juicy on the inside these pancakes are addictive. Serve with little gem lettuce leaves and dipping sauce on the side, they are guaranteed to be hoovered up.

This recipe makes four medium pancakes that are designed to be shared. 

Serves 2-4 – depending on appetite!

Kimchi Pancakes – Kimchijeong

150g standard flour

75g white rice flour

½ tsp salt

1 large egg

1 x 300g jar of kimchi

Juice from the jar of kimchi (about 6tbs)

4 spring onions, finely chopped 

1/2tsp chilli flakes (optional)

250mls cold sparkling water

100mls vegetable oil for frying

Dipping Sauce

2tbs soya sauce/tamari

2tbs rice vinegar 

1 tsp toasted sesame oil

1tsp sugar

1 tsp sesame seeds

1tbs finely chopped spring onion greens

1 fresh chilli, finely chopped or ½ tsp Korean chilli flakes

Little gem salad leaves or similar for serving

First make the dipping sauce. Lightly toast the sesame seeds in a dry frying pan until they take little colour and become fragrant. Tip into a small bowl, add all the other ingredients then stir together and put aside.

Wash the salad leaves.

Drain the jar of kimchi, reserving the liquid.

Chop the kimchi quite small.

Whisk the egg, fizzy water and kimchi juices together then whisk in the flour, rice flour, salt and chilli or chilli flakes. Stir in the chopped kimchi and spring onions.

Heat a non-stick frying pan and add roughly 2tbs oil. Add one quarter of the mix, spreading it out with the back of a wooden spoon.

Fry the pancake on a medium high heat for 2-3 minutes until a golden crust forms then using a spatula carefully flip the pancake over and cook the other side. Add a little more oil around the sides. This might seem like a lot of oil but it’s the oil that makes the pancake crispy so don’t skip this step. You should see the oil bubbling around, but not over, the pancake.

Flip the pancake one more  time and cook for a further minute or two then again on the other side. Slip the pancake onto a plate then cut like a pizza for sharing. Repeat the process 3 more times.

Put the dipping sauce, lettuce leaves and pancake on the table then tuck in. Break off pieces of the pancake, wrap in a lettuce leaf then dunk in the dipping sauce.

Delicious!


Asparagus Days are Here

Our glasshouse is bursting at the seams and the only picture I have of it is photo of myself and a friend enjoying a breakout glass of wine – Semi al fresco, the door was open

There are crowds of seedlings waiting to move to a more spacious location to continue growing. We have just re-covered the tunnel that was destroyed in one of the winter storms so the tomatoes can relocate and the other tunnel is full of infant spinach, chard, herbs and baby beans.

The potatoes are peeping up and the fruit trees are in blossom. It’s such an exciting time of the year in a garden yet the pickings are fairly slim as last years green crops shoot for the sky and go to seed and the new ones aren’t quite ready to be picked.

One vegetable that’s coming into season is Irish asparagus. Sadly we don’t have any in our garden anymore – I dug it up in frustration. After several years of nursing the plants and trying to keep them weed free then only getting a couple of spears at a time I gave up.  I should have researched growing asparagus before wasting so much time as I have discovered that not only do the seedlings need three years on a weed free bed, it also hates slugs and needs warmth and sunshine – a minimum of eight hours sunshine a day! 

I take my hat off to the Irish growers who supply us with this seasonal treat as it takes so much time and effort and ideally a tunnel or covered growing area that is designated to this use.

The Irish asparagus season is short, there are six weeks in May/June when these plants do their thing, growing up to 18cms in a day and funnily enough it’s the male plants that shoot up the spears, the female plants provide the seeds – kind of reverse to humans.

I always enjoy the asparagus when it’s in season here in Ireland. It’s such a seasonal treat and one of the most nutritionally balanced vegetables packed with vitamins and antioxidants.

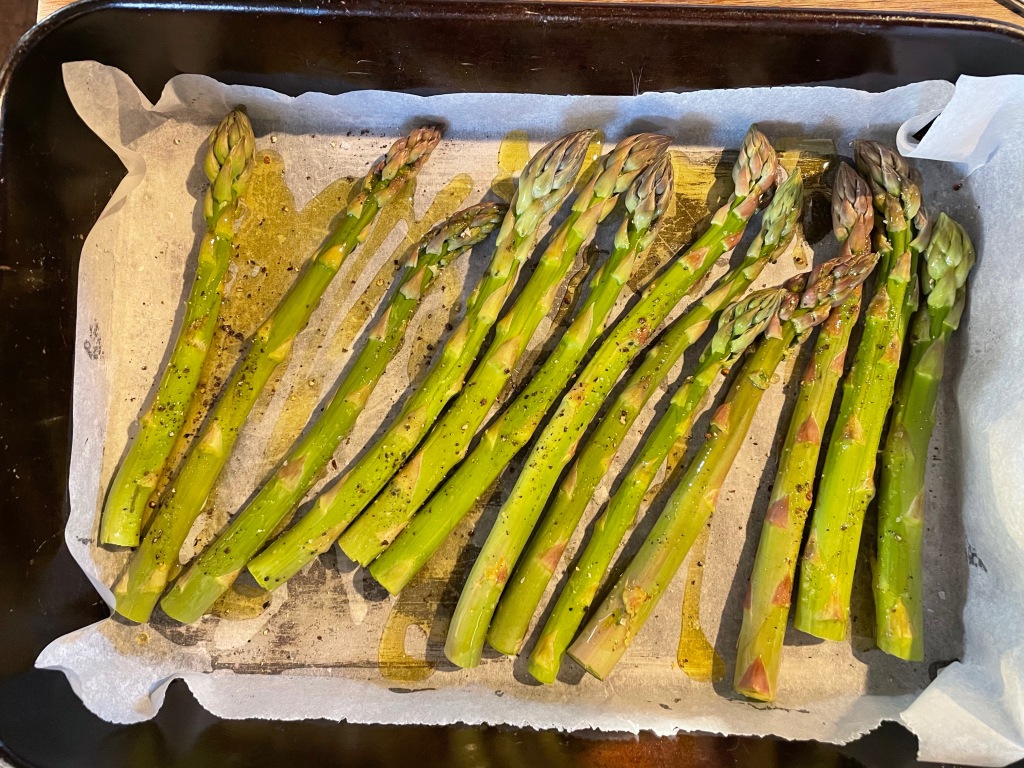
It’s best cooked simply. My favourite way is grilling on a cast iron pan but I have also discovered roasting in a very hot oven can produce a similar result. The heat seals in the flavours and the asparagus still has a little bite.

We have plenty of fresh eggs and a big bunch of Dunworely asparagus at hand so this month’s recipe is a plate of roasted asparagus over Puy lentils with herb hollandaise. The lentils are simply cooked then seasoned with salt and dressed with the best olive oil and a splash of balsamic vinegar to brighten them up.

Sublime!! It’s very easy to prepare and well worth seeking out the local asparagus for, infinitely superior to asparagus that has been flown half way round the world and sold for next to nothing. Help save the planet, buy local!

Roasted Asparagus with Puy Lentils and Herb Hollandaise

Serves 3-4

1 bunch asparagus –  4 spears per person

200g ripe cherry tomatoes

200g Puy lentils

200g butter

2 egg yolks

Juice of half a juicy lemon

A handful of fresh soft herbs – chives, basil and/or chervil

Salt and cracked black pepper

Extra virgin olive oil

Balsamic vinegar

Pre-heat the oven 220c

Put the lentils into a saucepan and cover with at least twice as much water. Bring to the boil, turn to simmer then cook for 20 minutes. Check them by tasting a couple and if they are still a little hard cook for 1-2  minutes longer but be careful as they should be just done. Drain the lentils, rinse with hot water then dress with a drizzle of extra virgin olive oil, a splash of balsamic vinegar and a little salt. Put the lid back on to keep them warm and put aside.

Whilst the lentils are cooking prepare the asparagus. Wash the spears then trim the woody end. You could snap them but I usually lightly run a sharp knife over the stem working from the stalk up and the knife cuts like butter as soon as you pass the woody bit. Line a baking tray that’s big enough to accommodate the asparagus in one layer with parchment paper. Dry the spears then put them in the tray and drizzle over olive oil. Sprinkle over a little salt and cracked pepper then roll them about so they are all lightly dressed,.

Wash the tomatoes and dry then put them into a baking tray with a drizzle of olive oil and a sprinkle of salt.

Put the tomatoes and asparagus into the oven and set the timer for 7 minutes, toss both then cook for a further 5 minutes.

The Hollandaise is made using a held blender which is a clever trick – no whisking over a bain-marie, just instant Hollandaise.

Put the egg yolks into the beaker or a jug with the lemon juice.

Gently melt the butter and heat until hot.

Chop the herbs finely

Put the blender into the beaker and buzz the yolks and lemon juice together. Add the hot butter in a slow steady stream. When it has emulsified season with salt and pepper and stir in the chopped herbs. If it is too thick, thin with a little warm water. If you are not ready to serve you can keep the sauce warm by putting the jug into a bowl of hot water.

To assemble the dinner put a big spoonful of lentils onto each plate, lay the asparagus on top and pour a little hollandaise across. Put the roasted tomatoes around the sides.


Giant Cauliflowers Make Giant Cakes

Finally our cauliflowers have arrived, there’s a colony of them and some are seriously big.

We have waited so long. I was convinced we would have caulis for Xmas but nope, nothing happened . We just had these huge plants on long stems that seemed to be in some kind of animated suspension and now, all at once they are emerging. It’s far from the first cauliflowers that we have grown but usually they arrive rather inconveniently in August or are very welcome in October and November. Last years lockdown meant we got our seeds where we could and I must have picked up this winter variety. I’ve now checked it out and discovered that winter cauliflowers take 40-50 weeks to mature which is quite some time to nurture a vegetable but they are so welcome. A joy to the eye and they’re going to be exciting to eat, or perhaps I should say a challenge.

We regularly make cauliflower fritters and cauliflower pakoras which are both delicious but last night I broke out and and made a cauliflower Sfomato with the enormous cauliflower that I had picked. Sformato looks like a cake which has a touch of a soufflé to it. It’s also enormous, enough to feed 6- 8 for dinner or 4 for dinner and 4 for lunch!

I have feeling we’re going to have cauliflowers coming out of our ears!

Cauliflower Sformato

1 large cauliflower

olive oil to roast the cauliflower

2 red onions, peeled and chopped

90g butter

90g flour – I used rice flour as it’s gluten free

800mls milk

6 eggs

75g grated parmesan or mature cheddar, grated

1tbs Dijon mustard

1/2tsp smoked paprika

Pre heat the oven 190c

Line the base and sides of a 24-26cm loose bottomed cake tin

Break the cauliflower into even sized florets and toss with little olive oil and salt. Spread out on a large baking sheet and roast for 20 minutes. leave aside to cool a little then chop small.

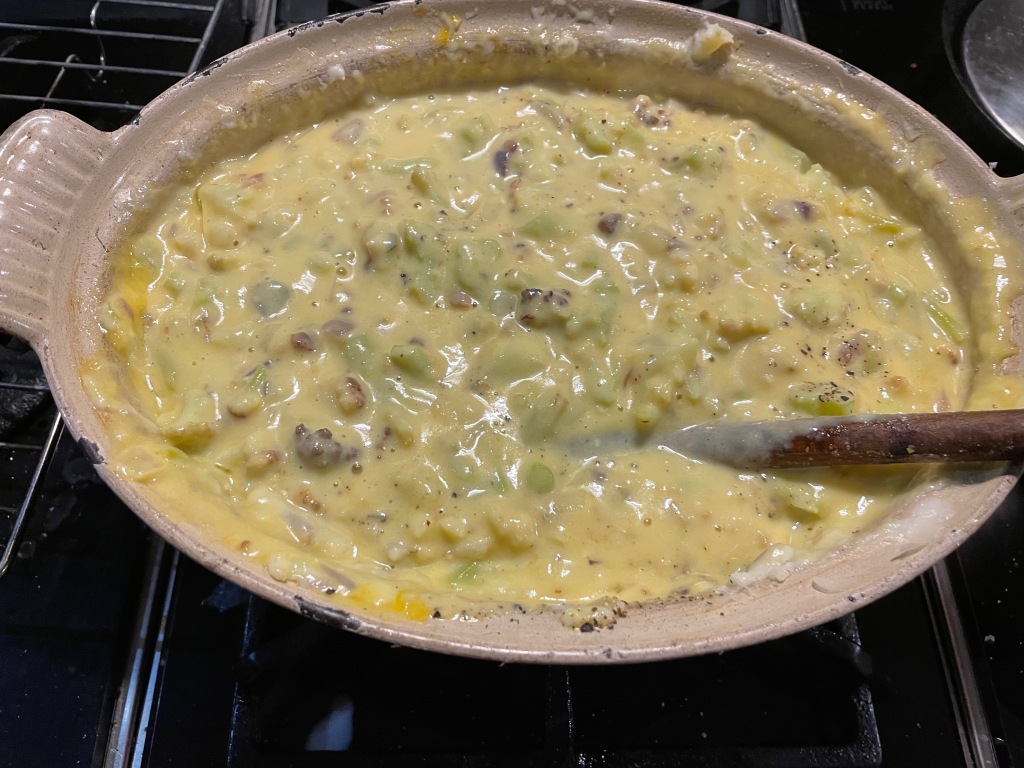
Melt the butter in a large saucepan (mine was little small) then stir in the flour. Cook gently for a few minutes then begin to add the milk. Do this in stages, whisking the milk and roux(flour mix) until it comes together in one mass before adding a little more. You will end up with a fairly thick sauce. Season with salt and cracked black pepper. Stir the chopped cauliflower, smoked paprika, mustard and grated cheese.

Check the seasoning then pour into the prepared tin.

Bake in the centre of the oven for 40 minutes or until a knife comes out clean.

Bake in the centre of the oven for 40 minutes or until a knife comes out clean.

Leave to rest for a few minutes before removing the tin and serving.

It’s not going to win a beauty contest but very tasty!


Spring into Dumplings

In between storms and torrential rain the green things are struggling to come back, valiantly pushing ahead anytime there’s a ray of sunshine. Spinach, chard, rocket, nettles, wild garlic are all growing again. Most of our spinach and chard have weathered the winter outside. At one point, when it froze for a week it looked like they might lose the will to live, their leaves were sad and frost burnt but somehow they rallied on and now look like they’re good to go. The nettles and wild garlic are just emerging and the rocket is as always surging ahead but as the rocket’s in the tunnel it does have an advantage. 

We have learnt from previous winters that it’s always good to have a stash of green things in the tunnel so late each August we plant up little beds of spinach, rocket and kale just to make sure we have a supply of these useful greens.

The new glasshouse is slowly filling up with seedlings and by Easter it will be bursting at the seams and we’ll be off again. Another year in the garden.

I wanted to make a recipe with wild garlic but as I write this there are very slim pickings out there so I’ve modified my plan. What was going to be ricotta gnocchi with wild garlic pesto has morphed into ricotta gnocchi with rocket pesto. It could just as easily been kale pesto or nettle pesto but as I have a choice and I particularly enjoy the fresh pepperiness of rocket, rocket it is. Classic pesto is made with basil but it can in fact be made with a huge variety of tasty leaves. 

The recipe for pesto is pretty fluid – olive oil, nuts/seeds, cheese, garlic and herb/leaves of you choice. I often put in a little lemon juice which prevents the pesto from going Gollum green if it’s not used quickly – it also brightens up the flavours.

Ricotta gnocchi are very easy to make unlike potato gnocchi which take a little more effort. They are often called malfatti (badly made) as they don’t have a  uniform shape – all part of their inner beauty! Just get yourself some of our wonderful local ricotta and a clean bowl and you’re nearly there!.

Ricotta Gnocchi 

250g ricotta

1 egg

nutmeg

50g semolina

75g grated Parmesan cheese

salt and black pepper

Put the ricotta into a bowl and beat together with the egg.

Season with a little grated nutmeg and salt and pepper.

Stir in the semolina, this will give you a soft mass that should hold together

Bring a large pot of salted water to the boil then turn down to simmer. It’s important the water is a quiet simmer as a rolling boil will cause too much agitation and the gnocchi will break apart. 

Wet your hands to prevent the mix from sticking to them then form small balls with the mixture and gently slip them into the water. Leave the gnocchi to cook for a few minutes and when the gnocchi rise back to the surface they are ready. Remove with a slotted spoon and drain any excess water before plating or putting in a serving bowl.

Drizzle the pesto over the gnocchi and serve immediately.

Serves 2-3 

Rocket and Pumpkin Seed Pesto

15g pumpkin seed

50g rocket

25g Parmesan cheese

1-2 cloves garlic

100ml olive oil

juice of 1/2 lemon

salt

Heat a dry pan and gently toast the pumpkin seeds.

Roughly chop the garlic and rocket

Place the pumpkin seeds,  garlic, lemon juice, olive oil, rocket, parmesan and salt into a  jug and using a hand held blender blitz to a smooth sauce. 

Check the seasoning and the pesto is ready . Use what you need then put the remainder into a small pot and pour a little olive oil over the top. This will stop the pesto from oxidising. Store in the fridge and use within the week. Delicious with pasta, grilled vegetables, meat, fish…..perks up everything.


Fridge Booty

I often arrive home hungry and gaze into the fridge where there’s nothing instant to eat but many pots of left overs. Fortunately the left overs are full of potential and anything that tasted good the night before can be enjoyed with egg so we make odd frittatas/tortillas. Pasta works very well as do left over beans, lentils and vegetables.

Yesterday’s lunch was courgette and spaghetti encased in an egg blanket which makes a surprisingly great tortilla. Interesting texture and plenty of flavour – I threw in an extra handful of basil, and today’s could be lentils and stir-fried kale. The possibilities are endless and easy if you’re happy to live on a diet of eggs and random left overs. Add ins are welcome additions; cheese, herbs, tomatoes etc

Simply fry the ingredients in little olive oil until they are hot then tip them into a bowl of whisked eggs seasoned with salt and pepper. (I usually use 4 or 5 eggs)

Mix well and pour back into the pan.

Cook the egg mix carefully, lower the heat and cover with a lid. When the egg is cooked at the sides and beginning to set in the middle give the pan a shake and with a bit of luck your tortilla will be mobile, if not gently ease it away from the pan with lifter until it moves.

Place a plate on top of the pan and flip the tortilla onto the plate then slide it back into the pan again and cook for 2 minutes more – not too long as it’s better if the egg isn’t cooked dry. If the thought of flipping the pan freaks you out you can finish the tortilla under the grill or in the oven in which case you’ll have a frittata – the main difference between a tortilla and frittata being how you finish cooking the eggs.

Delicious with salad on the side and even portable if you need to run.


Eggstraordinary Times

Our chickens have no idea that the covid virus has slowed most of the world down so we have a lot of eggs They are laying like machines, their systems in synch with the daylight hours. The eggs are piling up in baskets on the window sill awaiting a mission in life, Ordinarily we pass these valuable ovoids around our friends but as we have to stay at home we’re having to up our intake.

I’m digging out recipes that use eggs, this is a tasty one.

Indian Style Eggs is a fast and easy dish for brunch or lunch. A kind of a lightly spiced Indian style omelette with salad piled on top. I use garam masala, which is a mix of spices, which have been toasted and ground.

Indian Style Omelette with Salad on Top.


2 onions

2tbs ghee or vegetable oil

5 eggs

½ tsp salt

1 tsp garam masala

1 big ripe tomato or a handful of ripe cherry tomatoes

1 green chilli (optional)

a handful of chopped fresh coriander.


Peel the onions, cut them in half, then cut into 1cm slices.

Cut the slices into 1 cm pieces.

Heat a frying pan, add the oil or ghee then fry the onions on a medium high heat until they are translucent but still a bit crisp. This will take a few minutes. The onions shouldn’t brown.

Whisk the eggs in bowl together with the salt, then pour over the onions. Give the pan a little shake to mix the eggs and onions together then using a fork, draw the egg mixture that is setting to the middle, repeat this again with the set egg and give the pan a shake to even the ingredients out.

Sprinkle the teaspoon of garam masala over the top then turn the heat to low and cover the omelette with a lid for a couple of minutes, until the top is more or less set. Don’t overcook as the residual heat will make the eggs finish setting.

Dice the tomato/es and season with a little salt. Thinly slice the chilli. Maybe check out how hot it is by testing the end near the stalk. If you find it too hot remove some of the seeds as this is where the heat is. Of course if you don’t like chillies leave the chilli out and maybe substitute chopped spring onion.

Chop the fresh coriander.

Scatter the tomatoes, chilli and coriander over the top of the omelette and eat immediately.


In Anticipation of Peas

fullsizeoutput_147f

It’s a busy time in the garden, lots to sow, transplant and weed but not a vast selection to eat. There are plenty of green things – salad leaves, herbs, baby spinach, a few bolting leeks but for the rest we are waiting.

This recipe is in anticipation of the peas.

Our peas are about 15cms tall and on the up, beginning to climb their chicken wire fence. There’s a way to go but they’re coming

There is still time to plant peas if you have the space. They enjoy the Irish climate and providing the mice don’t eat the seeds will soon emerge and start climbing up, grasping with tiny tendrils to whatever is close by so it’s best to make a fence to keep them where you want them.

The main reason I plant pod peas is because they are so sweet. We snack on them in the garden so probably only half the harvest hits the kitchen.

The secret with peas is to eat them as soon as you pick them, before the sugars convert to starch. This is why frozen peas are so successful and indeed can be superior to pod peas.as unless they were recently picked they will have become a little starchy.

These little green orbs have a lot going for them as they are a source of plant-based protein, officially a legume not a vegetable. Paired with eggs, a little fresh goats cheese or yoghurt to make a complete protein this makes a nutritious vegetarian option that is easy and fast to make.

I was going to make the recipe in the blender but there was a power cut so instead of buzzing the mix I got stuck in with  a potato masher  and the result was chunky pea in batter delicious so the recipe can be made either way. If you use a blender pulse buzz and stop before the mix is smooth.

We’re using Sunview fresh goats cheese, which comes from Kilmichael near Macroom. Goats cheese has a dodgy reputation but this new season fresh cheese is creamy and delicious, not in the least bit goaty.

If you can’t handle goats cheese use a little feta or leave it out.

We ate these with mint and yoghurt sauce and salad on the side.


Pea fritters


300g peas

3 eggs

3-4 spring onions

zest of half a lemon

50g crumbled fresh goats cheese

50g cornflour

½ tsp baking powder

½ tsp salt

oil to fry.


Bring apot of water to the boil , add the peas then cook for 3-4 minutes. Drain and refresh under the cold tap then put aside .

Crack the eggs into a bowl. Seive the cornflour and baking poiwder then whisk into the eggs together with the slat.

Finely chop the spring annions then stir into the batter with the lemon zest, goats cheese and peas. Mash with apotato masher to crush the peas.

Heat a frying pan, pour in a little oil – enough ti just cover the bottom of the pan. Spoon in 3 or 4 tablespoons of the batter, allowing each fritter to spread but not join up. Turn the heat to medium and fry the fritter for 2-3 inutes then flip over and cook the otherside. Repeat until the mix is used up. I made 10 fritters.


Mint Yoghurt Sauce


250mls Greek yoghurt

1 tbs finely chopped mint

salt. And cracked black pepper.


Mix te yoghurt and finely chopped mint together then season with salt and cracked black pepper.


Torta Pasqualina

Continue reading