Tag Archives: vegetarian

After the Storm Spicy Pancakes

Three storms in a week left our garden in tatters. Lettercollum –  Leitir Colm in Irish, doesn’t translate as windy hillside for nothing.

We had to use the chainsaw to cut our way out the morning after storm Eunice rocked by and any previous complacency that we had about the imminent arrival of an early crop of spinach and chard vanished when Eunice whisked the plastic off of the tunnel. It was left flapping in the wind like wet washing which mixed in with the debris of the uprooted tree and broken fruit cages made sad viewing.

Luckily the glasshouse is secure and is a comfortable refuge. There’s a kettle on the bench, teabags and a small stash of snacks. All mod cons.

The propagator is cranked up and I am slowly sowing seeds. The next crop of spinach and chard are in the seed trays as are the tomatoes, aubergines and chillies – no sign of them yet but it is early days. I have sown salad, rocket and herb seeds in the tunnel that’s still standing and the rocket true to it’s name has shot up. Another growing season is on the move.

Exciting times – one way or the other.

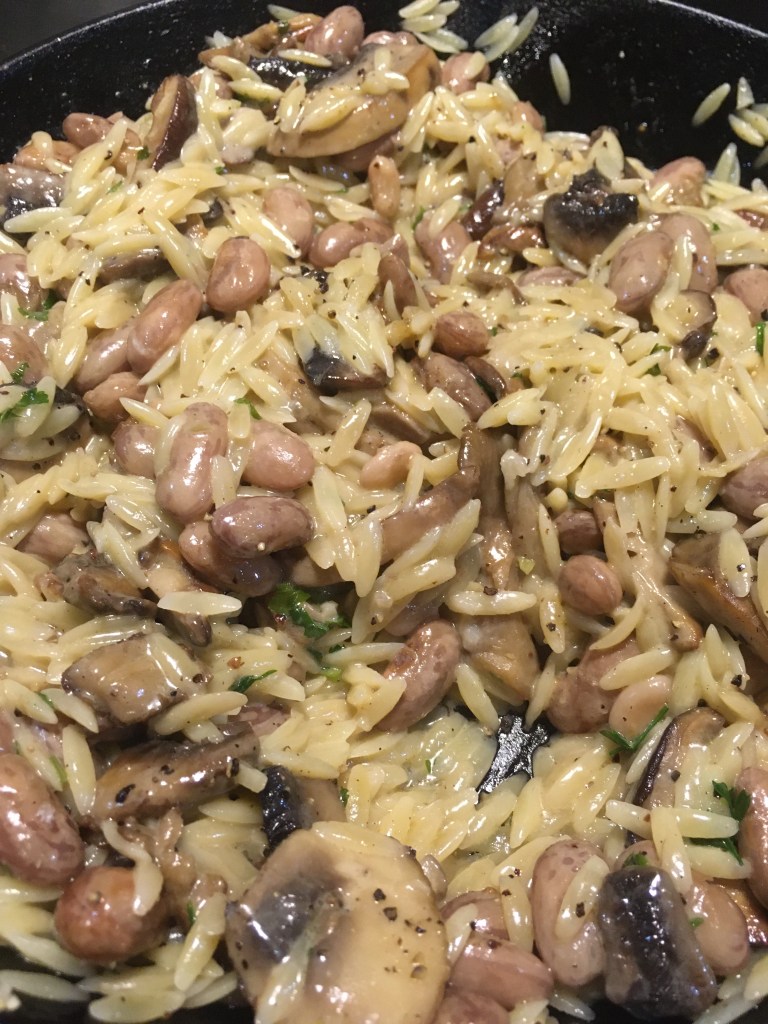
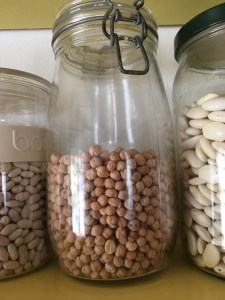
With the spinach on hold we’ve been enjoying Kimchi.

Kimchi is a spicy fermented Korean cabbage dish, like an Asian sauerkraut. It’s made by salting and spicing cabbages that are then allowed to ferment with wild cultures. It’s very much part of the Korean food culture. 

Fermented foods are full of probiotics which in turn are good for our gut health and immune systems. I reckon our immune systems could do with a boost after two years of covid/covid avoidance.

One of my favourite ways to eat kimchi is a kimchi pancake, known as Kimchijeong.

Kimchijeong are very easy to prepare as is kimchi if you have the time. For those of us who don’t there’s the perfect solution- open a jar! We use a locally produced Kimchi that is made by the Cultured Food Company. Not as spicy as Korean kimchi it is perhaps better tuned to the Irish palate and one jar of this kimchi fits the recipe perfectly.

With Shrove Tuesday imminently arriving this recipe for pancakes will be like an Asian mini break. 

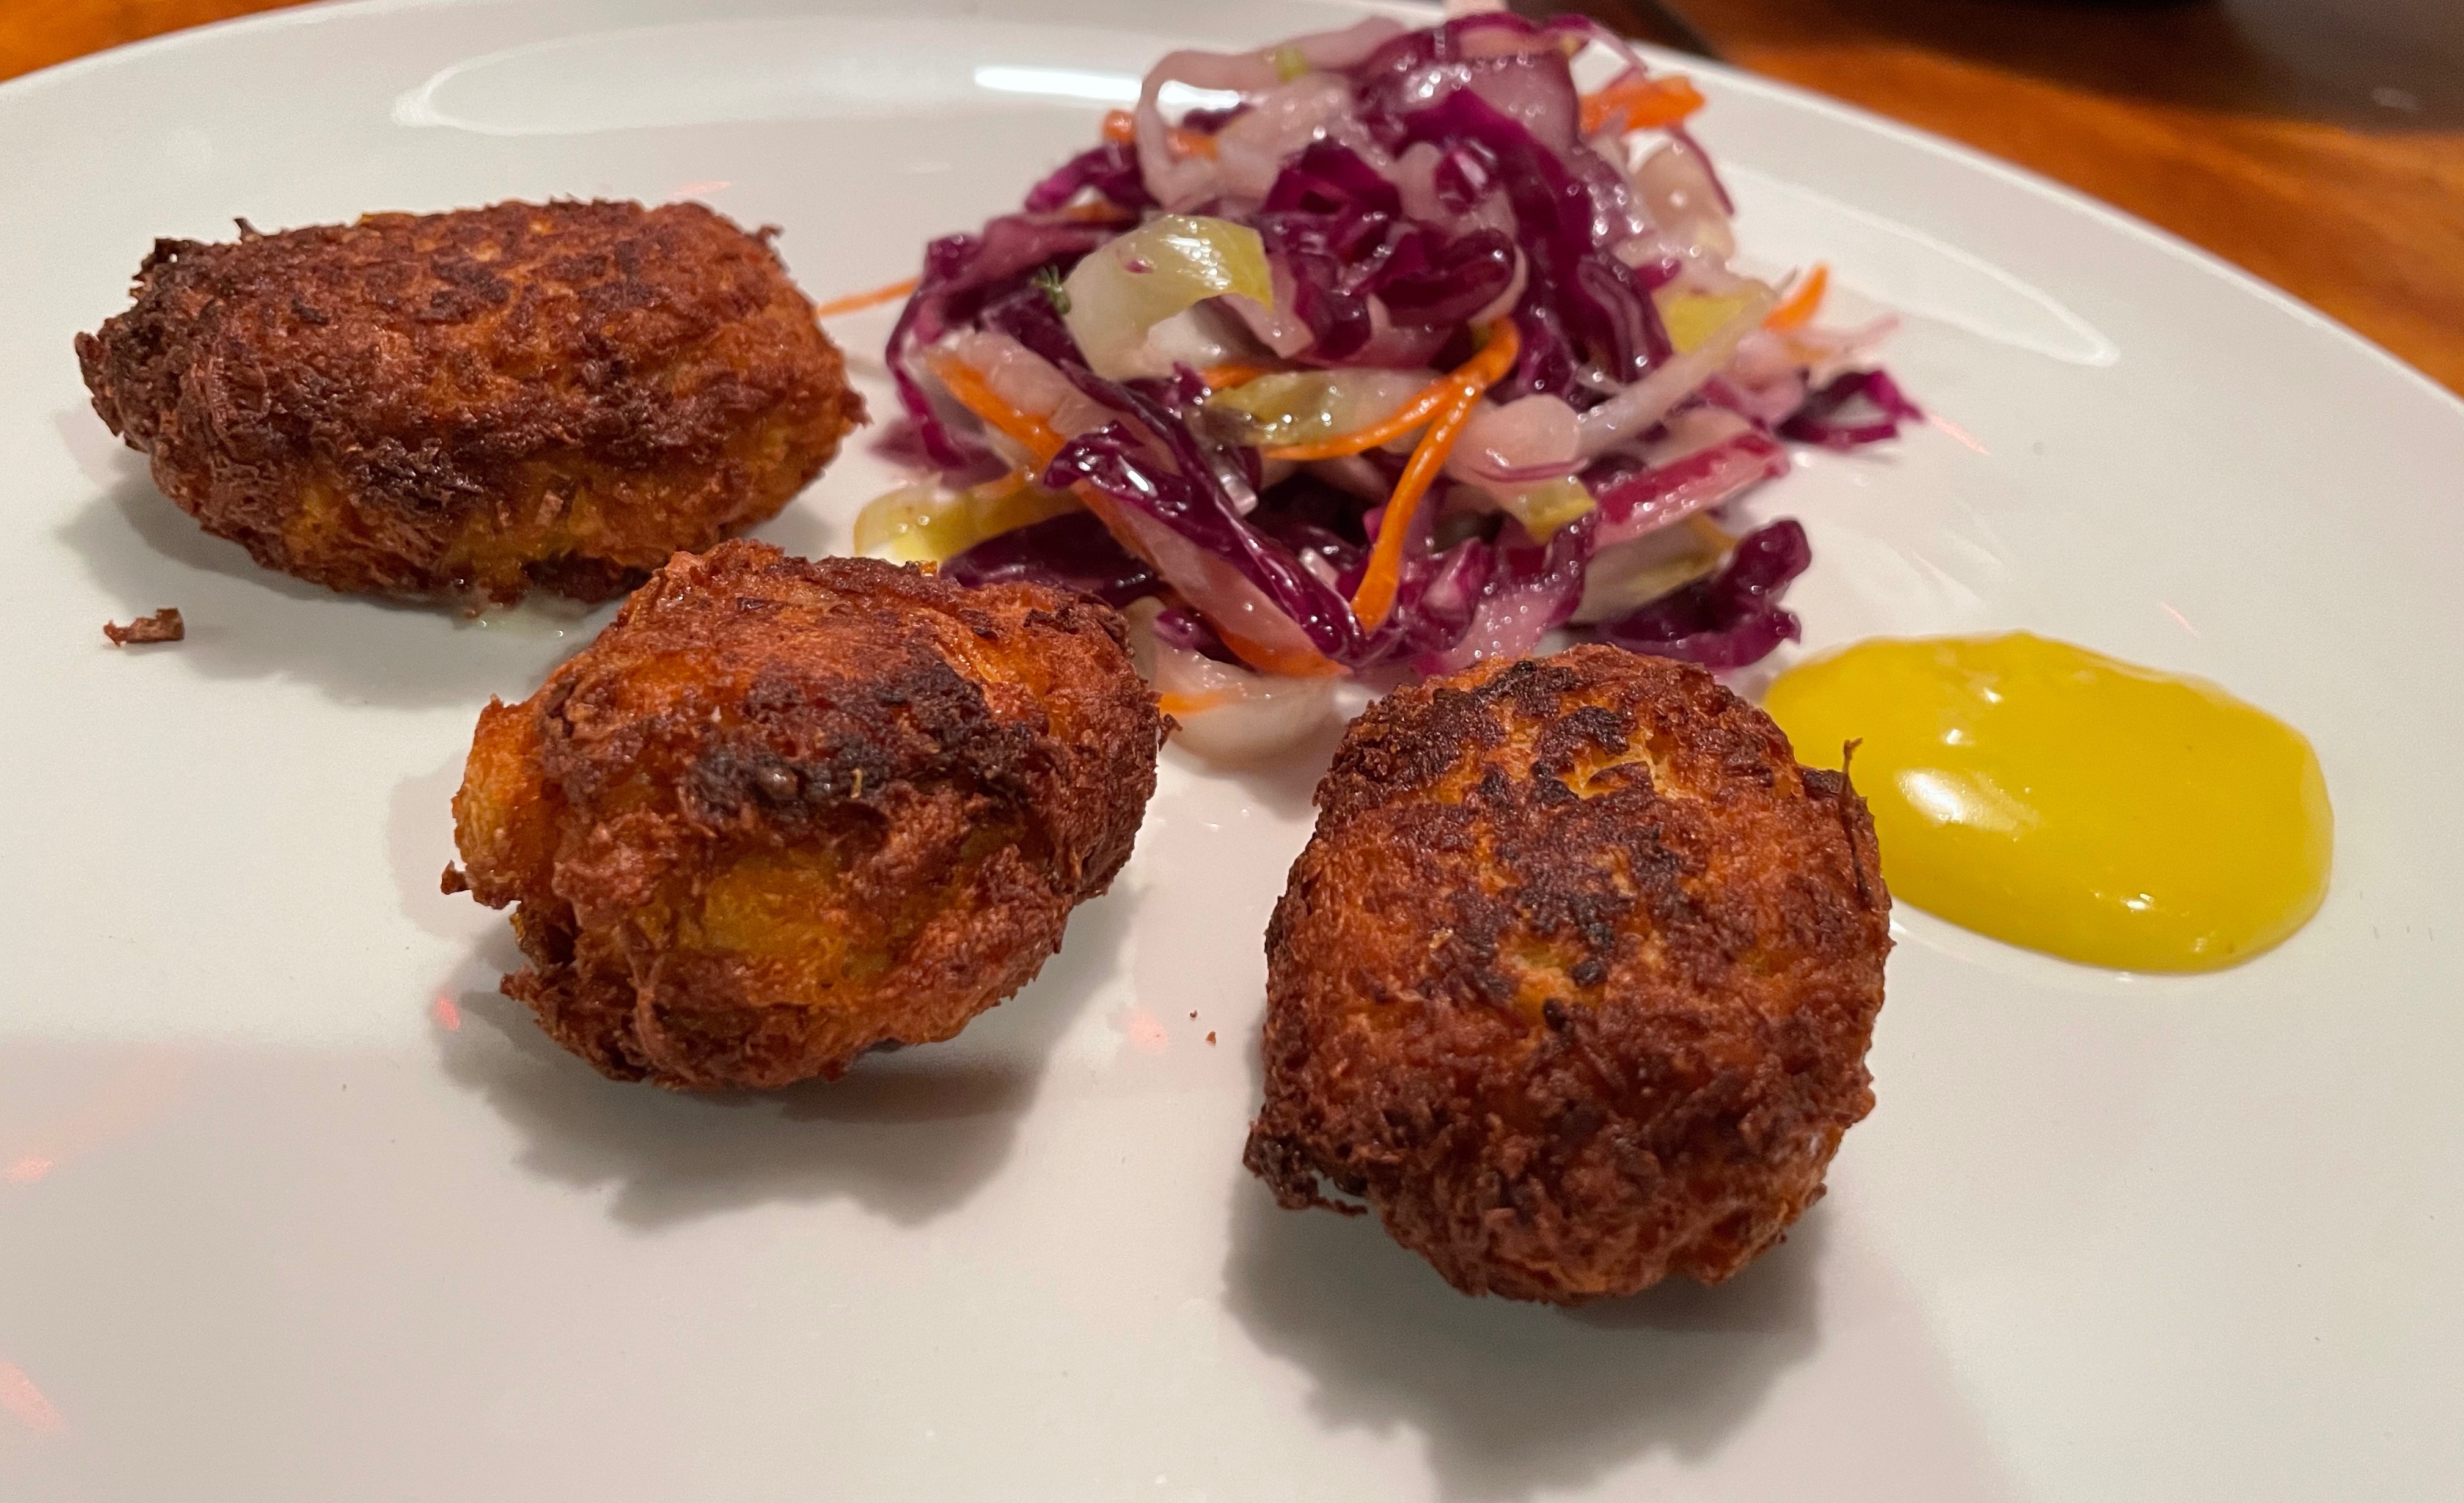
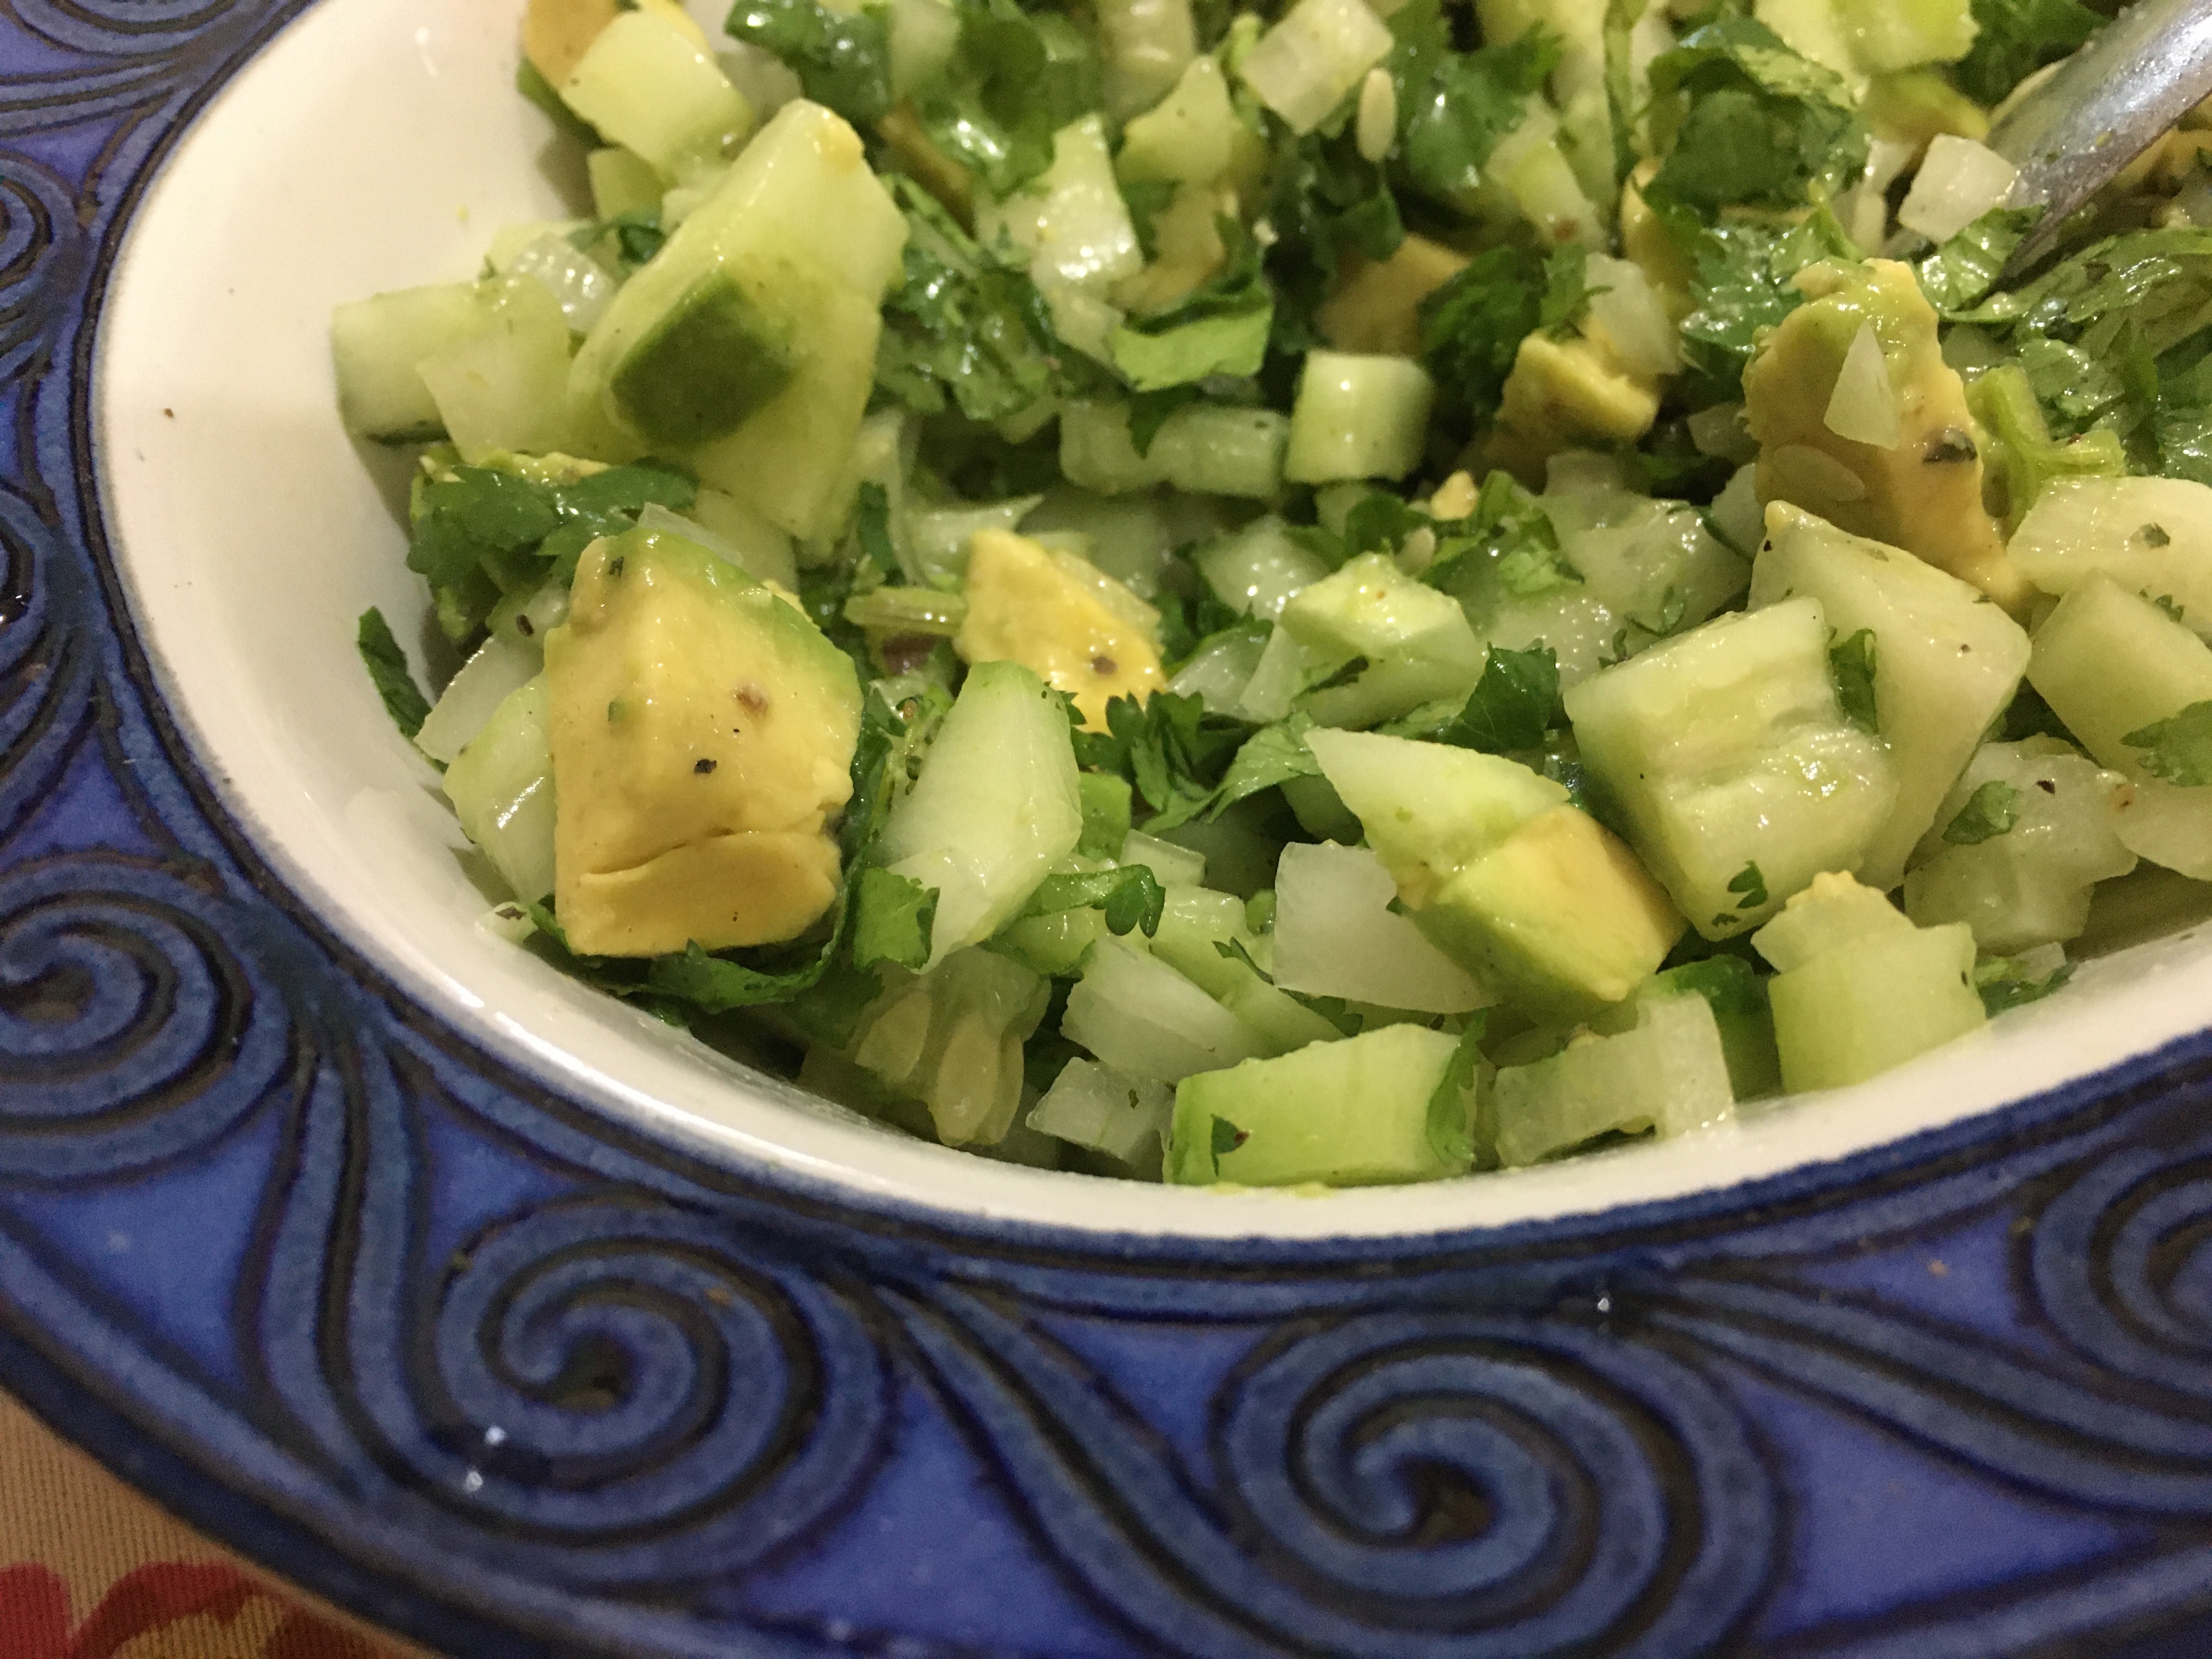
Crispy on the outside, juicy on the inside these pancakes are addictive. Serve with little gem lettuce leaves and dipping sauce on the side, they are guaranteed to be hoovered up.

This recipe makes four medium pancakes that are designed to be shared. 

Serves 2-4 – depending on appetite!

Kimchi Pancakes – Kimchijeong

150g standard flour

75g white rice flour

½ tsp salt

1 large egg

1 x 300g jar of kimchi

Juice from the jar of kimchi (about 6tbs)

4 spring onions, finely chopped 

1/2tsp chilli flakes (optional)

250mls cold sparkling water

100mls vegetable oil for frying

Dipping Sauce

2tbs soya sauce/tamari

2tbs rice vinegar 

1 tsp toasted sesame oil

1tsp sugar

1 tsp sesame seeds

1tbs finely chopped spring onion greens

1 fresh chilli, finely chopped or ½ tsp Korean chilli flakes

Little gem salad leaves or similar for serving

First make the dipping sauce. Lightly toast the sesame seeds in a dry frying pan until they take little colour and become fragrant. Tip into a small bowl, add all the other ingredients then stir together and put aside.

Wash the salad leaves.

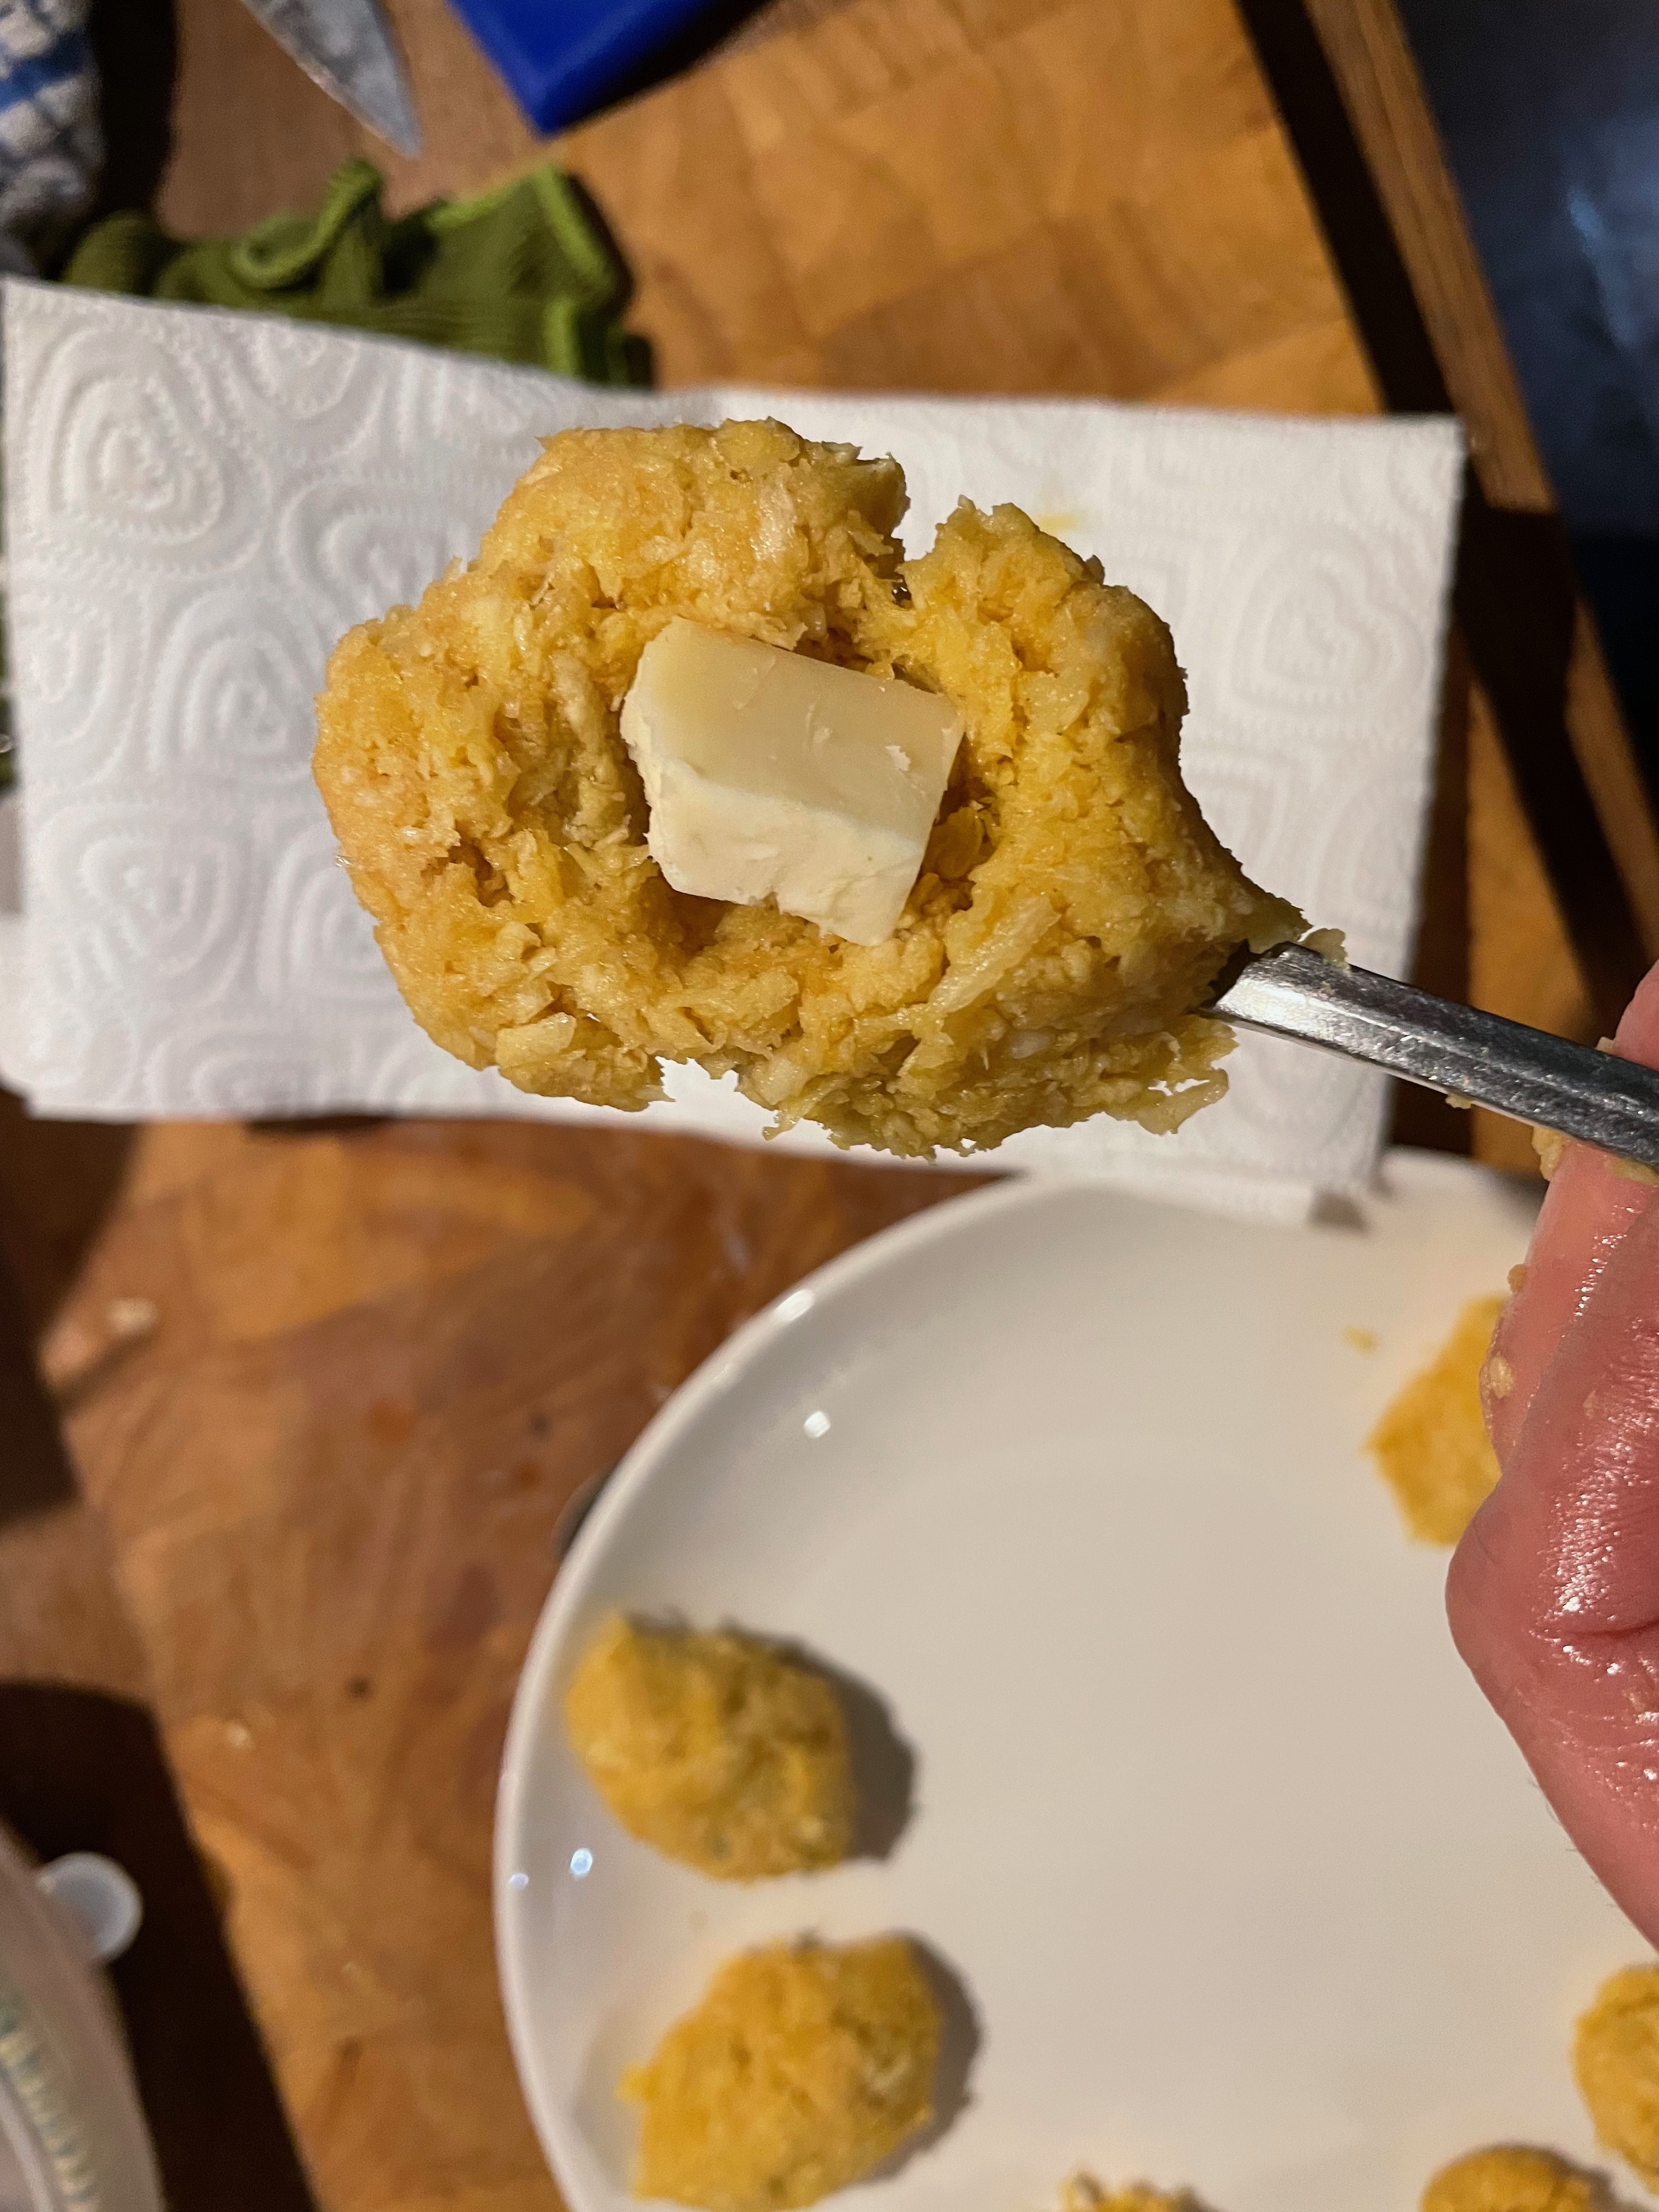
Drain the jar of kimchi, reserving the liquid.

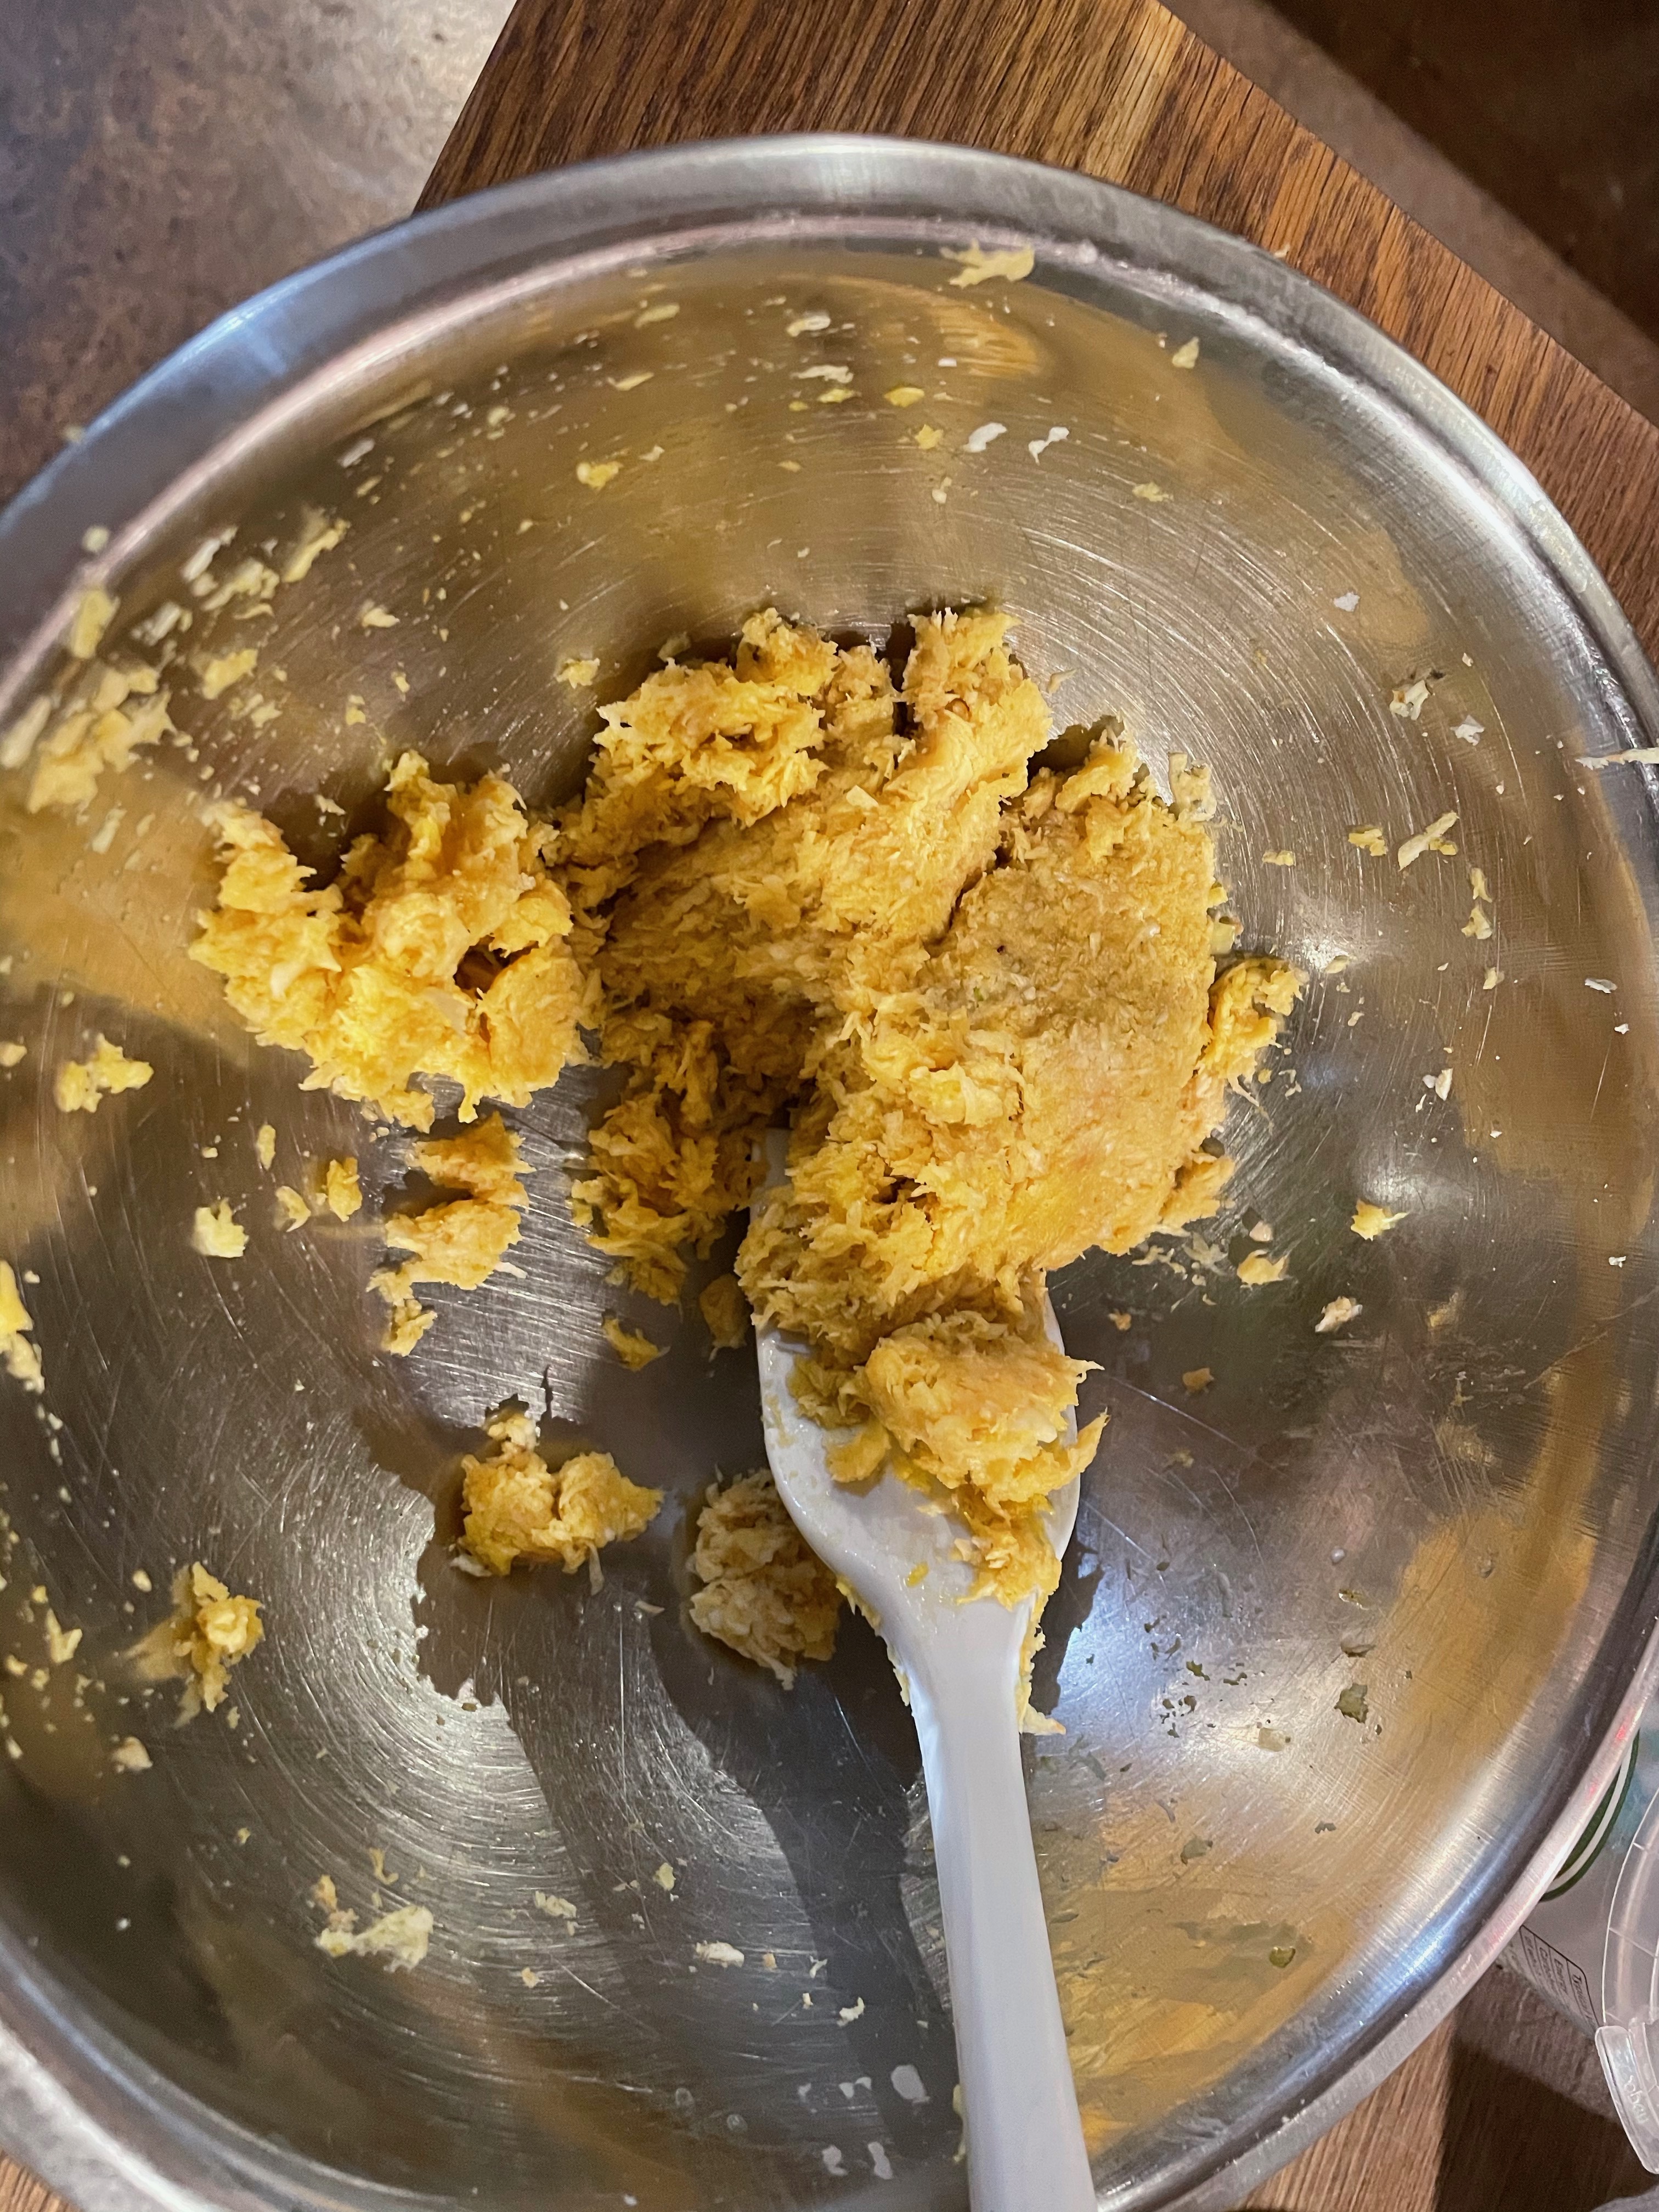
Chop the kimchi quite small.

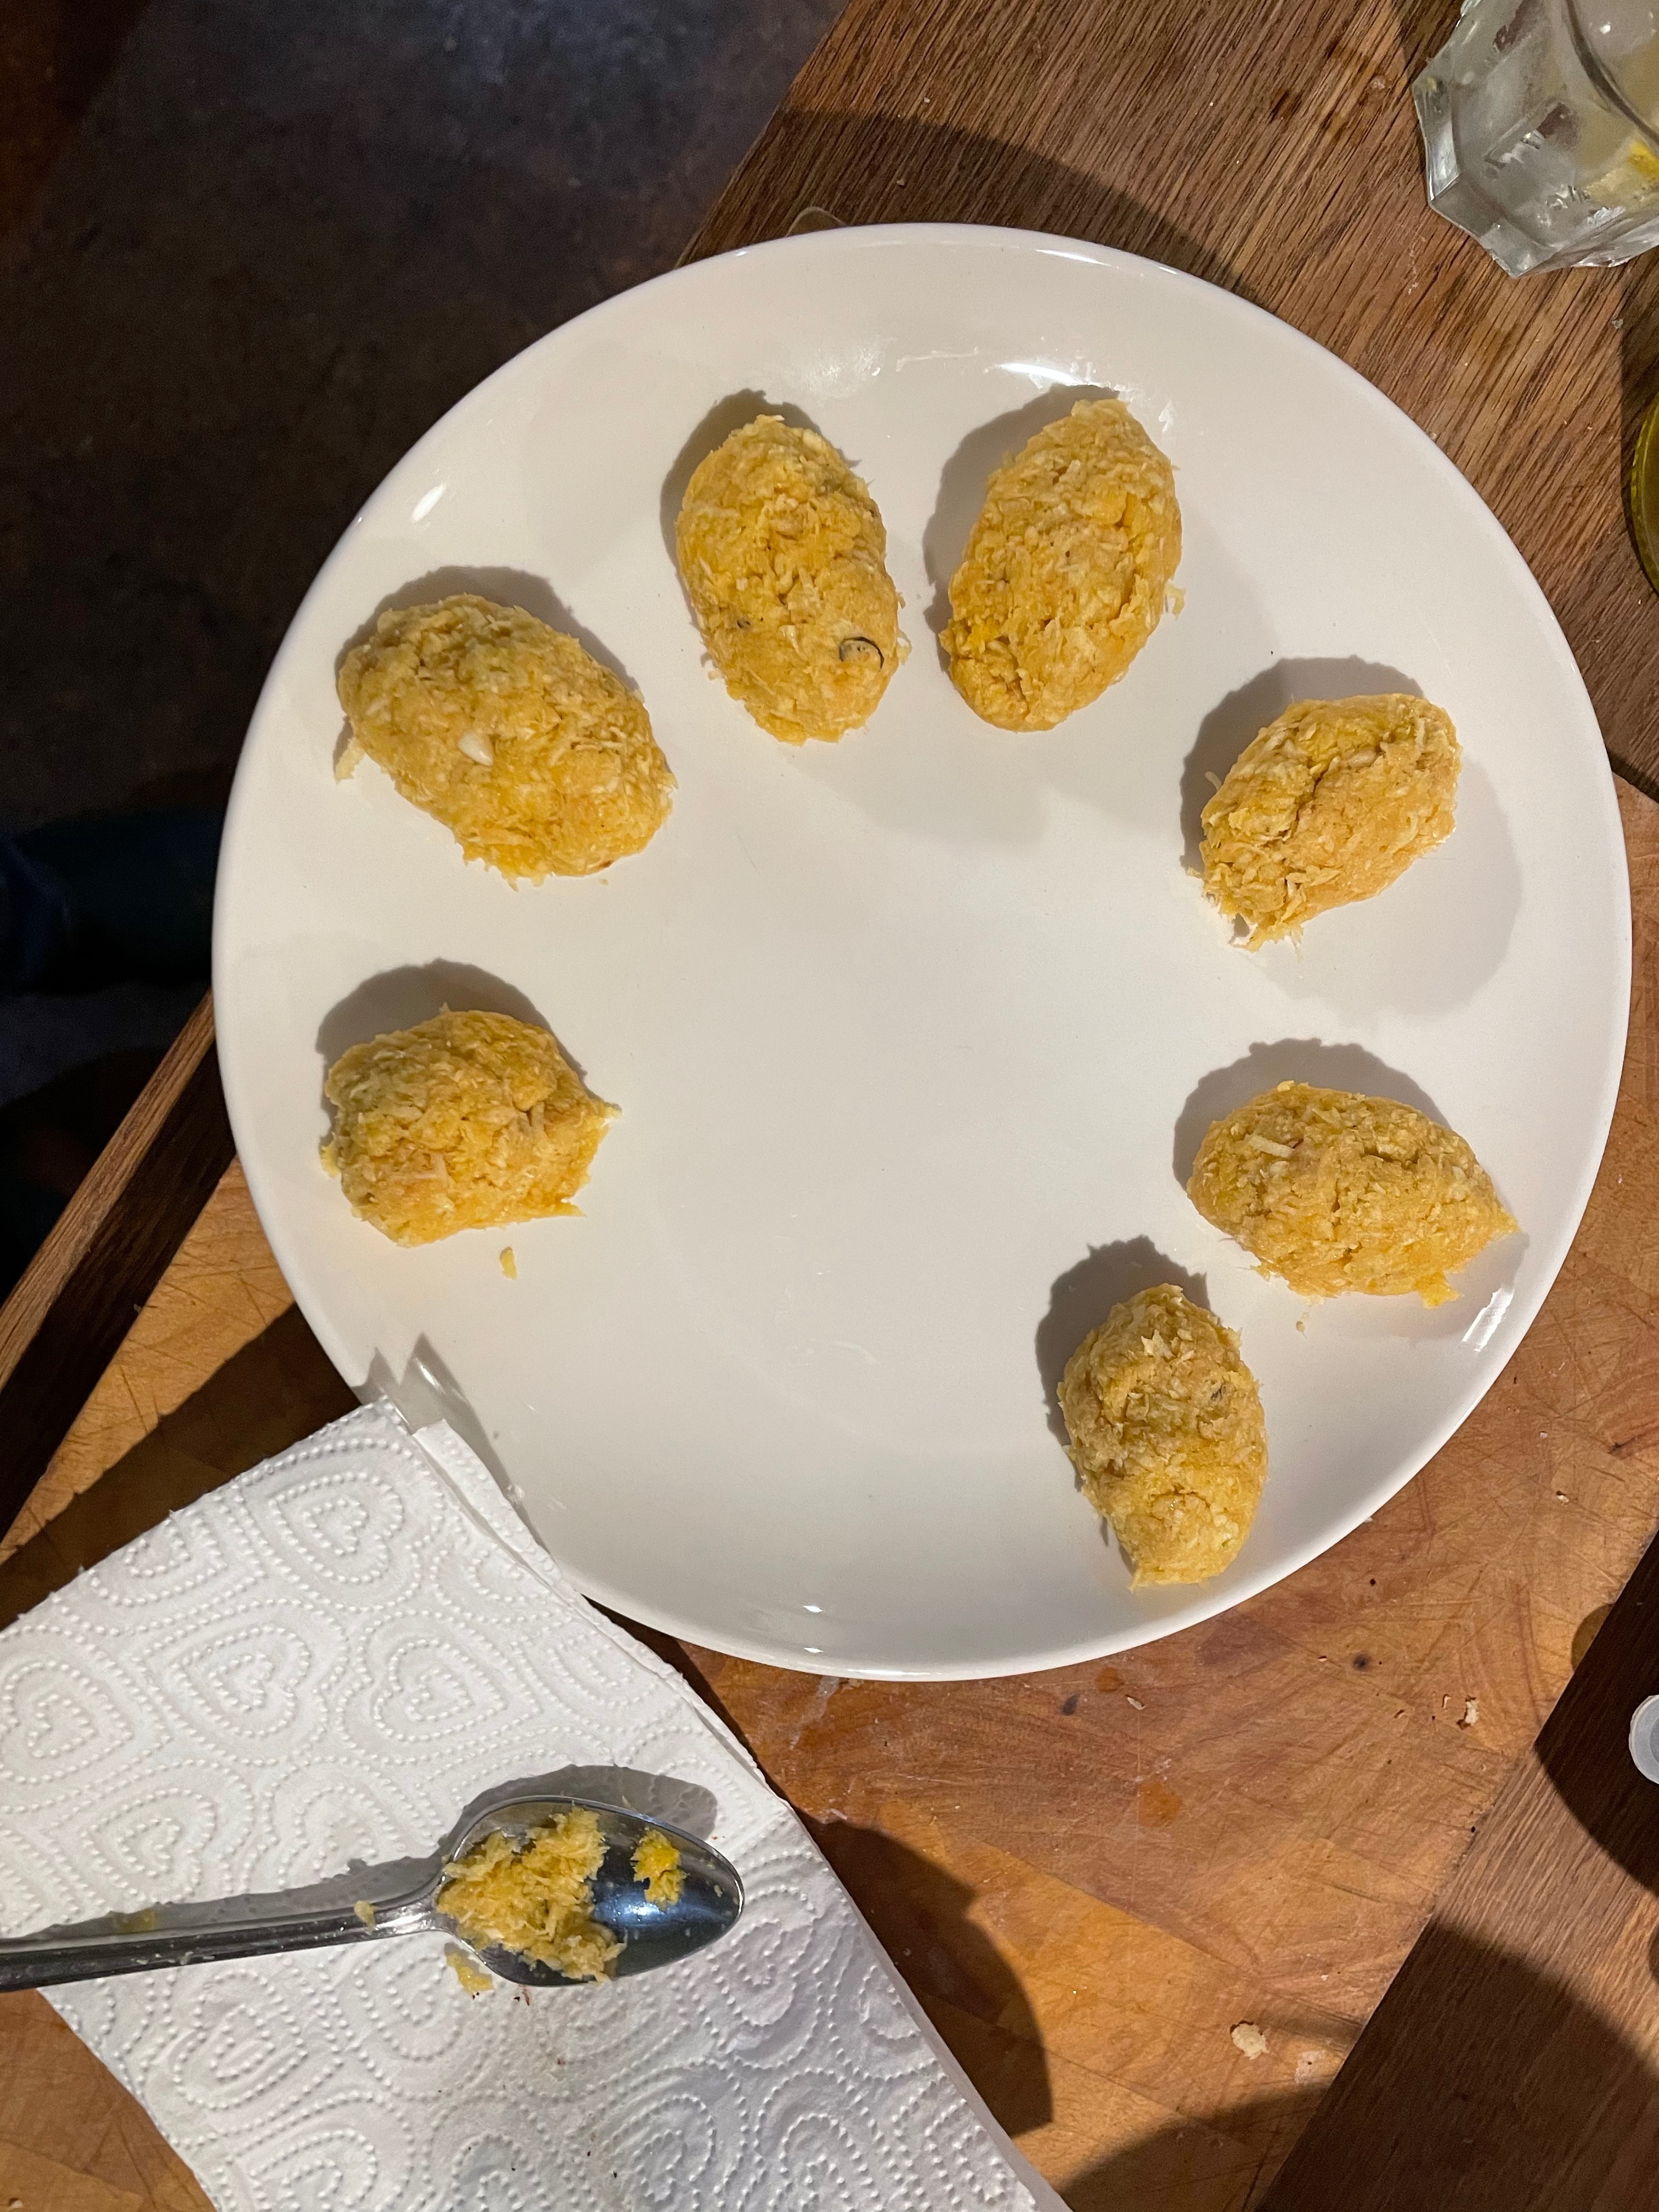
Whisk the egg, fizzy water and kimchi juices together then whisk in the flour, rice flour, salt and chilli or chilli flakes. Stir in the chopped kimchi and spring onions.

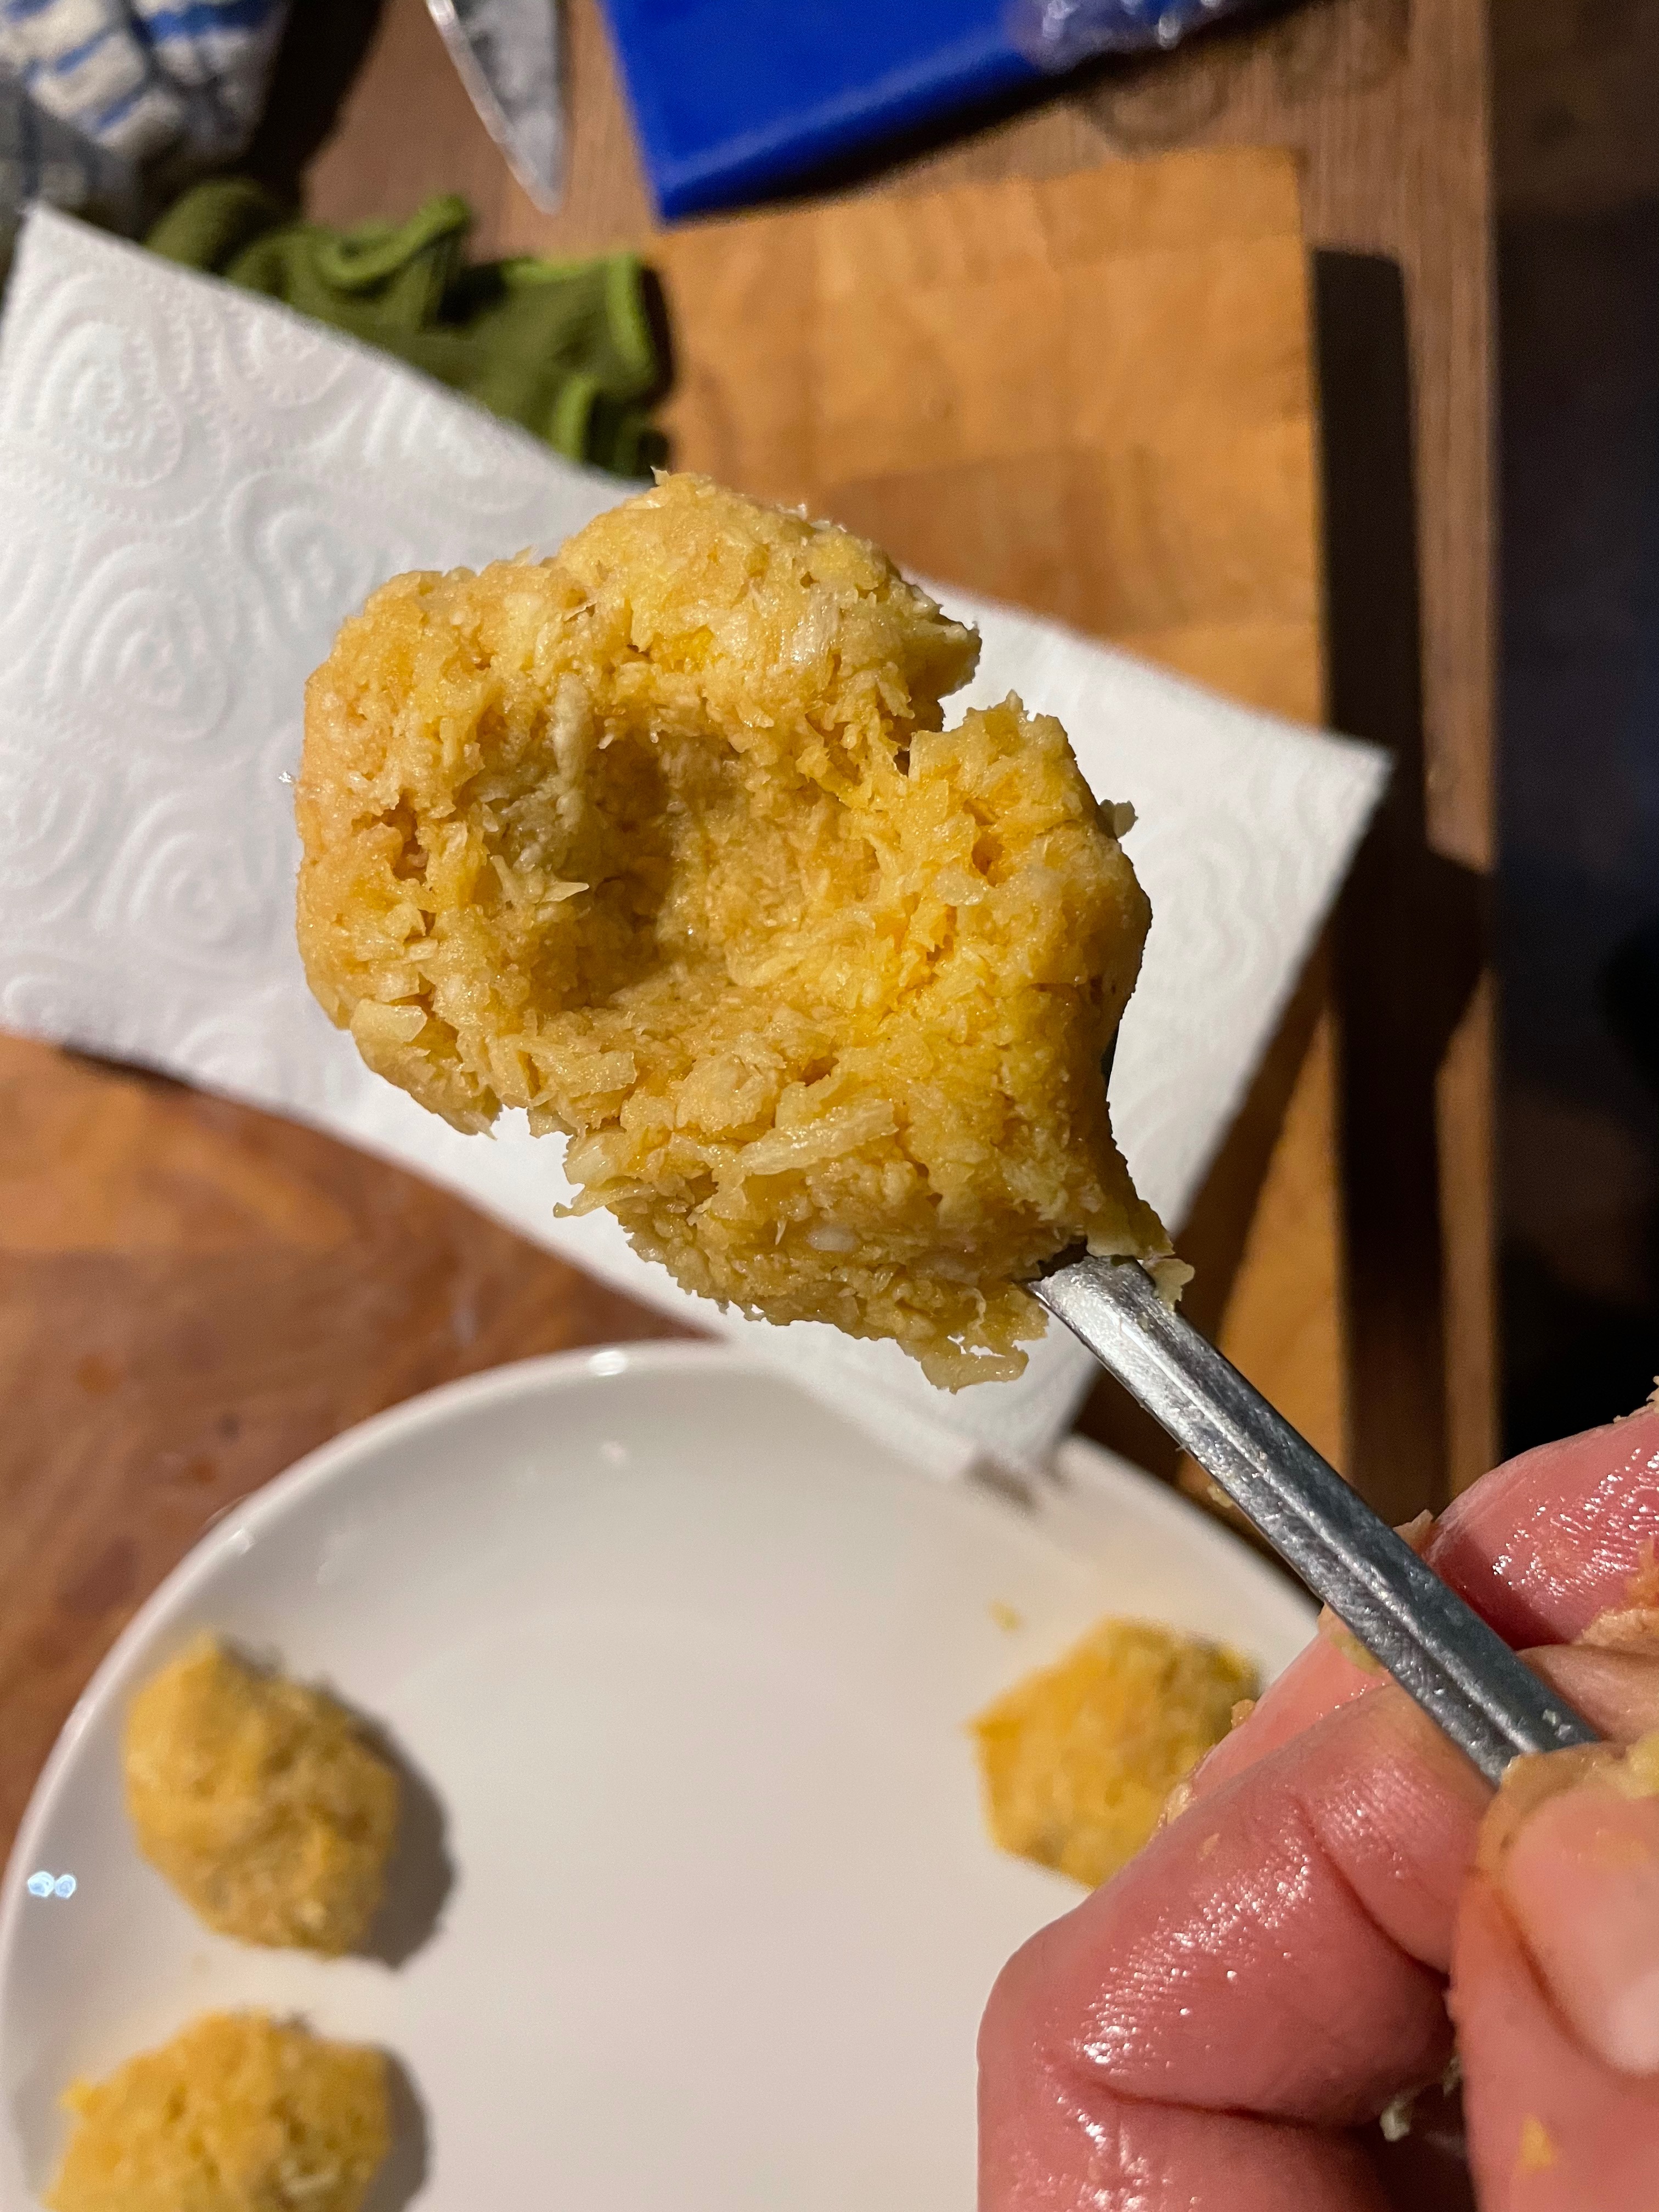
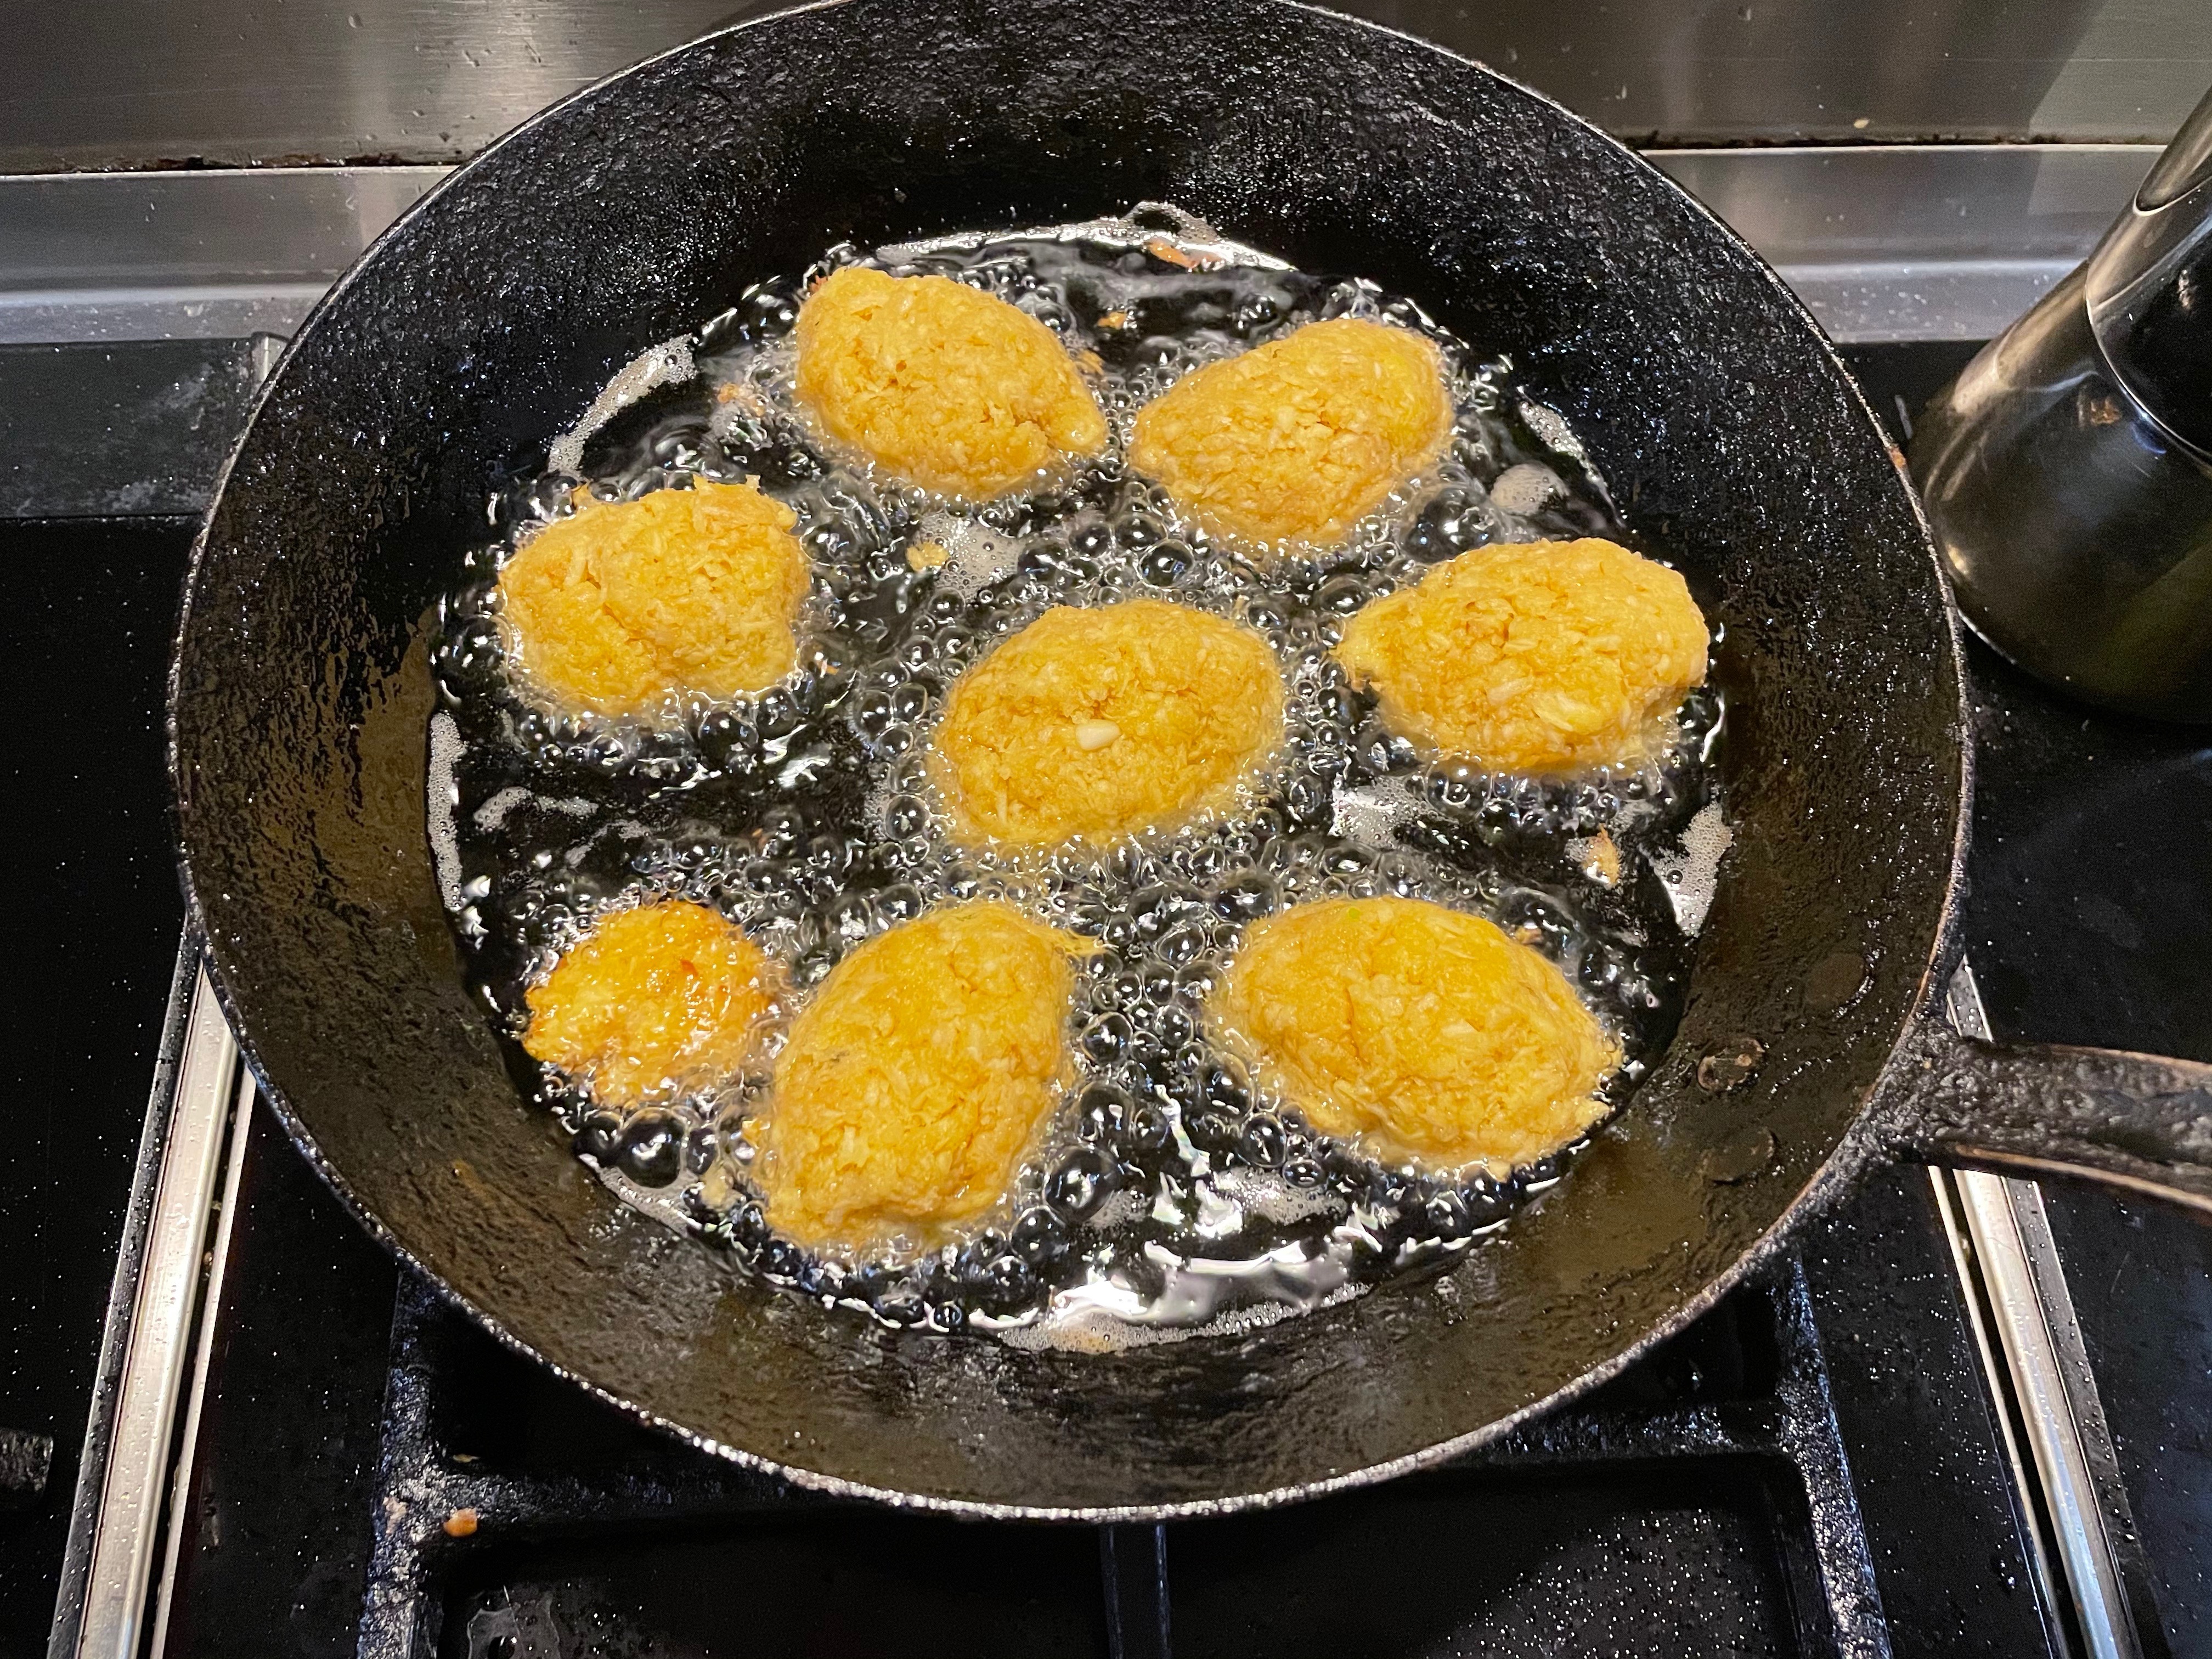
Heat a non-stick frying pan and add roughly 2tbs oil. Add one quarter of the mix, spreading it out with the back of a wooden spoon.

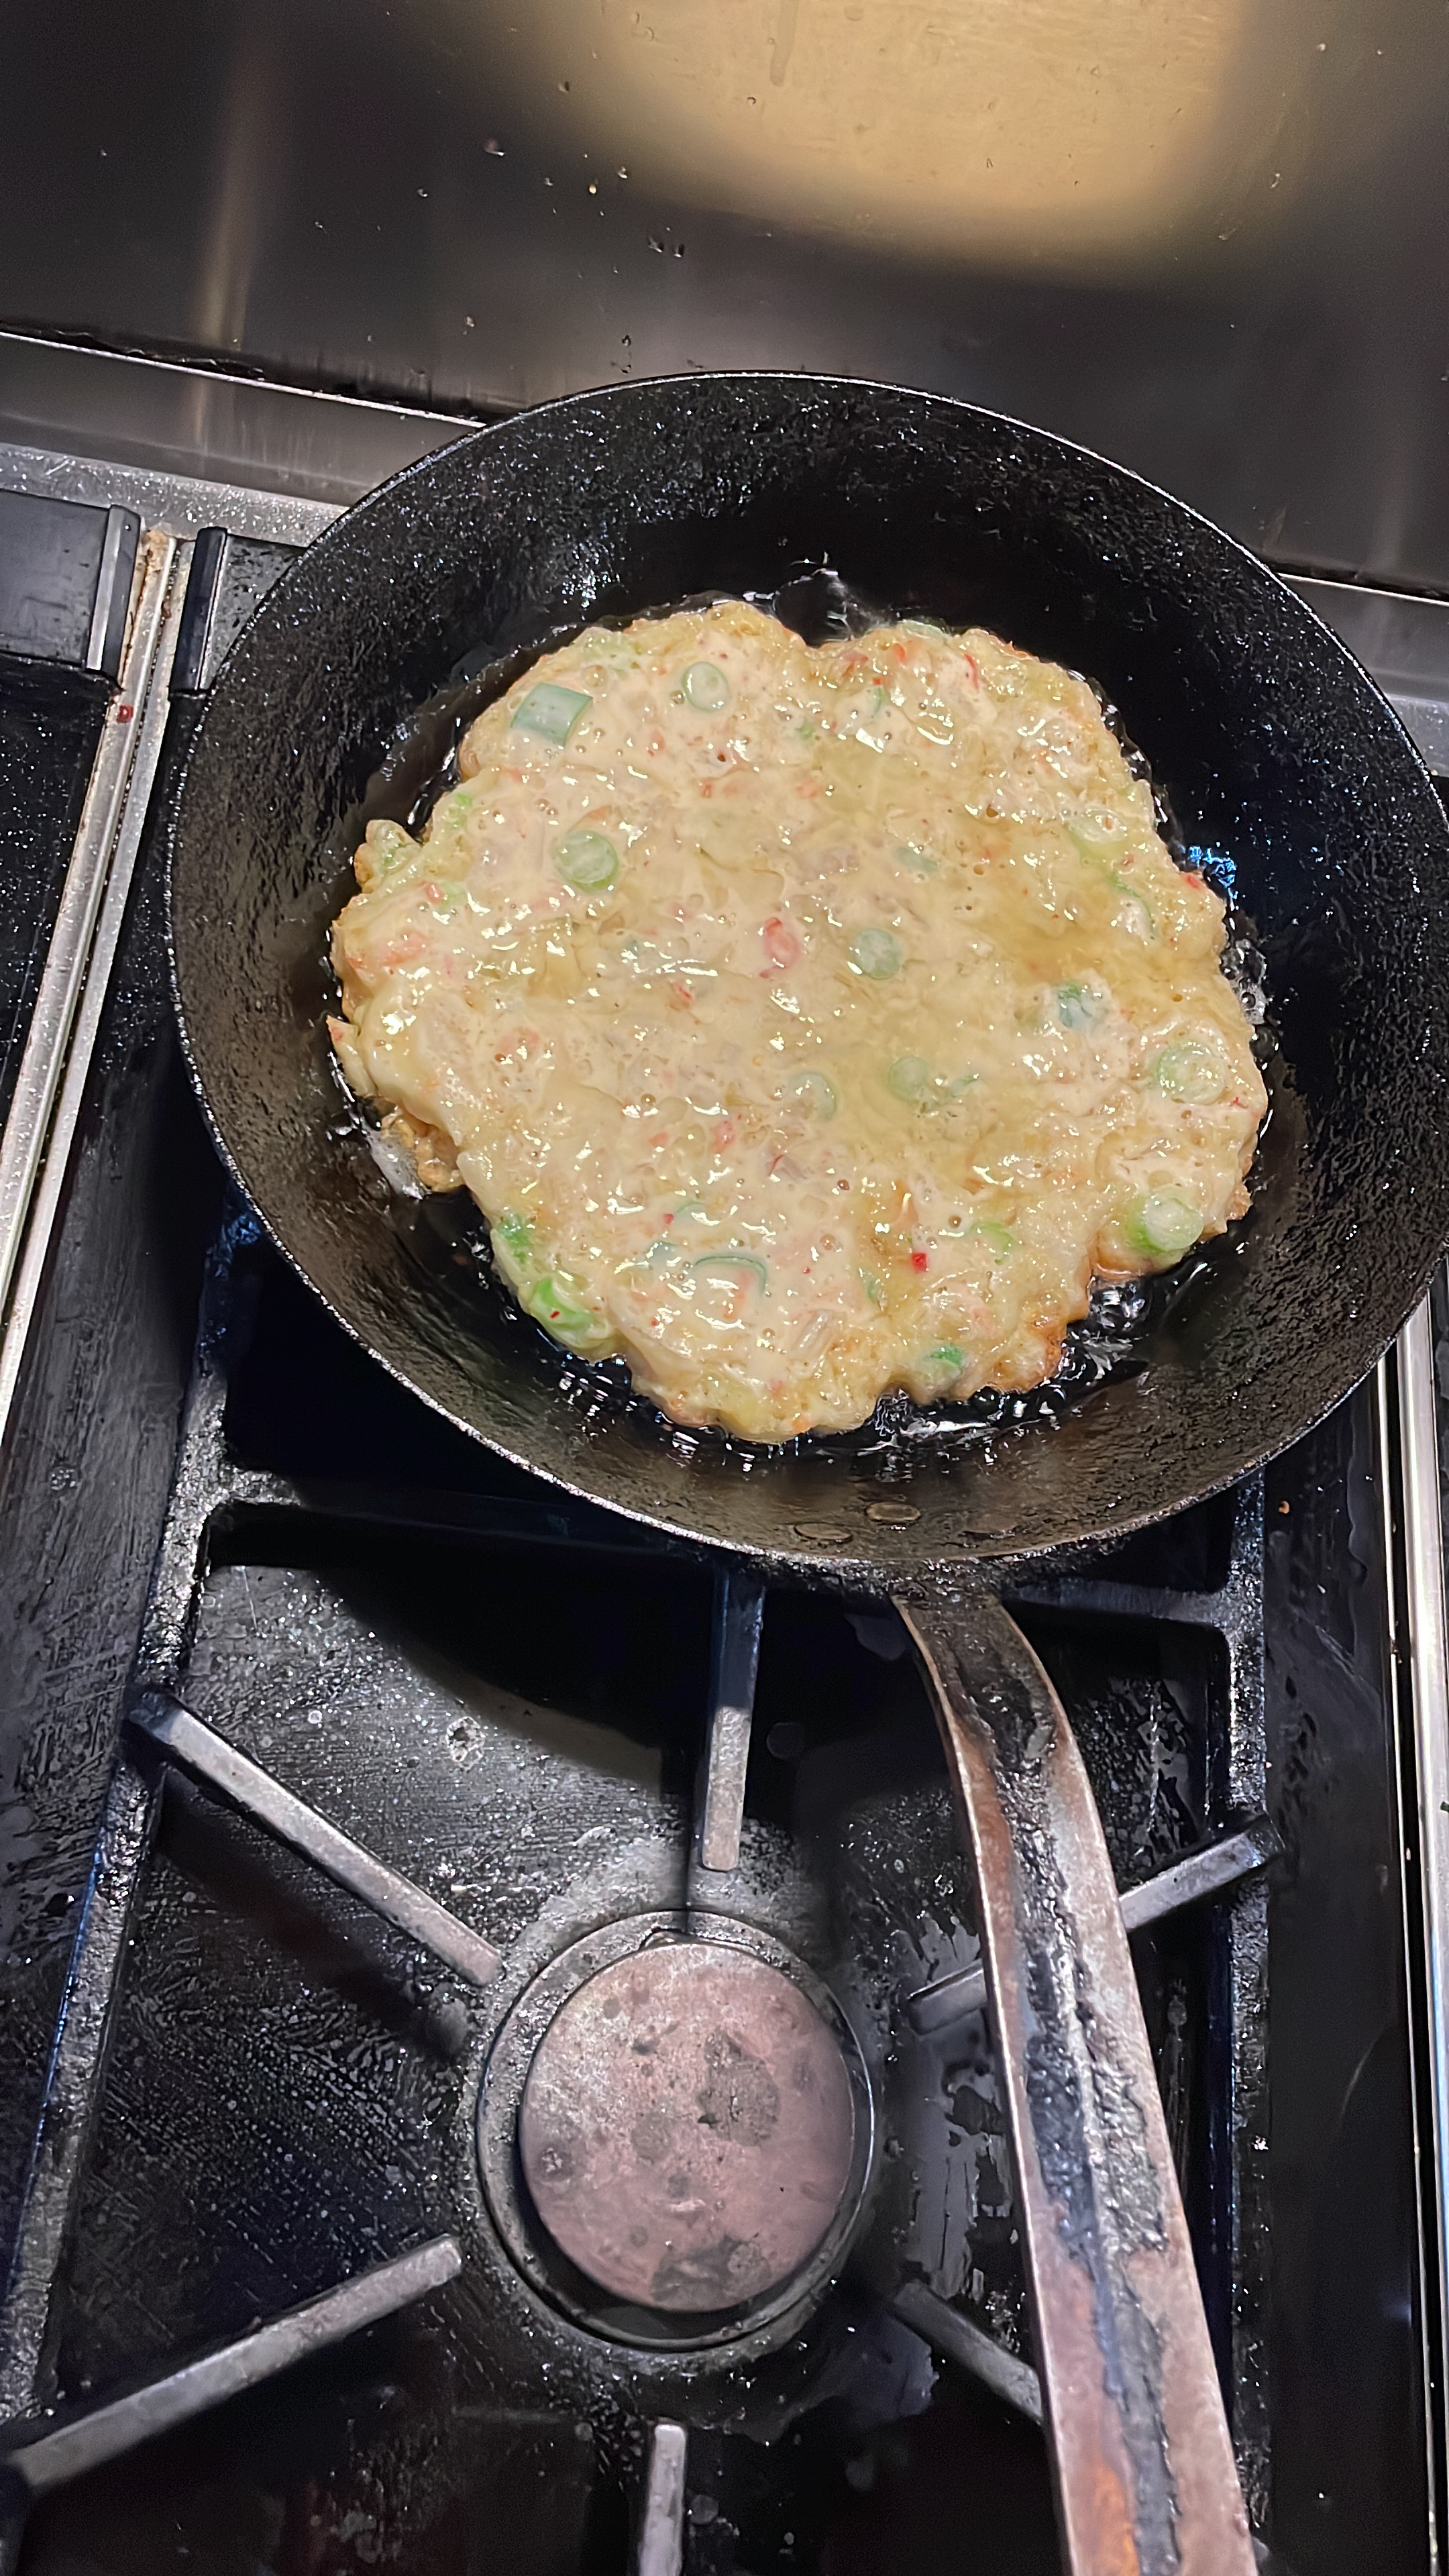
Fry the pancake on a medium high heat for 2-3 minutes until a golden crust forms then using a spatula carefully flip the pancake over and cook the other side. Add a little more oil around the sides. This might seem like a lot of oil but it’s the oil that makes the pancake crispy so don’t skip this step. You should see the oil bubbling around, but not over, the pancake.

Flip the pancake one more  time and cook for a further minute or two then again on the other side. Slip the pancake onto a plate then cut like a pizza for sharing. Repeat the process 3 more times.

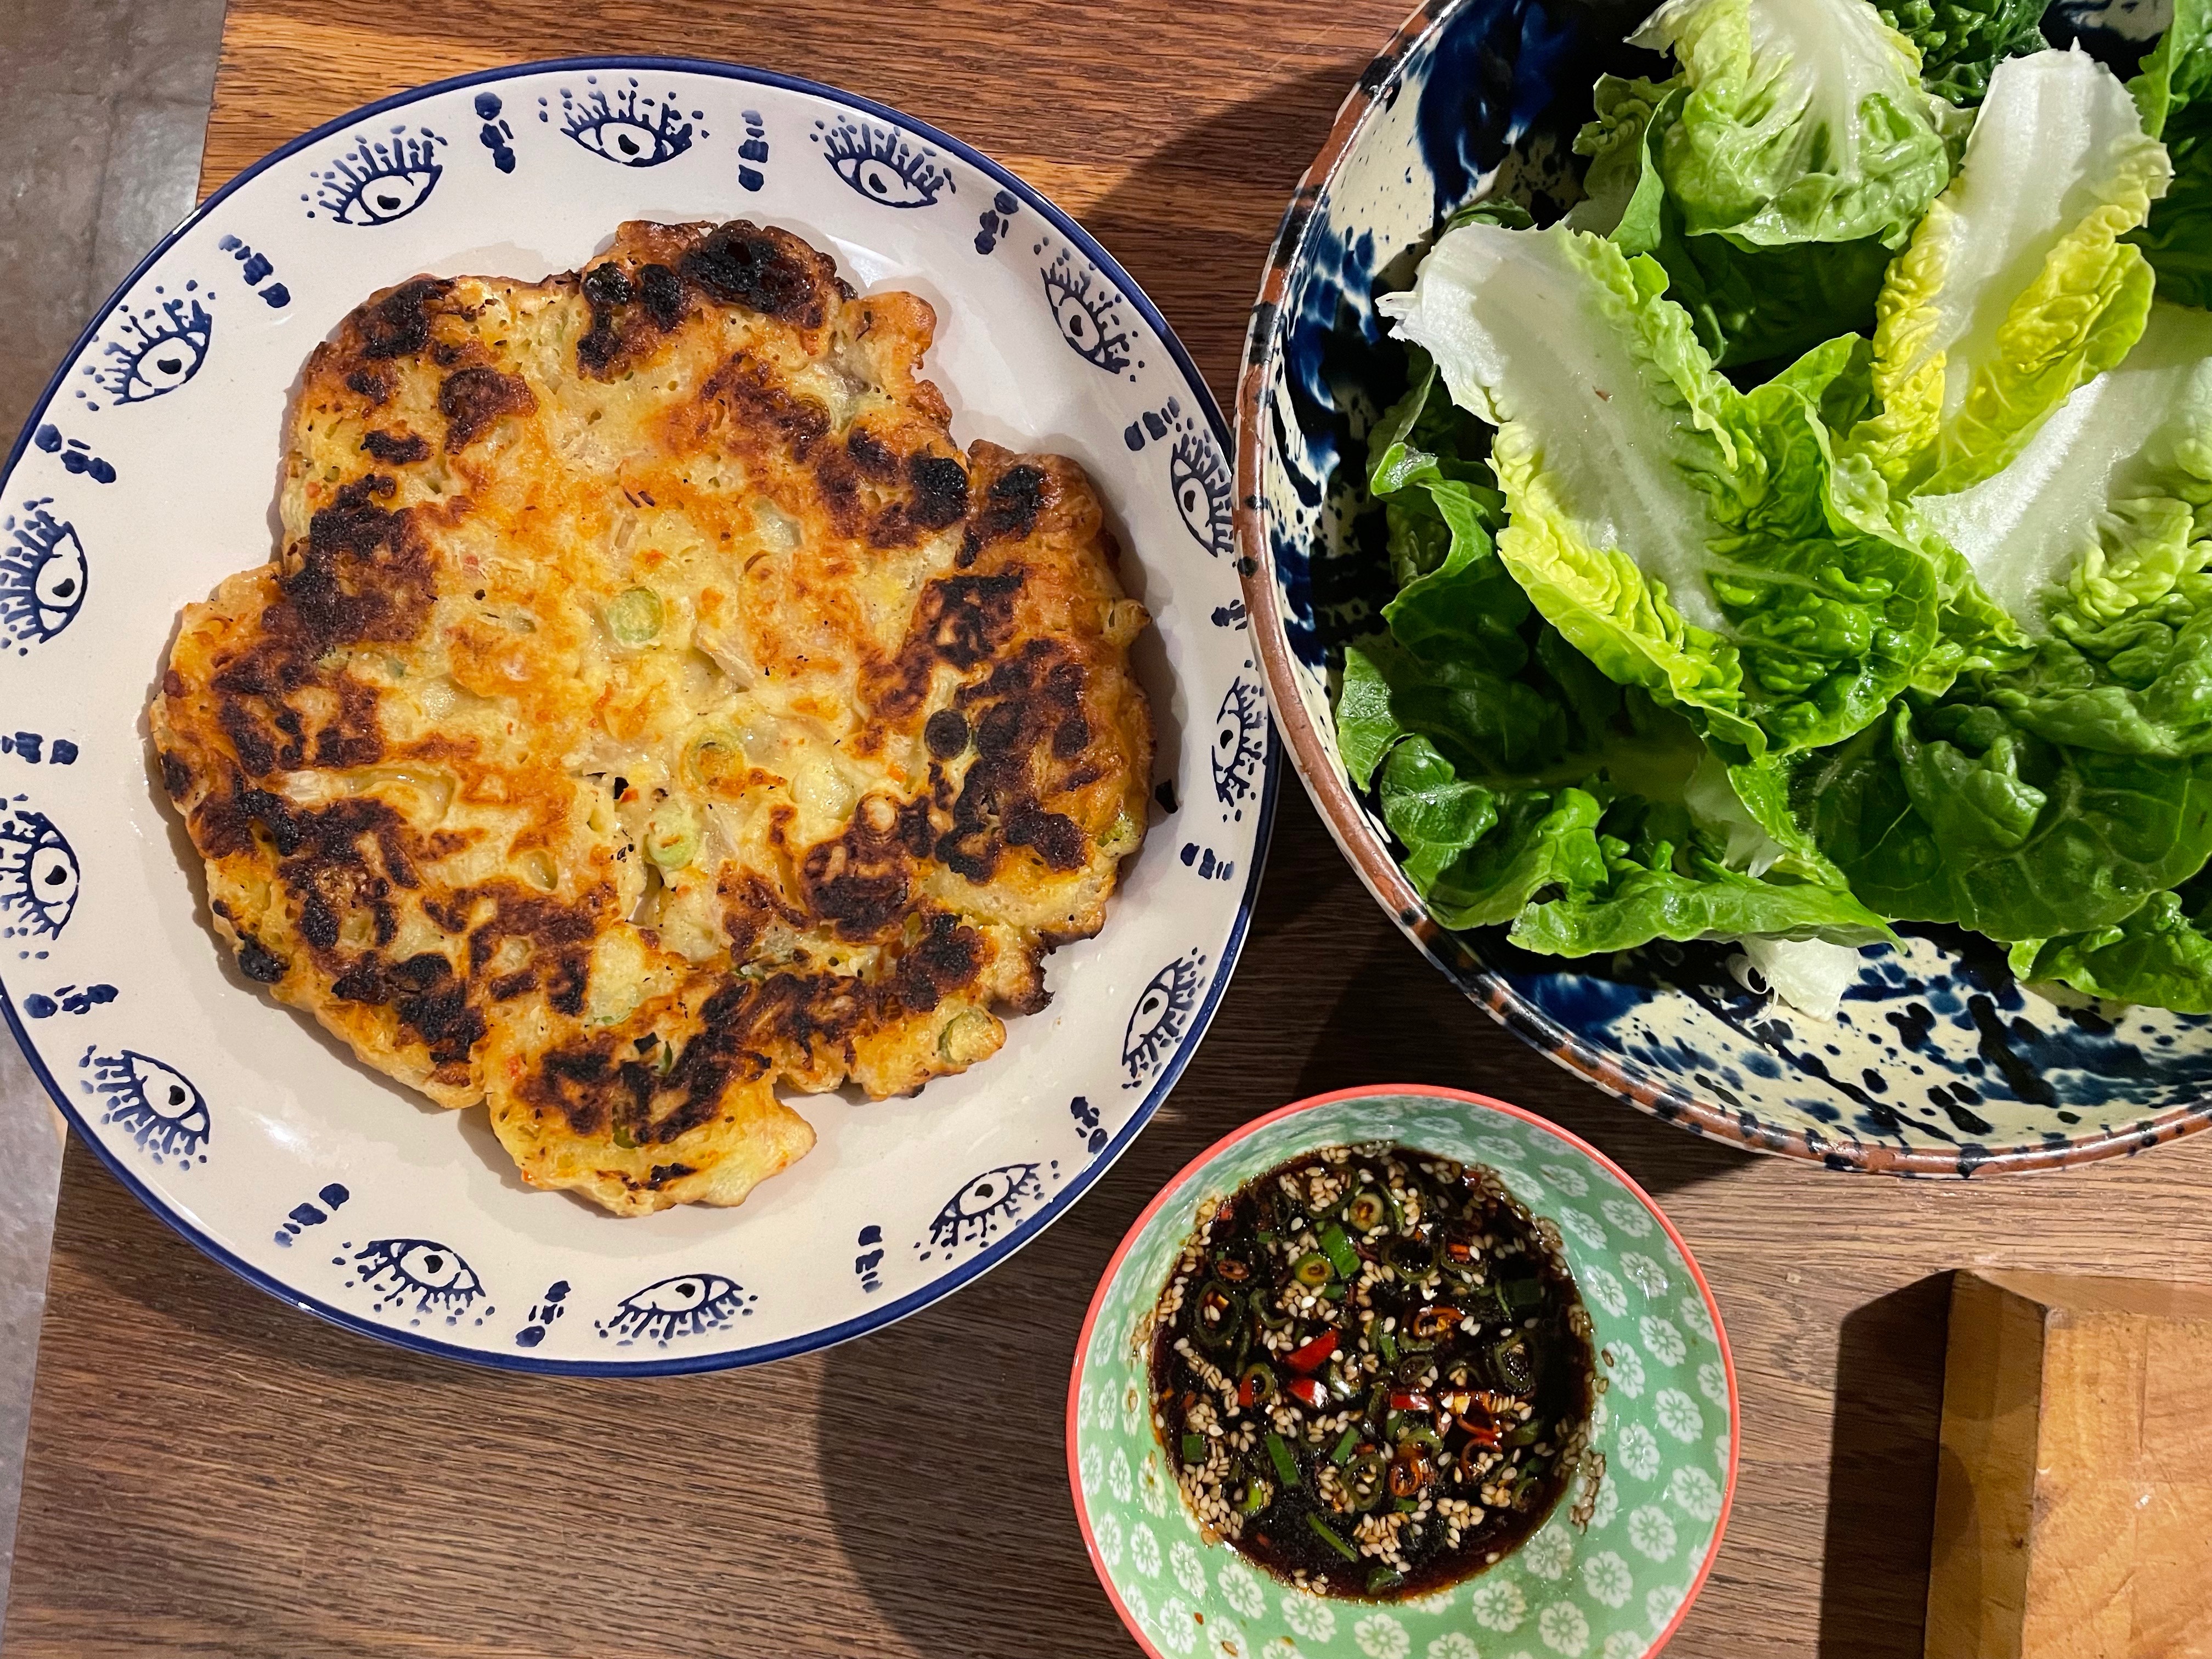
Put the dipping sauce, lettuce leaves and pancake on the table then tuck in. Break off pieces of the pancake, wrap in a lettuce leaf then dunk in the dipping sauce.

Delicious!


Garden Gratin

Jerusalem artichokes are easy to grow, they’re part of the sunflower family and are very undemanding on the gardening front. Pop the tubers into the ground and after that they pretty much look after themselves.

We grew Jerusalem artichokes last year and then forgot about them until last week when I went on an exploratory dig and discovered lots of knobbly roundish roots. They were in great condition and there are plenty of them. It’s presented the dilemma of what two do with them. Luckily they don’t all need to be eaten at once , they look quite comfortable in the bucket, muddy but dry, and will hopefully sit for a while whist we eat them up.

First up I made a gratin. I mixed some with potatoes, spinach, leeks and Tallegio cheese. This was adelightful combo, creamy, cheesy and very tasty with the sautéed leeks and spinach layered through and perfect eating for this weeks wet and wild weather. We ate the gratin after a beetroot and blood orange salad which is why the plate is pink.

One of the properties of Jerusalem artichokes is that they have a high content of inulin. Inulin has lots of dietary bonuses; plenty of fibre which in turn is helpful in managing diabetes, constipation and general gut health but they really should come with a warning. These powerful vegetables have great flavour but are also very windy. All that fibre causes mighty flatulence. Our duvet almost hit the ceiling when we went to bed. I guess it’s the type of vegetable to be only eaten with close family or friends – they aren’t known as fartichokes for nothing. Apparently if you eat them little and often you can override this side affect so I guess we need to proceed through the stash and see what happens.

The gratin was delicious!

Garden Gratin

600g potatoes

600g jerusalem artichokes

1tbs olive oil

250g fresh spinach

2-3 leeks

25g butter

a small bunch of thyme

300mls cream

250g Tallegio cheese

salt and pepper

Peel the potatoes and artichokes then slice very thinly. Put them into a big bowl. Drizzle over little olive oil, season with salt and pepper and add the thyme. Toss well .

Clean the leeks then slice small. Wash the spinach and trim any big stalks. Put a saucepan with little butter on the heat, add the leeks and when it begins to sizzle turn the heat low and cover with a lid. Shake very couple of minutes until the leeks soften then stir in the spinach. Cover again with the lid and cook for 2-3 minutes until the spinach has wilted down. Season with salt and pepper.

Pre heat the oven 190c

Rub a little butter or olive oil around a gratin dish put in a layer of half the potatoes and artichokes then add the spinach and leeks. Break the tallgio into small pieces and distribute over the top then layer up the remaining potatoes and artichokes.

Put the cream into a small saucepan and bring too the boil. Pour the cream over the vegetables. Cover the gratin dish with a piece off aluminium foil then bake for 50 minutes. Remove the foil and bake for another 15-20 minutes or until the top of the gratin is golden.

Allow to sit for 10 minutes before eating. The ideal amount of time to consume a salad.


Marvellous Leeks

It’s like there is a switch in the middle of January which kicks everything into action again. Those few more minutes of extra daylight  give out a message that even our geriatric chickens respond to. Suddenly we have eggs and all the green things in the garden perk up. 

We have plenty to eat in our garden. Not a great deal of choice but we do have lots of kale, cabbage, brussels sprouts and winter salad. We have a mighty crop of leeks too with long white stems that we are very proud of and we’re still munching our way through last year’s pumpkin harvest. 

The spinach and chard will begin to grow again in the tunnel soon and providing there isn’t a big freeze we’ll be picking outside by the end of March.  

We have enjoyed many wintery feasts of soups, stews and gratins often complemented by the fresh crunch of slaw and our imagination and memories are always on the go wondering how else we can cook these ingredients.

One dish that we resurrected is Poireaux al la Greque. 

This long forgotten recipe was from a time when we worked in a restaurant in Belgium. It was a fairly fancy bistro which served leeks braised in white wine with coriander seeds, olive oil and lemons. The cooked leeks were then split down the centre and served with a line of creamy pink tuna piped down the middle. I could always live without the tuna part – which was simply tuna, mayo and tomato puree to make it go pink, but I did enjoy the leeks. 

To celebrate our marvellous leeks I began to play with the recipe again and we ate them piled on top of mash – any mash will do but I used carrots, celeriac and potatoes all buzzed to a puree with a generous amount of butter – served with crispy caramelised lentils strewn over the top.

This way of cooking the leeks elevates them to star status. They can be eaten with the combination that we had or can be simply served as a starter or alongside chicken or fish using the braising liquid as a sauce.

Poireaux a la Greque

6 leeks

1 large glass white wine

2tbs olive oil

½ lemon

1 tsp coriander seeds

Salt and pepper

First clean the leeks. Trim the ends, cut off the green part – put the greens aside for something else – you could use them in a soup or stew. Rinse the white part of the leeks under the tap, shake dry then line them up in the bottom of a large saucepan that has a lid.

Pour over the white wine, it should come roughly half way up the leeks. Drizzle over the olive oil, sprinkle over the coriander then squeeze over the lemon juice. Put the squeezed lemon in with the leeks. Season with salt and black pepper. Put the pot on the heat and when it comes to the boil cover with a lid, reduce the heat, then gently simmer for 30 minutes.

To serve, strip off the very outer layer of each leek, lay on a plate or over mash then spoon a little cooking liquid over or around. 

Crispy Caramelised Lentils

125g lentils

20g butter*

1 tbs olive oil

1tbs light muscovado sugar

2tsps white wine vinegar

Salt.

Put the lentils into small saucepan, cover with at least twice the volume of water then bring to the boil. Turn the heat to low so that they are simmering gently then cover with a lid. Cook for 15-20 minutes or until the lentils are tender – try a few to check.

Drain the lentils, rinse under the cold tap then shake dry.

Put a small frying pan on the heat. Add the butter and olive oil and when it foams up stir in the lentils. Season with a little salt. Cook on a high heat stirring until the lentils begin to colour. Add the muscovado sugar and white wine vinegar. Mix well then continue to cook and shake until crispy.

* If you would like to make this dish vegan omit the butter and use a little more olive oil


Memories of Cuba

When we visited Cuba I enjoyed eating Fritura de Malanga which are fritters made from Taro root. These crispy fritters were often the one and only vegetarian choice bar rice and beans so I ate a lot of them .

Looking through my recipes I came across my notes on Fritura de malangas remembering this sunshine snack. 

Taro doesn’t grow around here but we have plenty of parsnips so I exchanged them and the results were really good and it also cranked up the points for sustainable eating.. The parsnips aren’t as starchy as taro but even though the batters looked very different (I’d done some YouTube snooping) they made excellent fritters. Another bonus from the YouTube snooping was the idea to put some cheese in the middle. We still had a knob of gorganzola left from the xmas cheese board which I thought would partner well with parsnips but I’d say use whatever you have or fancy.

500-600g parsnips

2 cloves garlic

2 eggs

½ tsp salt

About 100g cheese – something that’ll melt

Vegetable oil to fry

Peel the parsnips and grate finely – this is quite slow but it’s what you have to do!

Peel the garlic and chop finely.

Put the grated parsnips, chopped garlic and salt into a bowl then mix in the eggs.

You will have a quite dense paste/batter.

Cut the cheese into small cubes – no bigger than 1cm

Using a dessertspoon take small amounts of the parsnip mix and mould it onto the spoon then using your thumb make an indentation in the middle, pop a piece of cheese in and mould the paste back around the cheese so that it’s completely covered.

Put the fritter/croquette onto a plate and repeat the process until your mix is used up.

Put the fritter/croquette onto a plate and repeat the process until your mix is used up.

Heat 2-3cms vegetable oil in a deep sided frying pan or shallow pot, When it’s hot enough,  a piece of bread should pop to the surface as soon as you drop it in, start frying the fritters. Fry them on a medium heat as they need to cook through. Cook for 3-4 minutes turning them half way. Reduce the heat if they are browning too quickly.

Serve with something to dip – mayonnaise, alioli, or as in Cuba some kind of fruity sauce. I use mango chutney thinned with a little sugar syrup or alioli.


Rapid Fire Supper

Sunday evenings are a bit of loose cannon in our culinary week – no designated cook nor plan.

Usually whoever is the hungriest acts first.

Last night I spotted a small bowl of borlotti beans on the counter that had been picked a few days previously. It was too small to have any real purpose but too valuable to waste. I put them in pot with a bashed clove of garlic, covered them with water and set them to cook. As they were fresh this only took twenty minutes. When they were cooked I drained them, dressed them with olive oil and little salt and then checked out the fridge.

I found a bag of mixed mushrooms from the farmers market- shiitake, oyster and portabello and then I discovered a tub of Glenilen cremefraiche – surely the creamiest and tastiest. Hmmm…. a plan was beginning to form.

Here’s what we had. Fast , comforting and tasty – if little blonde – it was on the table in ten minutes.

Serves 2

Borlotti, Mushrooms and Orzo

400g cooked borlotti beans – or one can drained and rinsed

200g orzo

300g mixed mushrooms

2 cloves garlic, peeled and chopped

2 heaped tablespoons creme fraiche

a little chopped parsley

Put a saucepan of water to boil to cook the pasta

Slice the mushrooms and chop the garlic

When the water boils add a heaped teaspoon of salt and the orzo. Cook for 5 -7 minutes – check the packet for cooking time

Heat a large sauté pan. Add the butter and olive oil and as soon as the butter melts add all the mushrooms and stir well. Keep the heat high and stir the mushrooms every minute until they almost begin to brown. Add the borlotti beans then stir in the chopped garlic, cook for one minute longer. Take the pan off the heat.

At this stage the orzo should be cooked. Drain it and add it to the pan.

Stir in the creme fraiche and parsley and you’re ready to go


Stalking Courgettes

I have been stalking our courgette plants, prompted by a photo of my son’s dinner which was  a plate of courgette carbonara – our family is really into food porn! It got me dreaming of young courgettes which are succulent and tasty and perfect for this simple dish where they are the star of the show

So I ‘ve been waiting for our courgette plants to produce and finally there are these little stubby beauties winking at me.  Apart from being the first and therefore really wanted the small courgettes have a real flavour unlike the big ones which look splendid but are often more substance than flavour. As the season goes on our enthusiasm for courgettes lessens but right now we’re delighted to see them

The dish takes as long as the pasta takes to cook so salt the courgettes and as soon the water boils you’re ready to go.

Serves 2

2-4 small courgettes

25g butter

25mls olive oil

50g grated parmesan

2 egg yolks

50mls cream

a little lemon zest

Handful chopped basil

250g spaghetti

salt and pepper


Wash the courgettes and cut into julienne strips, sprinkle with a little salt, toss to mix then leave for 15 minutes.

Put a large pot water to boil. When the water is boiling add a tablespoon of salt and the pasta. Give it a stir and set the timer.

Mix the egg yolks and cream together in a small bowl

Tip the salted courgettes onto a clean tea-towel and pat dry. Heat a pan to cook the courgettes, one minute before the pasta is ready add the butter and oil to the pan followed by the courgettes. Keep tossing the pan so the courgettes cook evenly.Season with salt and pepper and a little grated lemon zest

Set a colander over your serving bowl then tip in the cooked pasta and drain over the bowl. Reserve a little cooking water then empty the bowl. This will pre heat your bowl which is important when serving pasta. Put the spaghetti back into the bowl, tip the courgettes and any cooking juice on top then pour over the cream/egg mix and grated cheese. Toss everything together. Add a little reserved cooking liquid to help everything move. Stir in the basil and serve


Time for Chickpeas

This is a recipe from the ‘live to be one hundred’ collection. Revithnos is a chickpea soup from Sifnos in Greece.  It’s cooked slowly using just a few key ingredients – chickpeas, onion, olive oil, lemon and bay leaves. The slow cooking makes the chickpeas velvety soft in an emulsion of olive oil and onion which is brightened up with a squeeze of lemon juice. I seldom cook this dish as it takes a long time to cook but time is something we have plenty of at the moment. Although don’t confuse taking time with having to do a lot as after the initial cooking of the onions and bringing everything to the boil this more or less looks after itself.

Today’s revithnos did take a long time, especially as our Irish bought chickpeas must have been sitting in a warehouse for months if not years. I soaked them for 48 hours then cooked then for five hours by which time we were hungry and the dish was not ready so we resorted to blasting them in the pressure cooker for 10 minutes. They were good, softer would have been better but our appetites got in the way of culinary excellence.  Next time I will seek out fatter and younger chickpeas but I still love the simplicity of this dish and even old chickpeas make a richly satisfying  one pot wonder

Here’s the recipe although the cooking times are variable and it’s also possible to cook this entirely stovetop – or blast it in the pressure cooker if your hunger gets the better of you.


Revithnos – Chickpea Soup


350g chickpeas

150mls olive oil

2 large onions

2-4 cloves garlic

1 -2 bay leaves

big strip of orange peel – skin only

lemon juice

salt and pepper

water

a handful of parsley


Soak the chickpeas over night then drain well.

Peel the onions and garlic and chop finely.

Put the olive oil into a heavy pot and heat gently. Add the chopped onion and cook until the onions melt down but don’t let them brown. Stir in the chopped garlic and cook for a further two minutes then add the chickpeas , orange peeland bay leaf. Stir everything together for a few minutes then add enough water to cover everything by 2-3cm. Bring to the boil, reduce to a low simmer and cover with a tight fitting lid. Cook for one to one and a half hours or until the chickpeas are soft.

Stir in the juice of a lemon , add a little more water if it looks like it’s getting dry and season with a little salt. Pop the pot into a low oven , 150c, oven for an hour.

Serve with a little chopped parsley. 


Avocado Ceviche Dreams

This seems a long time ago now although it was only last month. It’s a little recipe that I write for the local paper, the West Cork People. I didn’t take my laptop on this trip so never published what I had written, so here’s a little escape from the coronavirus………..It seems like another world now

IMG_6693
This month (February!) we are eating our way around south east Mexico. We flew into Cancun and travelled down the Caribbean coast of Quintana Roo towards Guatemala. It’s very beautiful, the water is crystal blue and but it comes with full on tourism and touts so we decided to head away from the coast and explore the Yucatan and towns of the interior. The land is lush, green and gently undulates. No mountains here and strangely no rivers, instead there is a network of water that travels underground popping up in cenotes.

IMG_6358

Cenotes are deep fresh water pools, sometimes open and sometimes in caves with with stalactites and creepers hanging. They are very deep- up to 45 metres- and crystal clear, absolutely stunning. It’s possible to jump into them and swim, strangely enough even though they are so deep they are not cold and there are plenty of fish which nibble your toes. The city centres are old colonial style which sprawl out to poorer areas. We’ve explored Valladolid, Merida and Campeche.

IMG_6572

We  seek out the markets which are overflowing with avocados, mangos, chillies and just about every conceivable fruit and vegetable that grows in the south. The sounds, smells and colours are amazing and an interesting place to buy breakfast/brunch. Quesadillas, negritos, empanadas, tacos, gorditas, enchiladas, polcans, panouches, chilaquiles, huaraches… The list is boggling but we are beginning to navigate our way around the menu.

IMG_6402

The one thing that they all have in common is corn. Each is made from ground corn be it a fresh tortilla, a fried tortilla or made from masa(corn dough) that is wrapped around a filling then grilled or deep fried. Topped or filled with shredded pork, turkey , pork, fish, prawns or refined beans, cheese , pink pickled onions, avocado, radishes, shredded cabbage and served with a variety of salsas this food is bright and diverse. Not a spud in sight! The salsa are nearly as varied as the tortilla dishes. The pico de gallo – diced tomato, chilli, onion, coriander and lime juice is fresh and zingy but the habanero salsa – which is the most popular can blow your head off

212ff1ca-069a-4e83-8062-75d65d0417d2
For the rest of the day there are taquerias on the street that churn out tacos and various cantinas that serve bigger meals. In the interior the food is pretty meaty and on the coast the menu is seafood.
We’ve been poking our noses into kitchens, picking people’s brains for recipes and were lucky enough to spend on evening cooking with a Mayan lady that we were introduced to. She made us real Mexican/Mayan home cooking. One recipe was this ceviche – without fish – as she explained, ceviche is a process not a fish dish. It was fresh and delicious, perfect scooped up with totopos (tortilla chips). It could also be piled on top of a burger, fish or grilled meats or just enjoyed as a salad. And better still the ingredients are available in Ireland. It’s important that the avocados are ripe which could take some forward thinking. If they are a bit hard , put them I the fruit bowl with a ‘do not eat me’ sign for a few days and they will ripen.

Avocado Ceviche

1 cucumber
1 small-medium onion
3 ripe avocado
A handful fresh chopped coriander
A pinch of crushed oregano
A pinch of black pepper
1 tbs olive oil
Juice 3-4 limes – depends how juicy they are
A good pinch of salt.

Cut the cucumber in half then scoop out the seeds then cut it into strips lengthwise and dice.
Peel and chop the onion finely
Cut the avocado in half, remove the stone then slice in strips (without going through the skin) then into a dice cutting the other way. Scoop the avocado from the skin with a spoon.
Add all of the above ingredients together then mix gently. Taste and add more salt or lime juice if needed.

fullsizeoutput_1b31


Vampire Soup with Optional Eyeballs

fullsizeoutput_18b3

Beetroots have been around since the Romans who enjoyed their earthy charm.  The root and leaves have been eaten for centuries. They also had a moment of glory when it was discovered that beetroots could be converted to sugar but these days these brightly coloured vegetables are known more for the fact that they’re packed with vitamins, minerals and antioxidants. The colour of the beetroot that makes everything that it touches turn some shade of pink/red/purple seems to perk people up. Antioxidants or not their colour certainly cheers things up on a rainy day


To celebrate Samhain and Halloween I ‘ve made this this sensational Vampire soup with optional eyeballs. The soup is in fact a sophisticated marriage of beetroot and fennel gently cooked into sweet submission and adorned with crème fraiche but with a little imagination and a few peas it transforms into a ghoulish delight.


The Vampire title may entice your children to try this stunning soup and the optional eyeballs are easily achieved by posting a pea on top of a little spoonful of crème fraiche and setting it afloat.

It could be just the thing for Halloween

You could even organise an eyeball eating contest.


Here’s the recipe

It’s very easy to make, It doesn’t matter too much  the size of the beetroots that you use, it’s more important that they are fresh so don’t use ones that are pre cooked and vacuum packed.

Choose about three big or six small beetroots


Beetroot and Fennel Soup


1 onion

75mls olive oil

1-2 stems celery

1 fennel

1 potato

3-6 beetroots

800mls vegetable stock

A squeeze of lemon juice


Peel and chop the onion

Heat a saucepan, add the olive oil and onion then cook on a medium heat.

Chop the celery into 4 lengthwise then dice small and stir in with the onion.

Trim the fennel then cut into half and chop finely.

Stir in with the onion and celery, season with a little salt. Keep the vegetables gently humming away in the pan. Turn the heat up and down until you’re happy the gentle sizzle is not burning. Peel and dice the  beetroots and potato small, add to the pan and stir into to combine leave to cook for another 10 minutes with the occasional stir. Season with salt,  Add the vegetable stock. Bring to the boil then cook at a gentle simmer for 15-20 minutes.

Blitz until smooth, add a squeeze of lemon juice, taste, then adjust the seasoning.

Serve with a swirl of creme fraiche


The Queen of Apple tarts

fullsizeoutput_16e1

Our bumper apple harvest has had us wading through buckets of apples. Apple puree for the freezer, apple juice and cider for imbibing, apple chutney and of course cakes and tarts.

Apple Tart Tatin is right up there when it comes to apple tarts. In our household it is the queen. It also uses a surprising amount of apples to make which helps get through the apple mountain. This tart takes a little time to prepare but the resulting buttery caramelised apples are worth the effort.

You will need an iron or cast-iron pan that can go on the stove top and also in the oven as this tart begins with apples sitting on a bed of butter and sugar gently caramelising on the stove top. The apples are then completely cooled and covered with pastry. Sweet pastry or puff pastry both work – my preference is for sweet pastry but whatever you have.

The size of the pan depends on how many people you have to feed and how many apples you have. A small pan will use around fifteen apples and large pan around 20-25 apples. Always have more at hand than you think you will need. I use small apples which are not floury. Our garden is full of ancient apple trees but if you need to buy the apples Cox’s Pippins or Braeburn are ideal.

This is the recipe for a small pan- all the measurements are approximate as the method will reveal


Apple Tart Tatin

about 150g butter

about 150g caster sugar

about 15 small apples

400g sweet or puff pastry


Slice the butter thinly and cover the bottom of the pan. Cover the butter with caster sugar – not completely buried but lightly covered.

IMG_5326

Peel the apples, cut into half, take out the cores and tidy the apples up – take out the ends where the stalk and belly button were.

IMG_5325

Place the apple halves into the pan. If the apple has a fat end put the fat end facing out. Pack them tightly sitting on their sides.

IMG_5328

IMG_5334
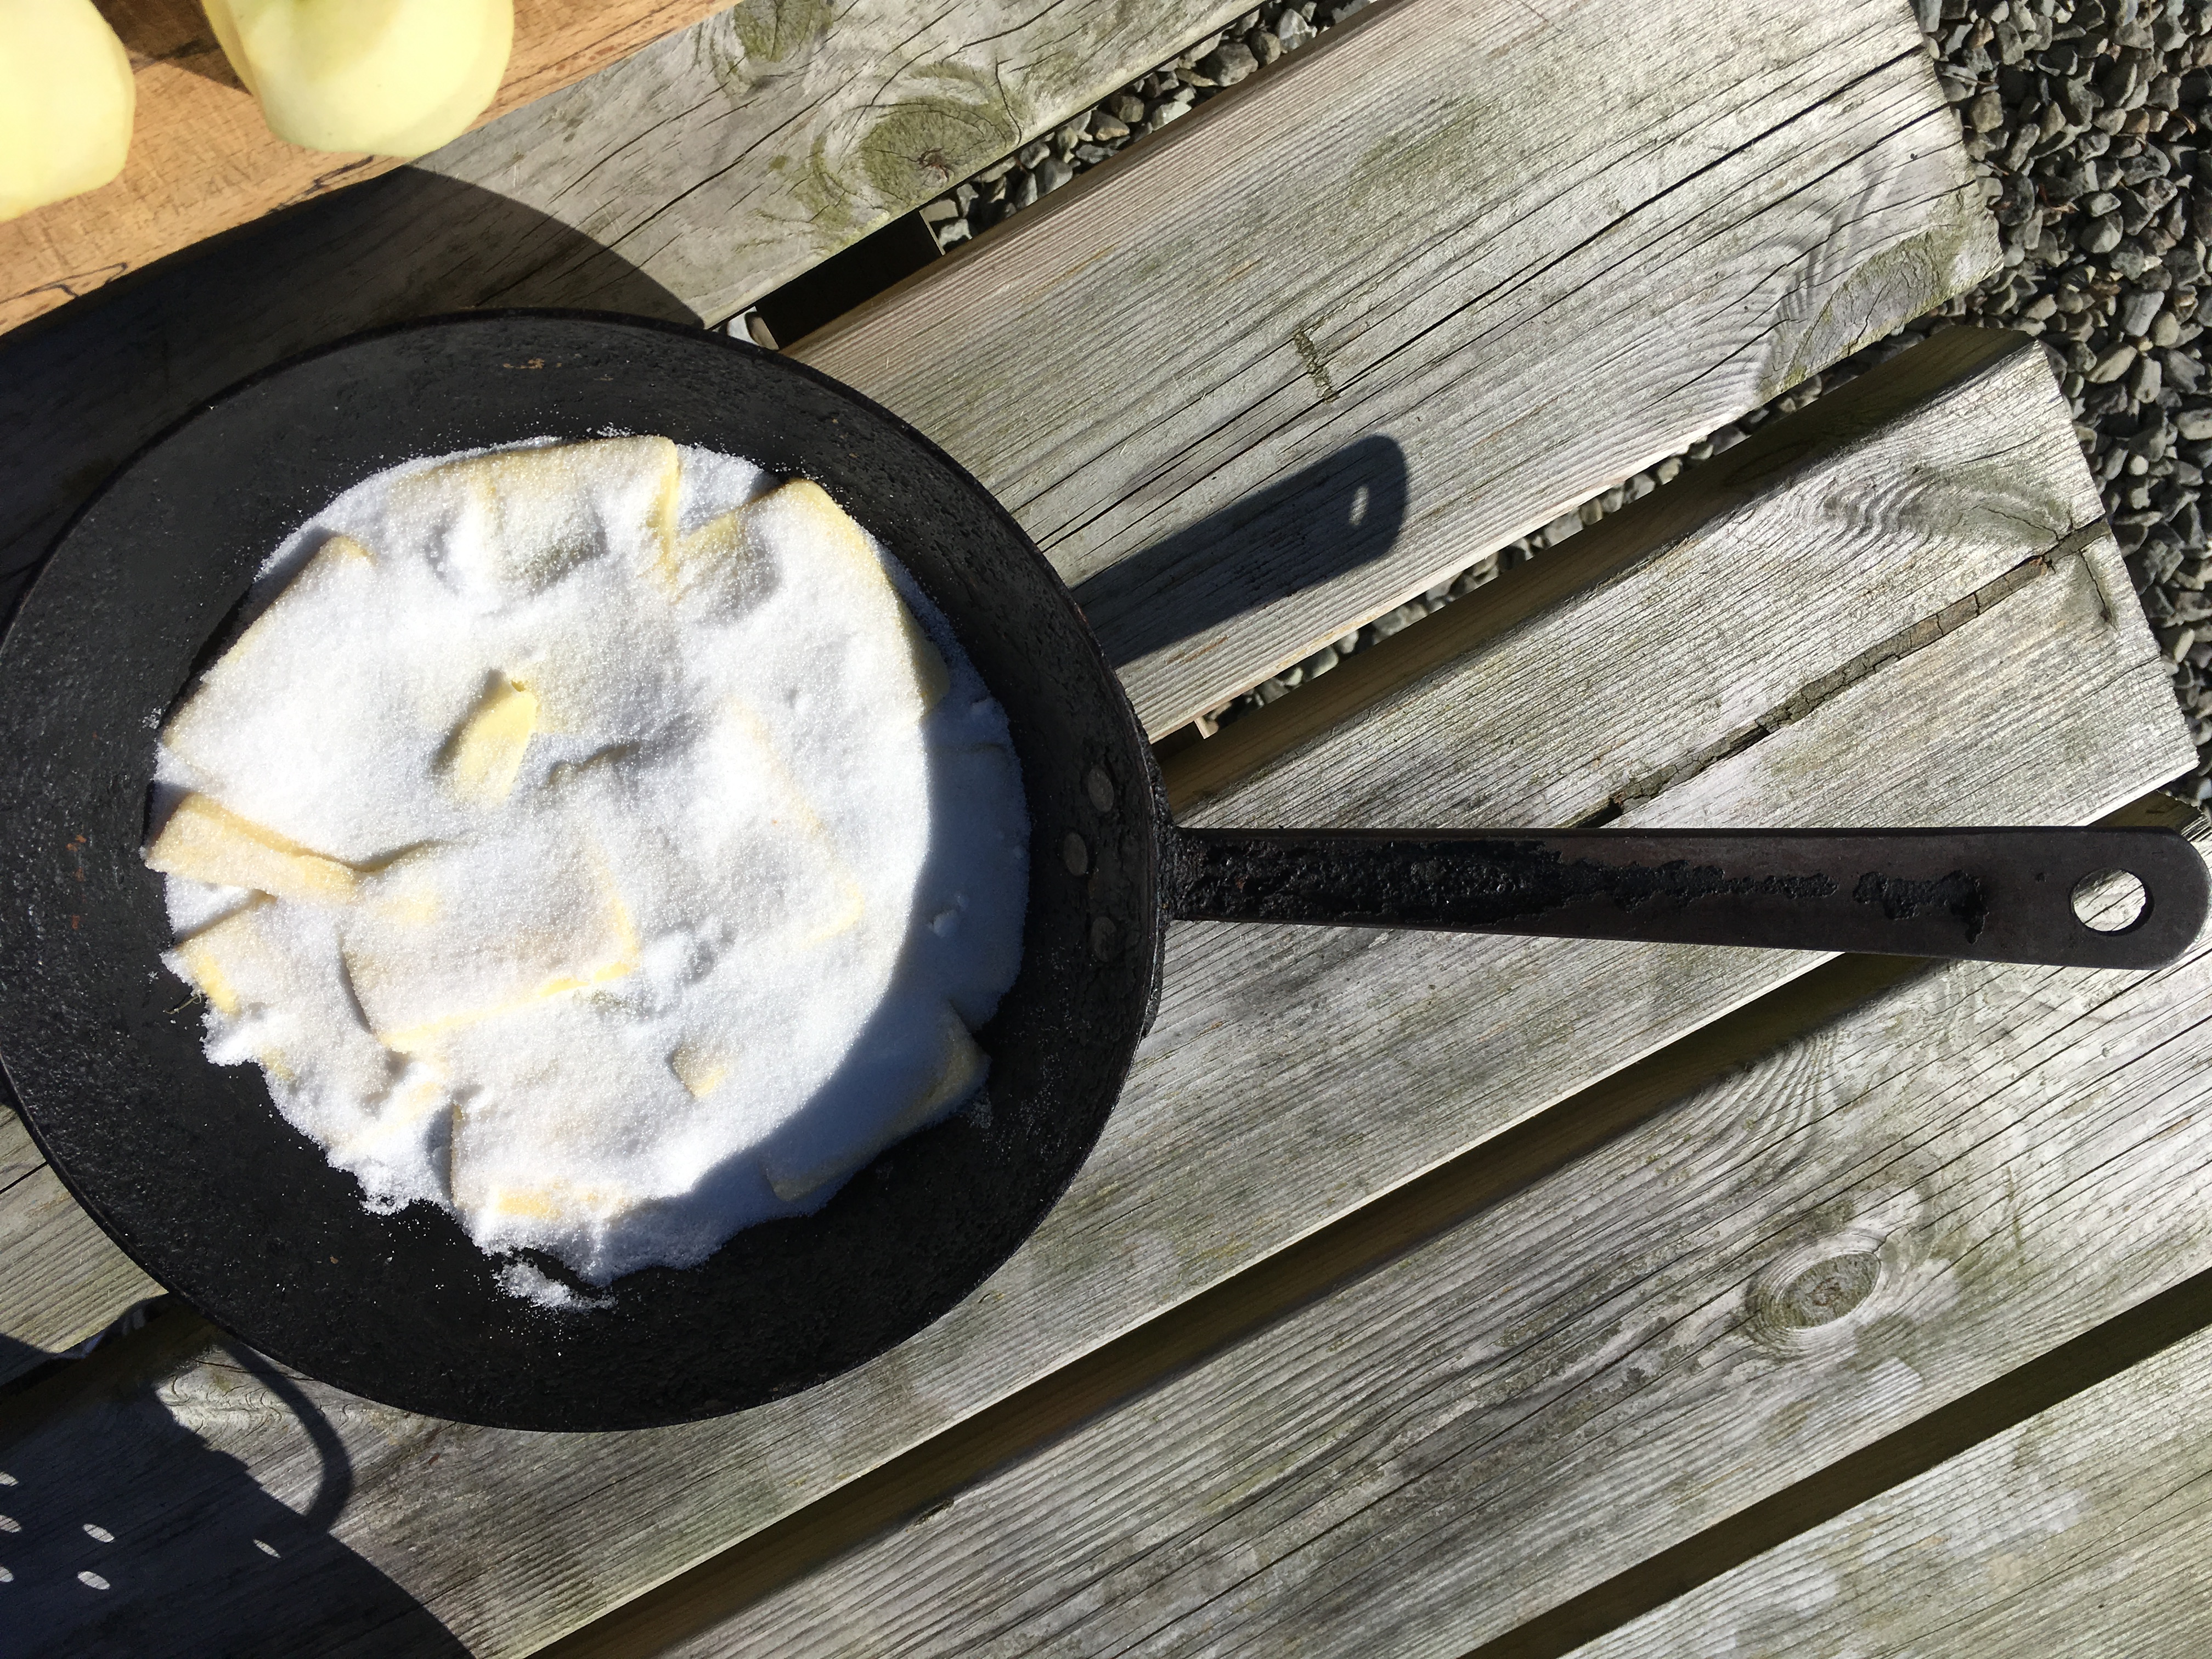
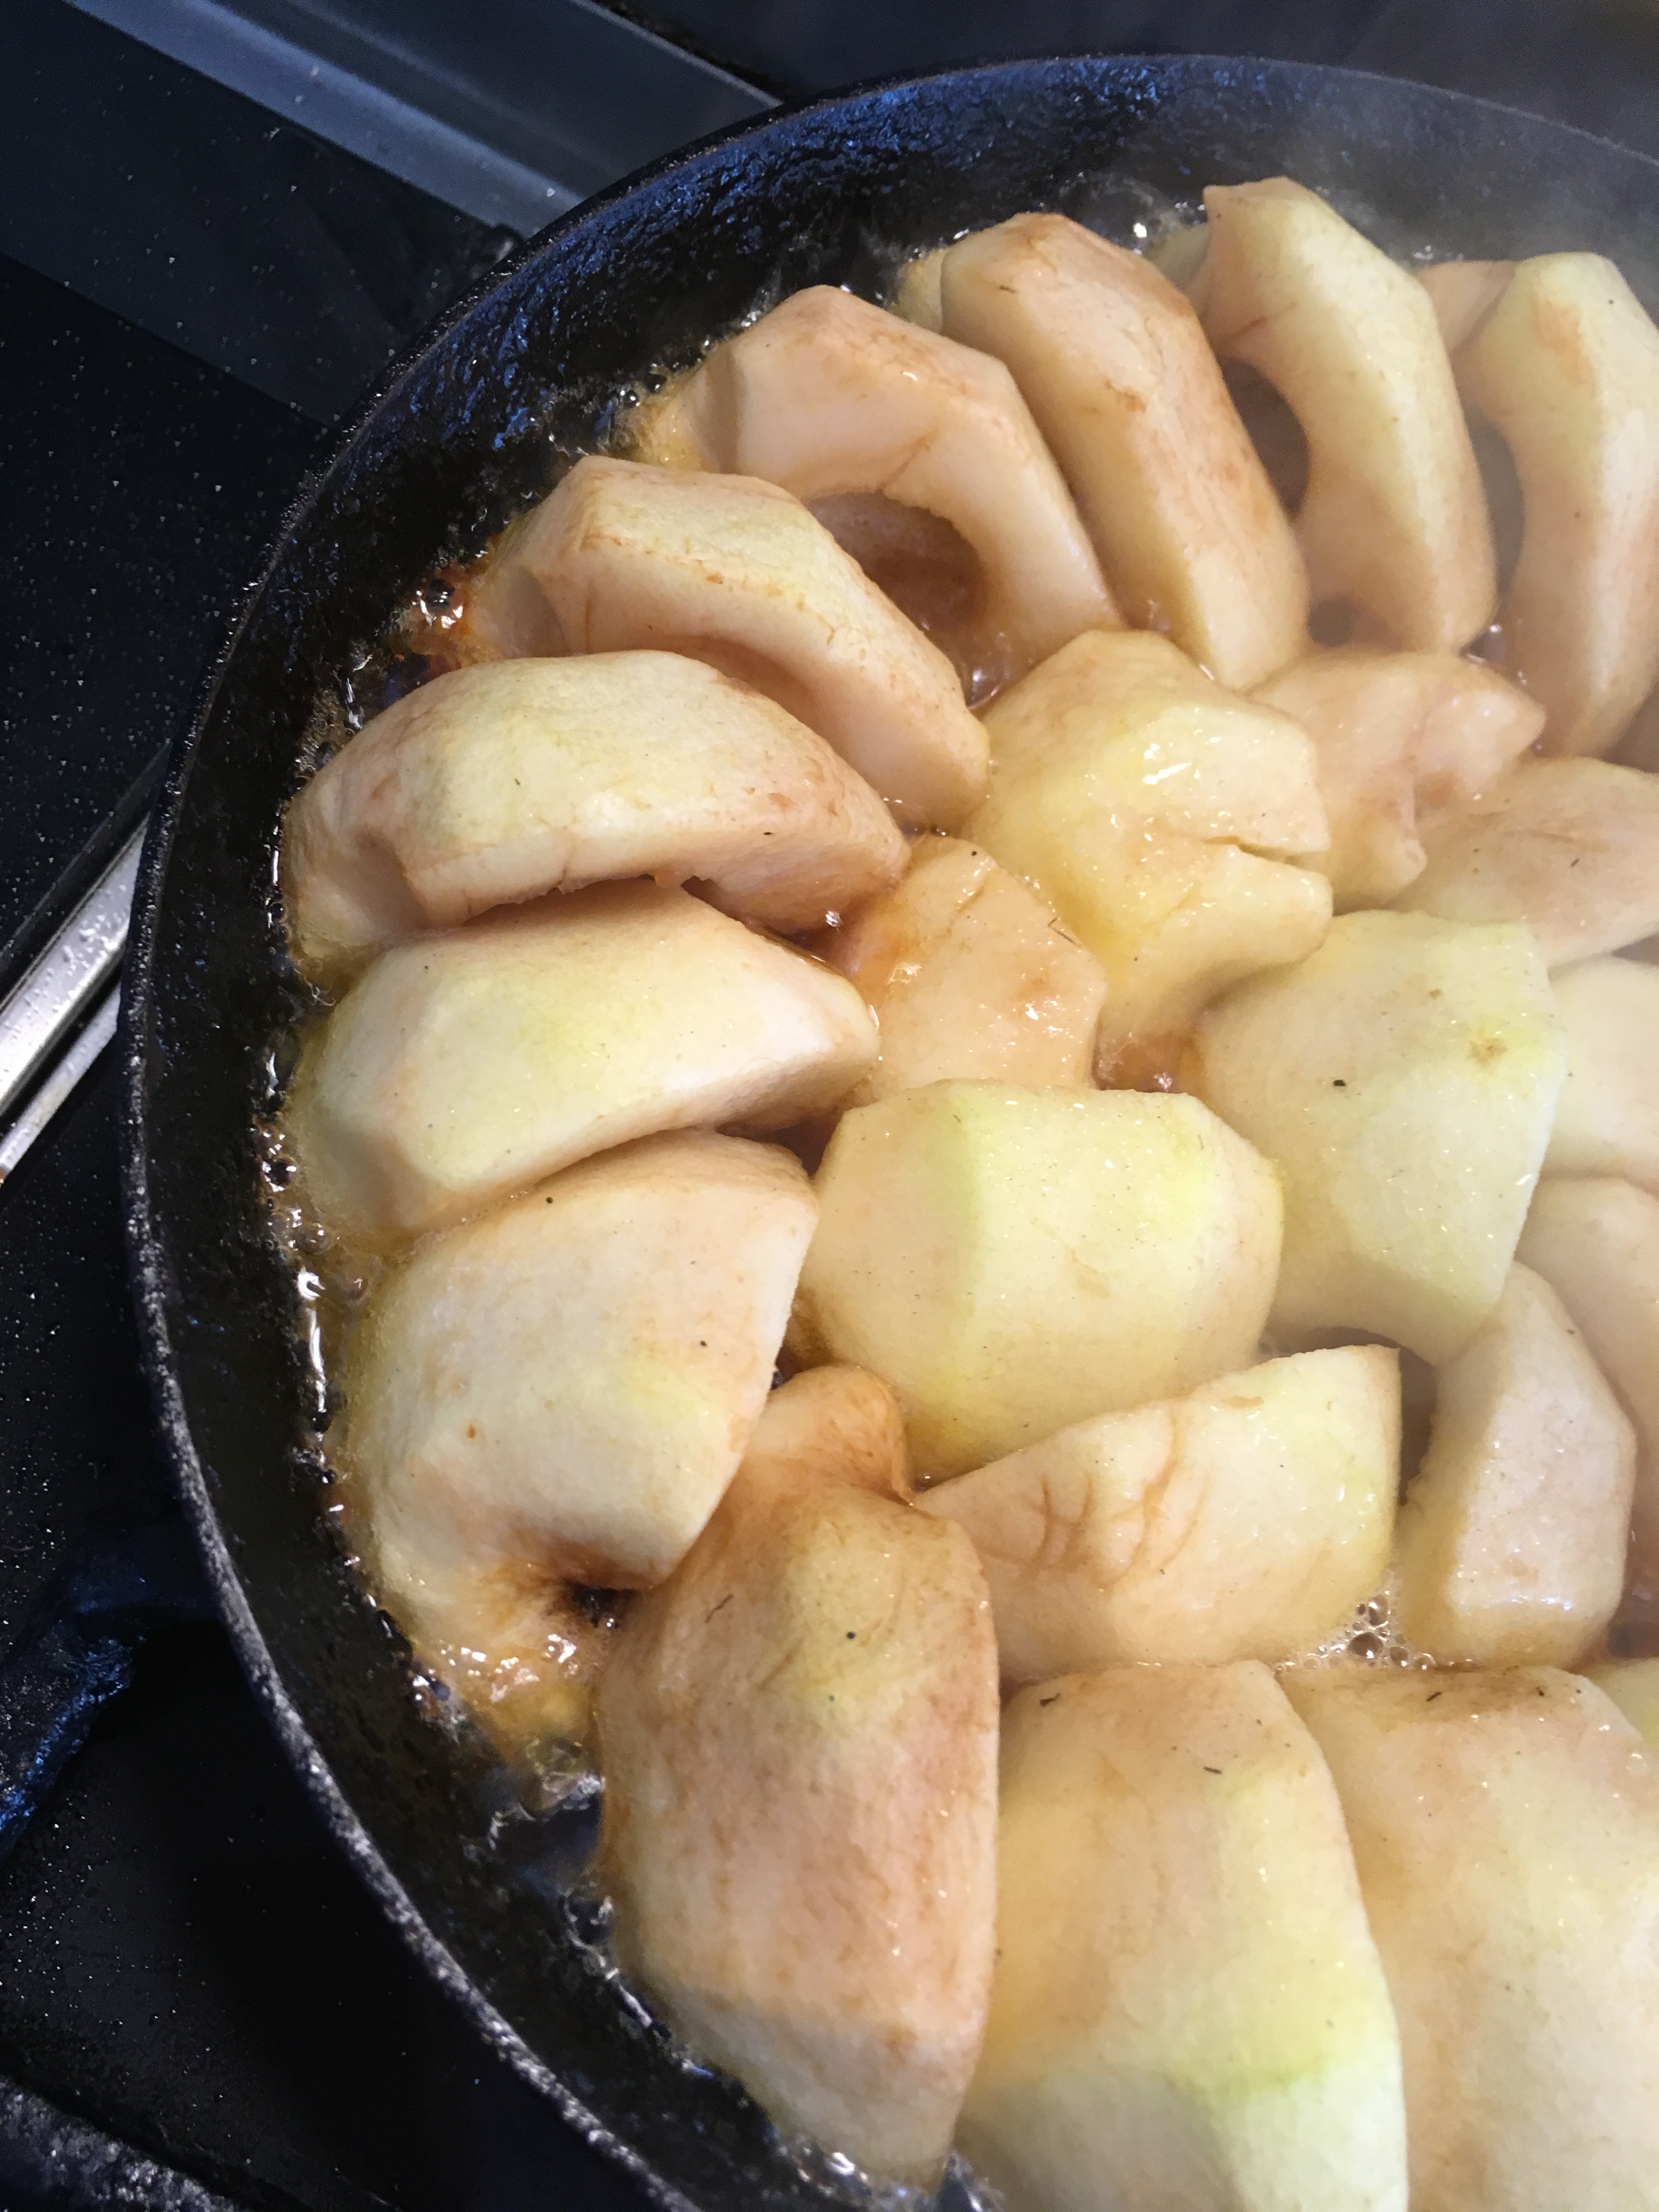
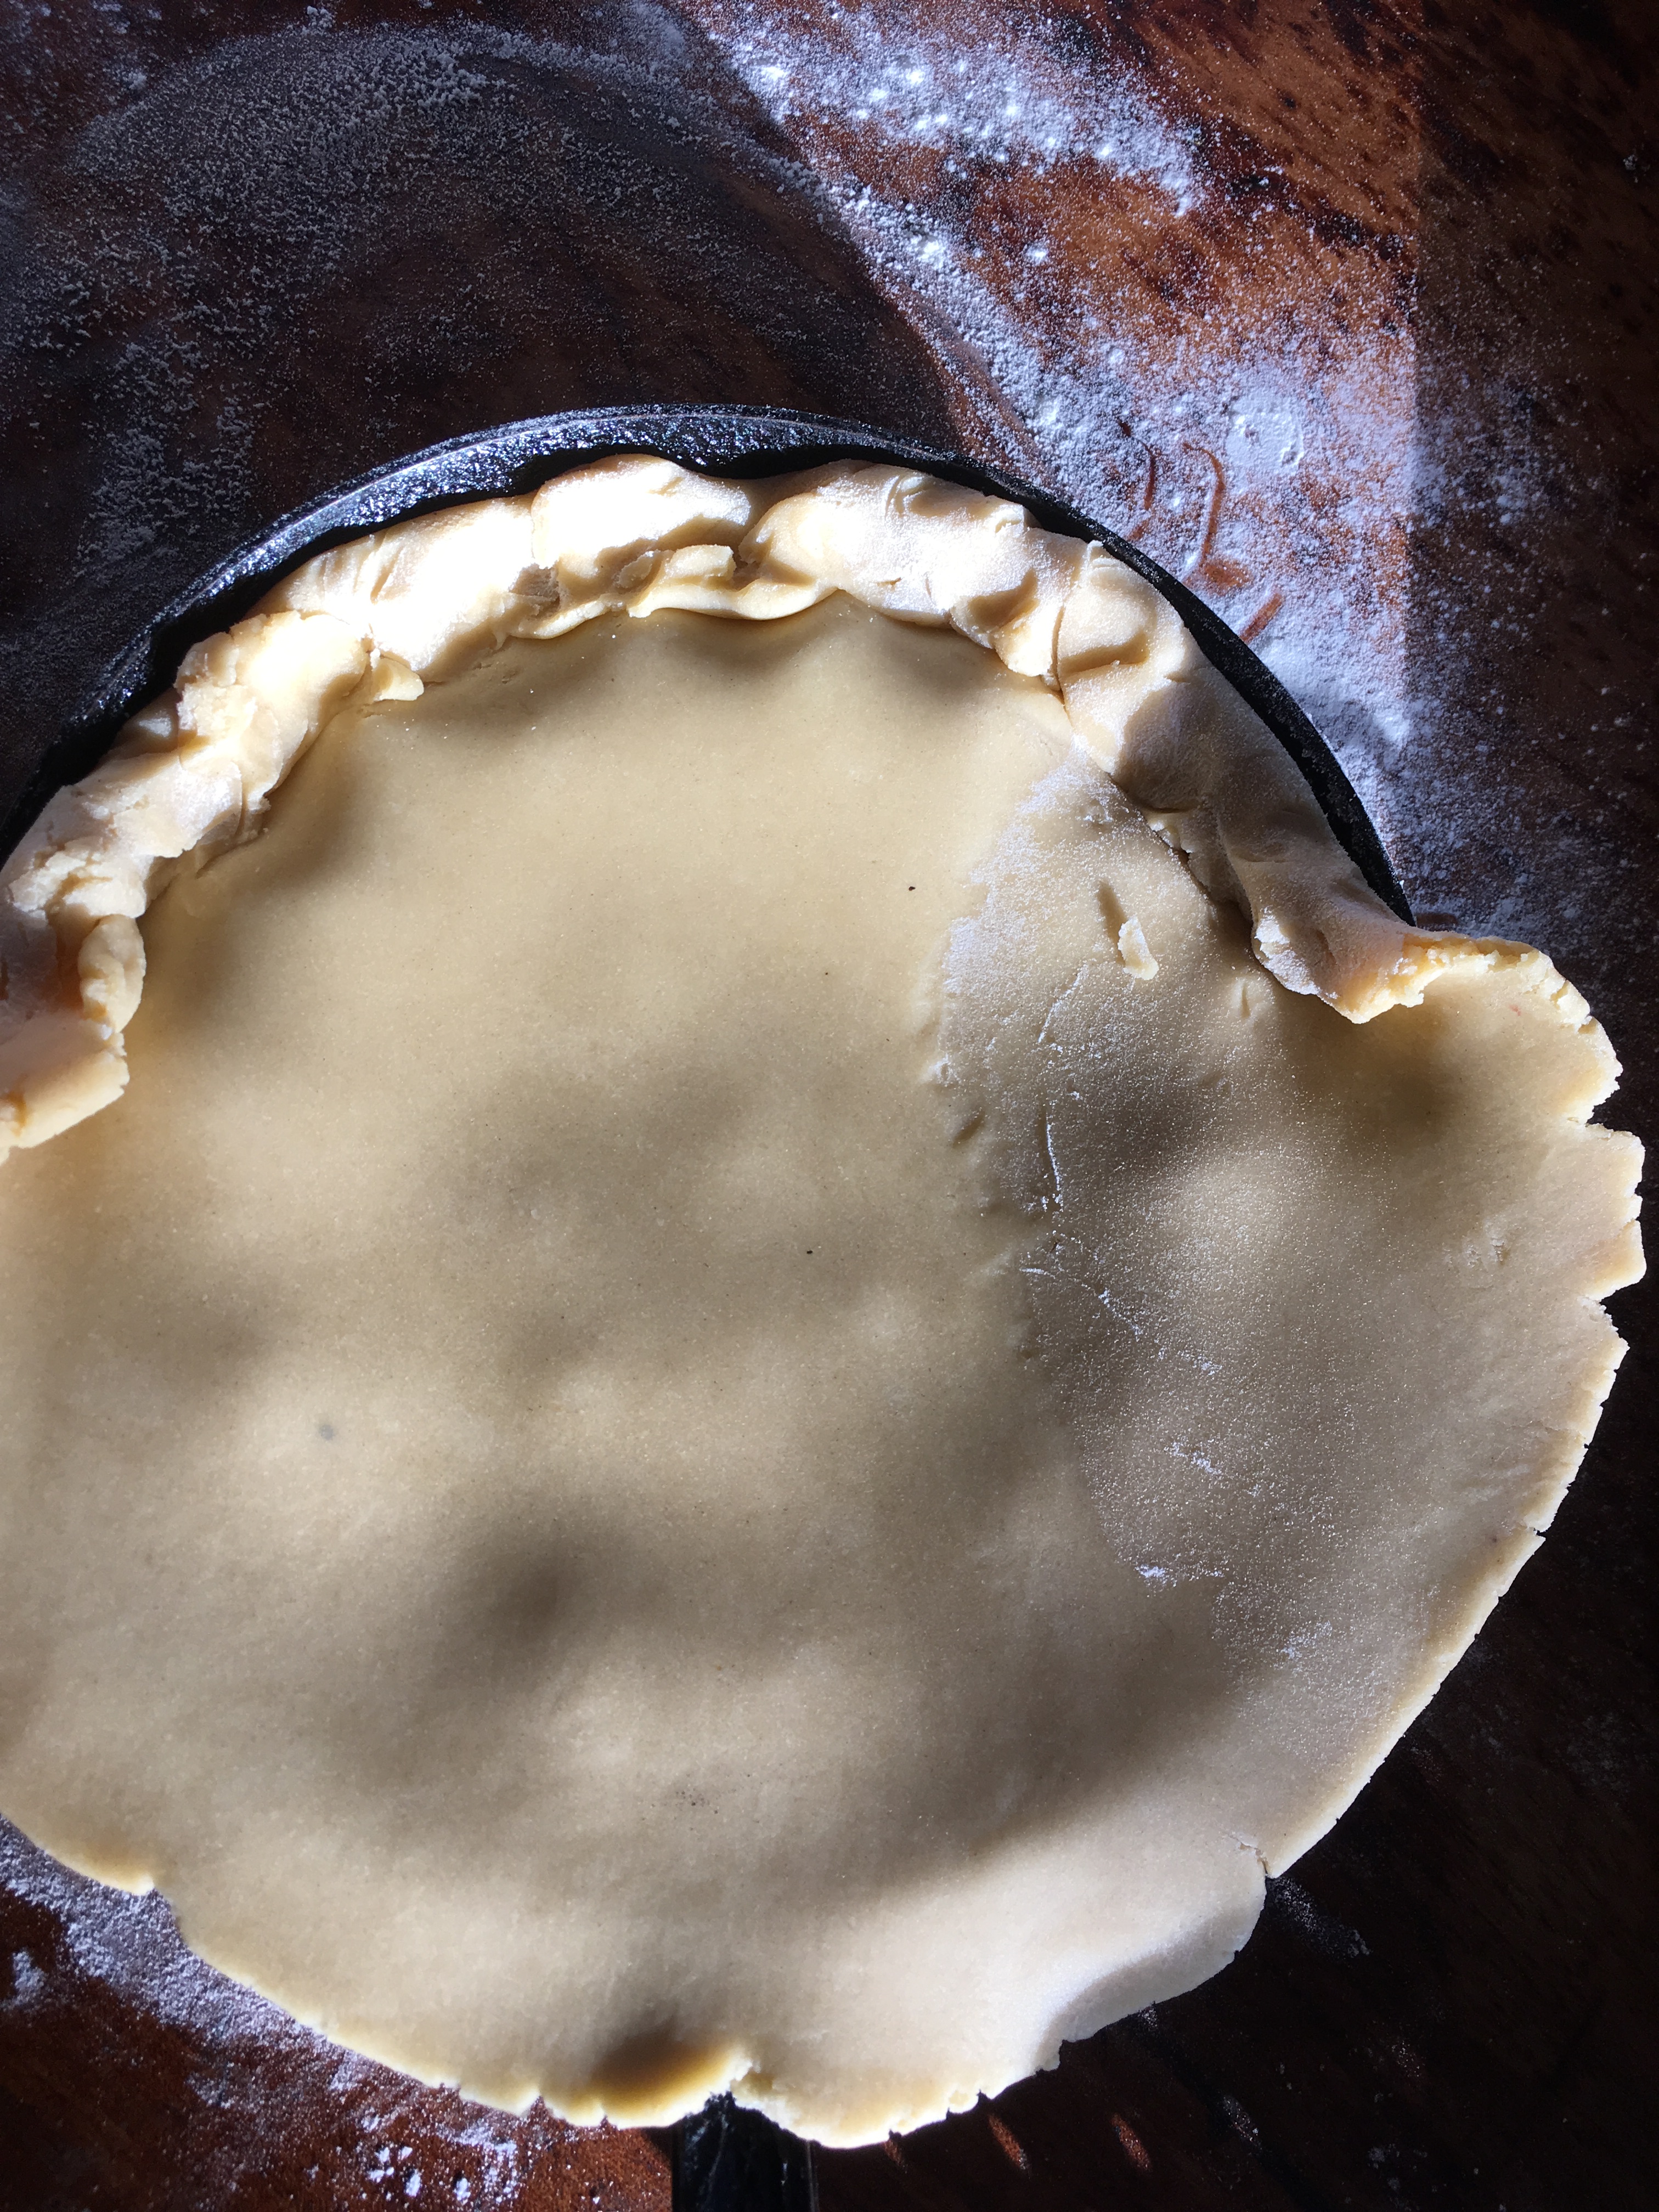
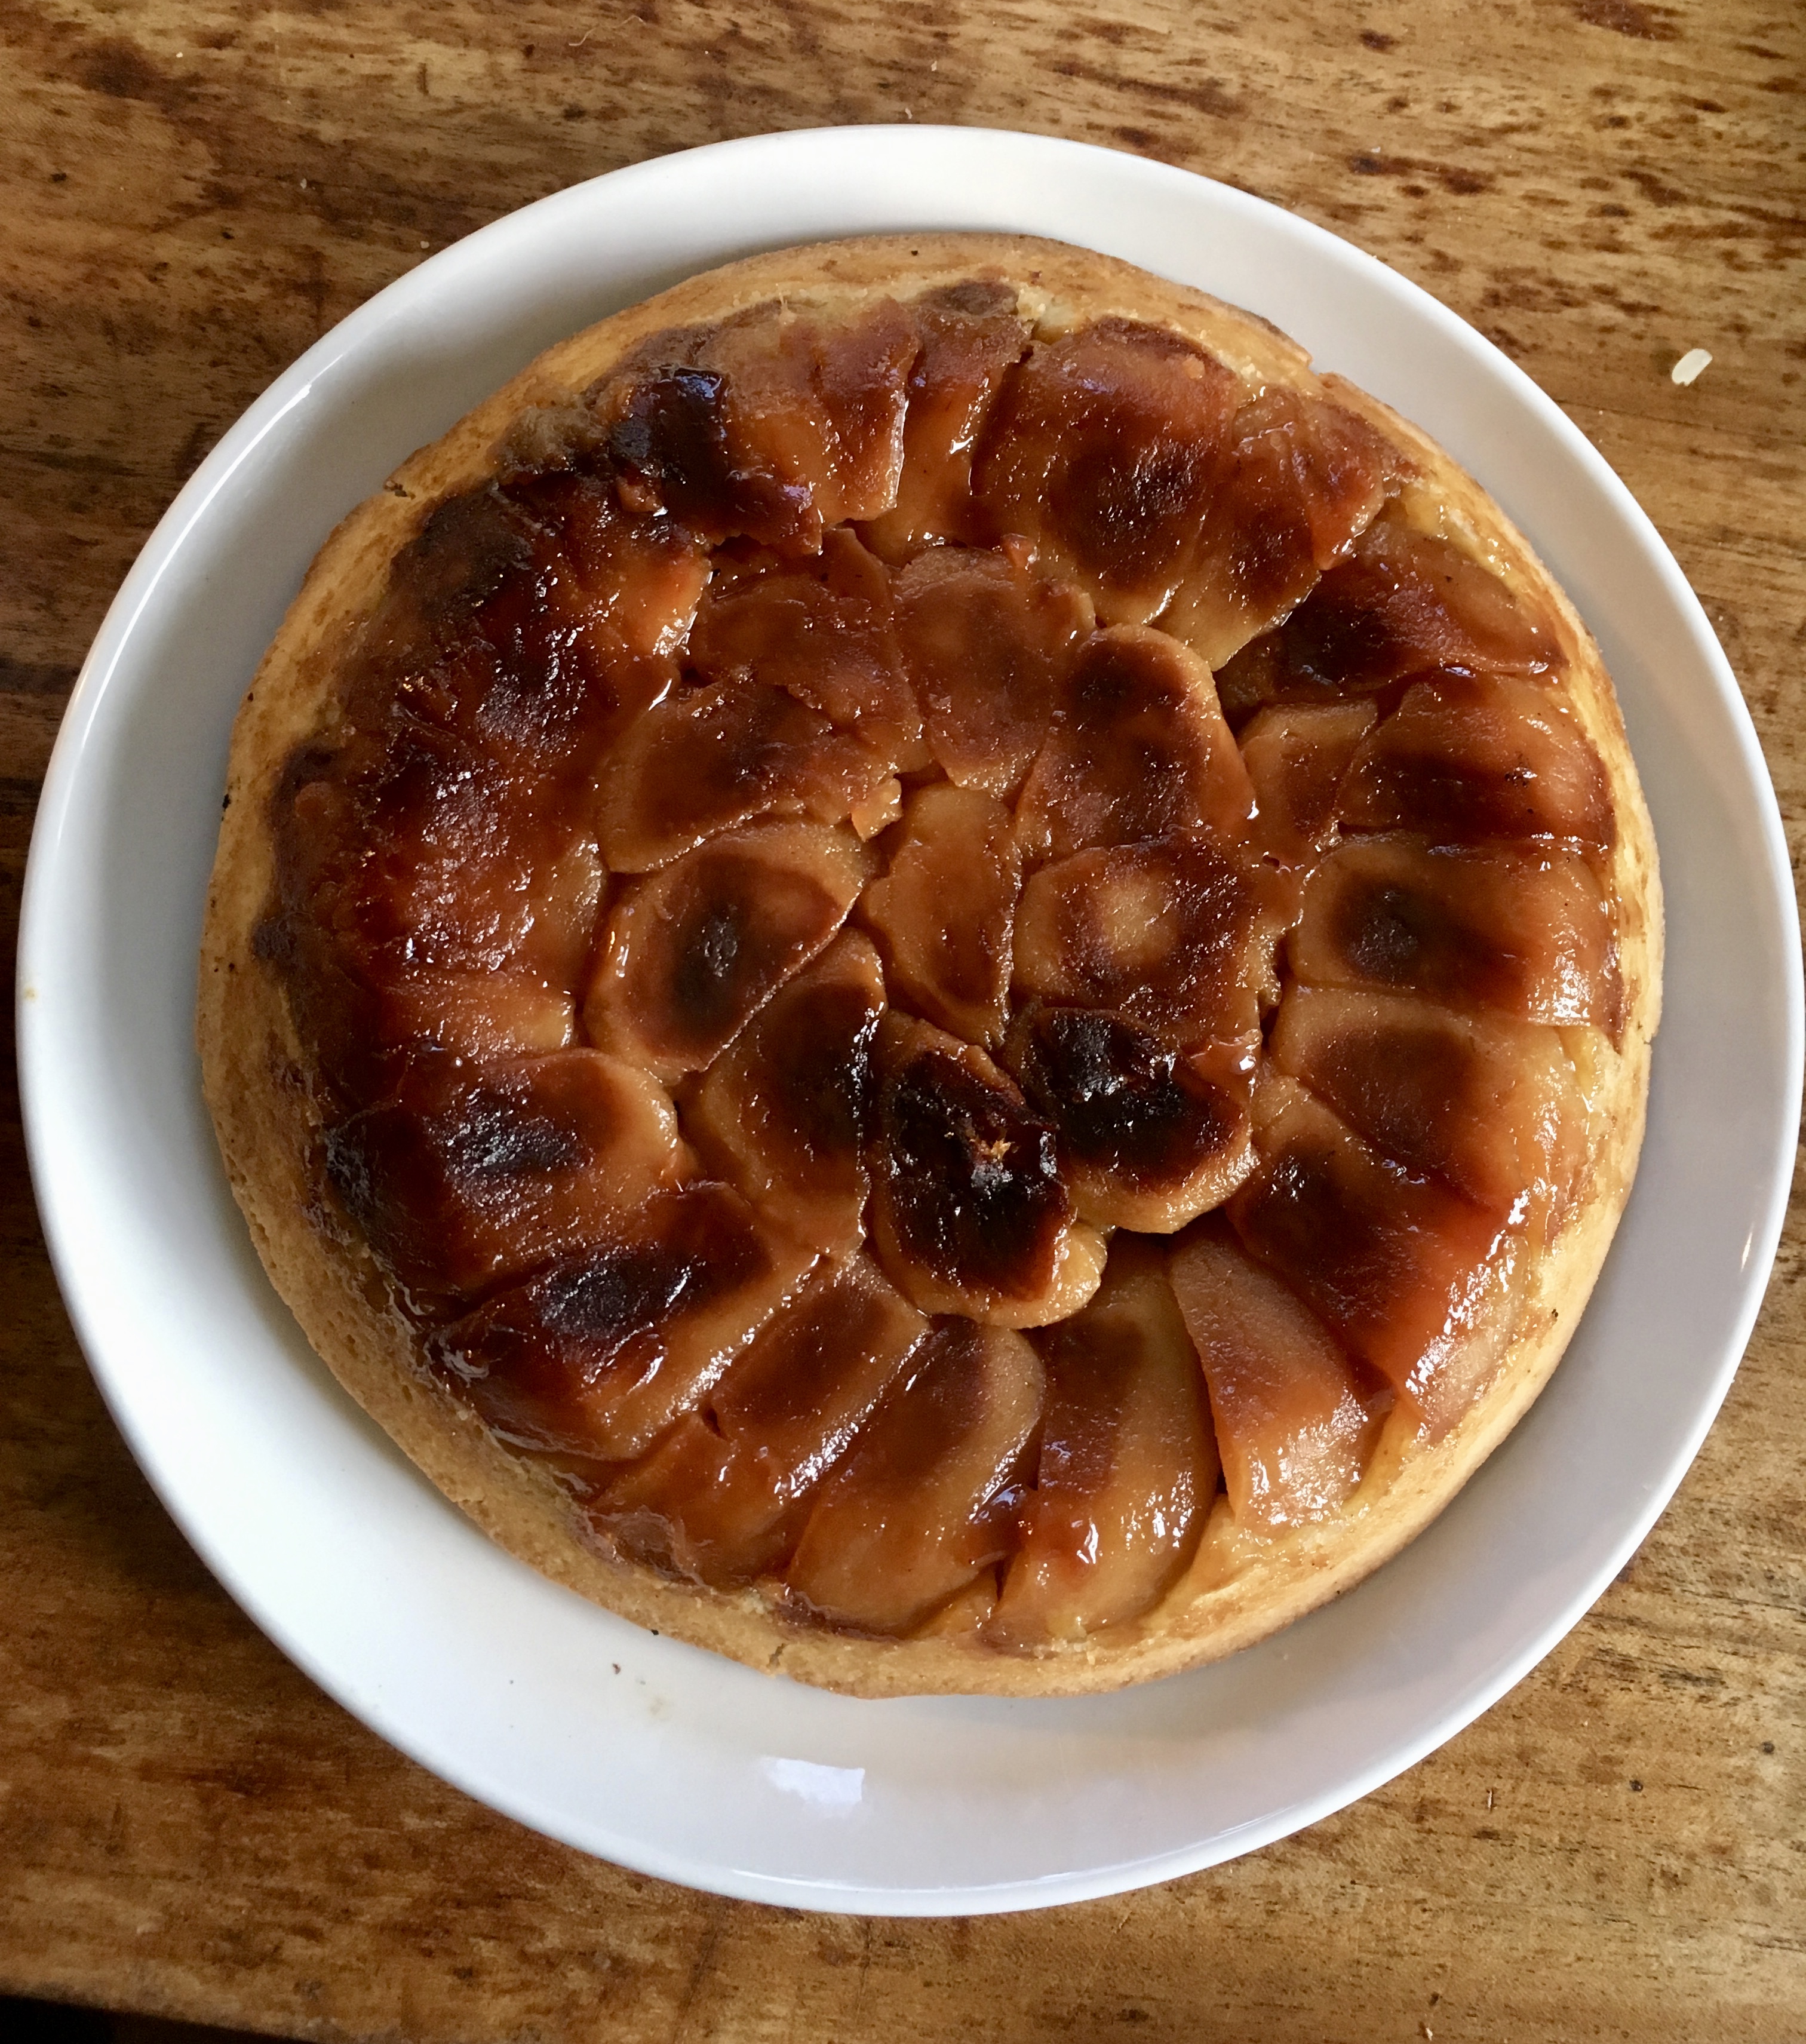
Put the pan onto the heat to melt the sugar and butter. When it bubbles up turn the heat to medium low. It should have some lively action going on but not too fierce otherwise it will burn. Let it slowly cartelise turning the pan to get even cooking. This will take about fifteen minutes, keep a close eye as when the it caramelises it will go quite quickly. Take the pan off the heat when the caramel is deep golden – you’ll see this bubbling around the edge. Take the pan off the heat. Iron pans retain the heat so if it looks like the caramel is getting too dark sit the pan onto some cool water to slow it down.

IMG_5339

Leave to cool completely,

Put the oven on 180c

Roll the pastry into a circle two fingers width wider than the pan. Carefull lift the pastry over the apples and tuck in the edges.

IMG_5344

Cook for approx 30 mins, until the pastry is golden.

IMG_5346

Take out of the oven and leave to cool almost completely. Don’t fiddle with it or be tempted to turn it out whilst it is hot as the caramel will not be set and will run off the tart which will break your heart after all that effort.

When the pan is nearly cold – only a little warm underneath, run a knife around the edge of the pastry to ensure it’s all mobile then put large plate over the pan and invert the tart quickly. Gently lift the pan off of the tart….. et voila! Alternatively allow the tart to go completely cold cold then heat the pan for couple of minutes to loosen the caramel then follow the same procedure.

fullsizeoutput_16e0

Delicious with cream, ice-cream or custard