Category Archives: dairy free

Think Pink

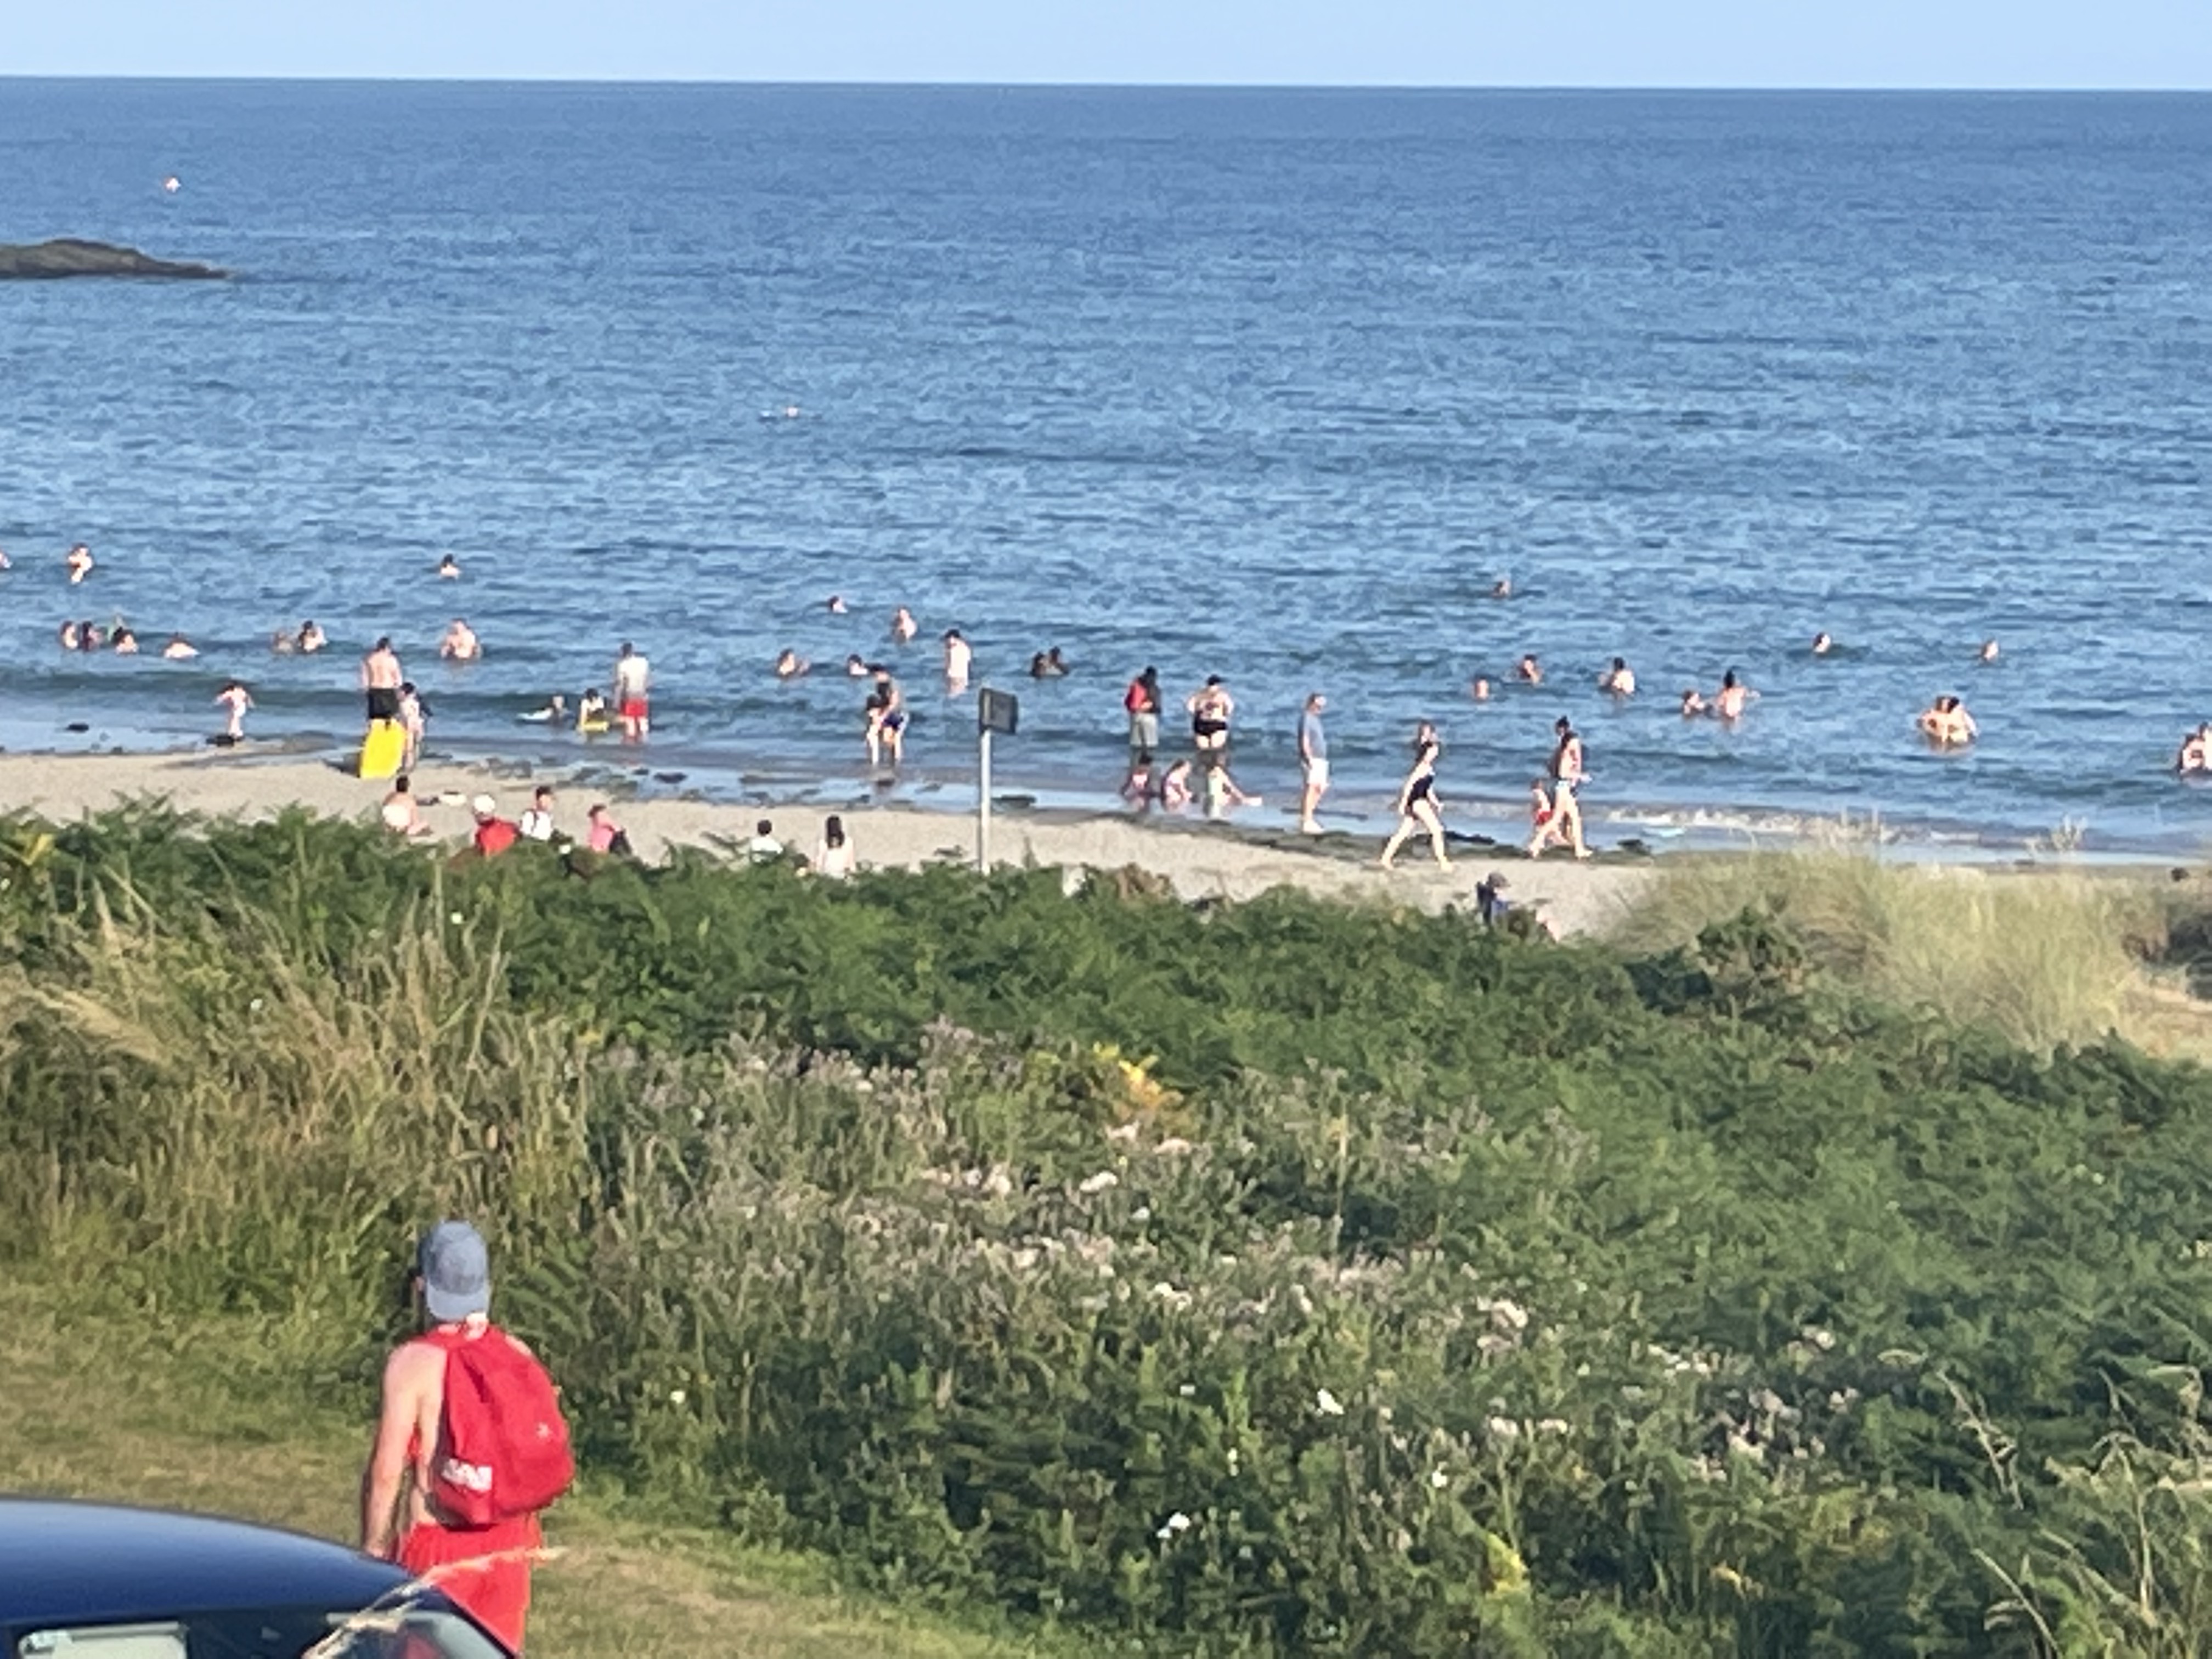
Berlin in early summer is full of Horse Chestnut trees in blossom. Some of the trees are immense – as tall as five storey buildings, and when the wind blows the pink blossoms come down like confetti, falling everywhere, sometimes landing into the glasses of the people drinking on the terraces and relaxing on river banks. It’s not drinking in a drunken way, just social. The weather has warmed up and everyone’s out. There are little bottle shops around the neighbourhoods which sell a huge selection of beers, soft drinks and snacks and it’s perfectly acceptable to consume them pretty much anywhere. People drink beers and other people pick the bottles up and get the deposit back. It all works very well.

Amongst the selection of beers that are consumed are pink drinks.

Rhubarb spritzers, lemonades and cocktails, all totally delicious.

I checked out how to make rhubarb cordial – the base for all these confections, and I feel like I have discovered a perfect use for rhubarb.

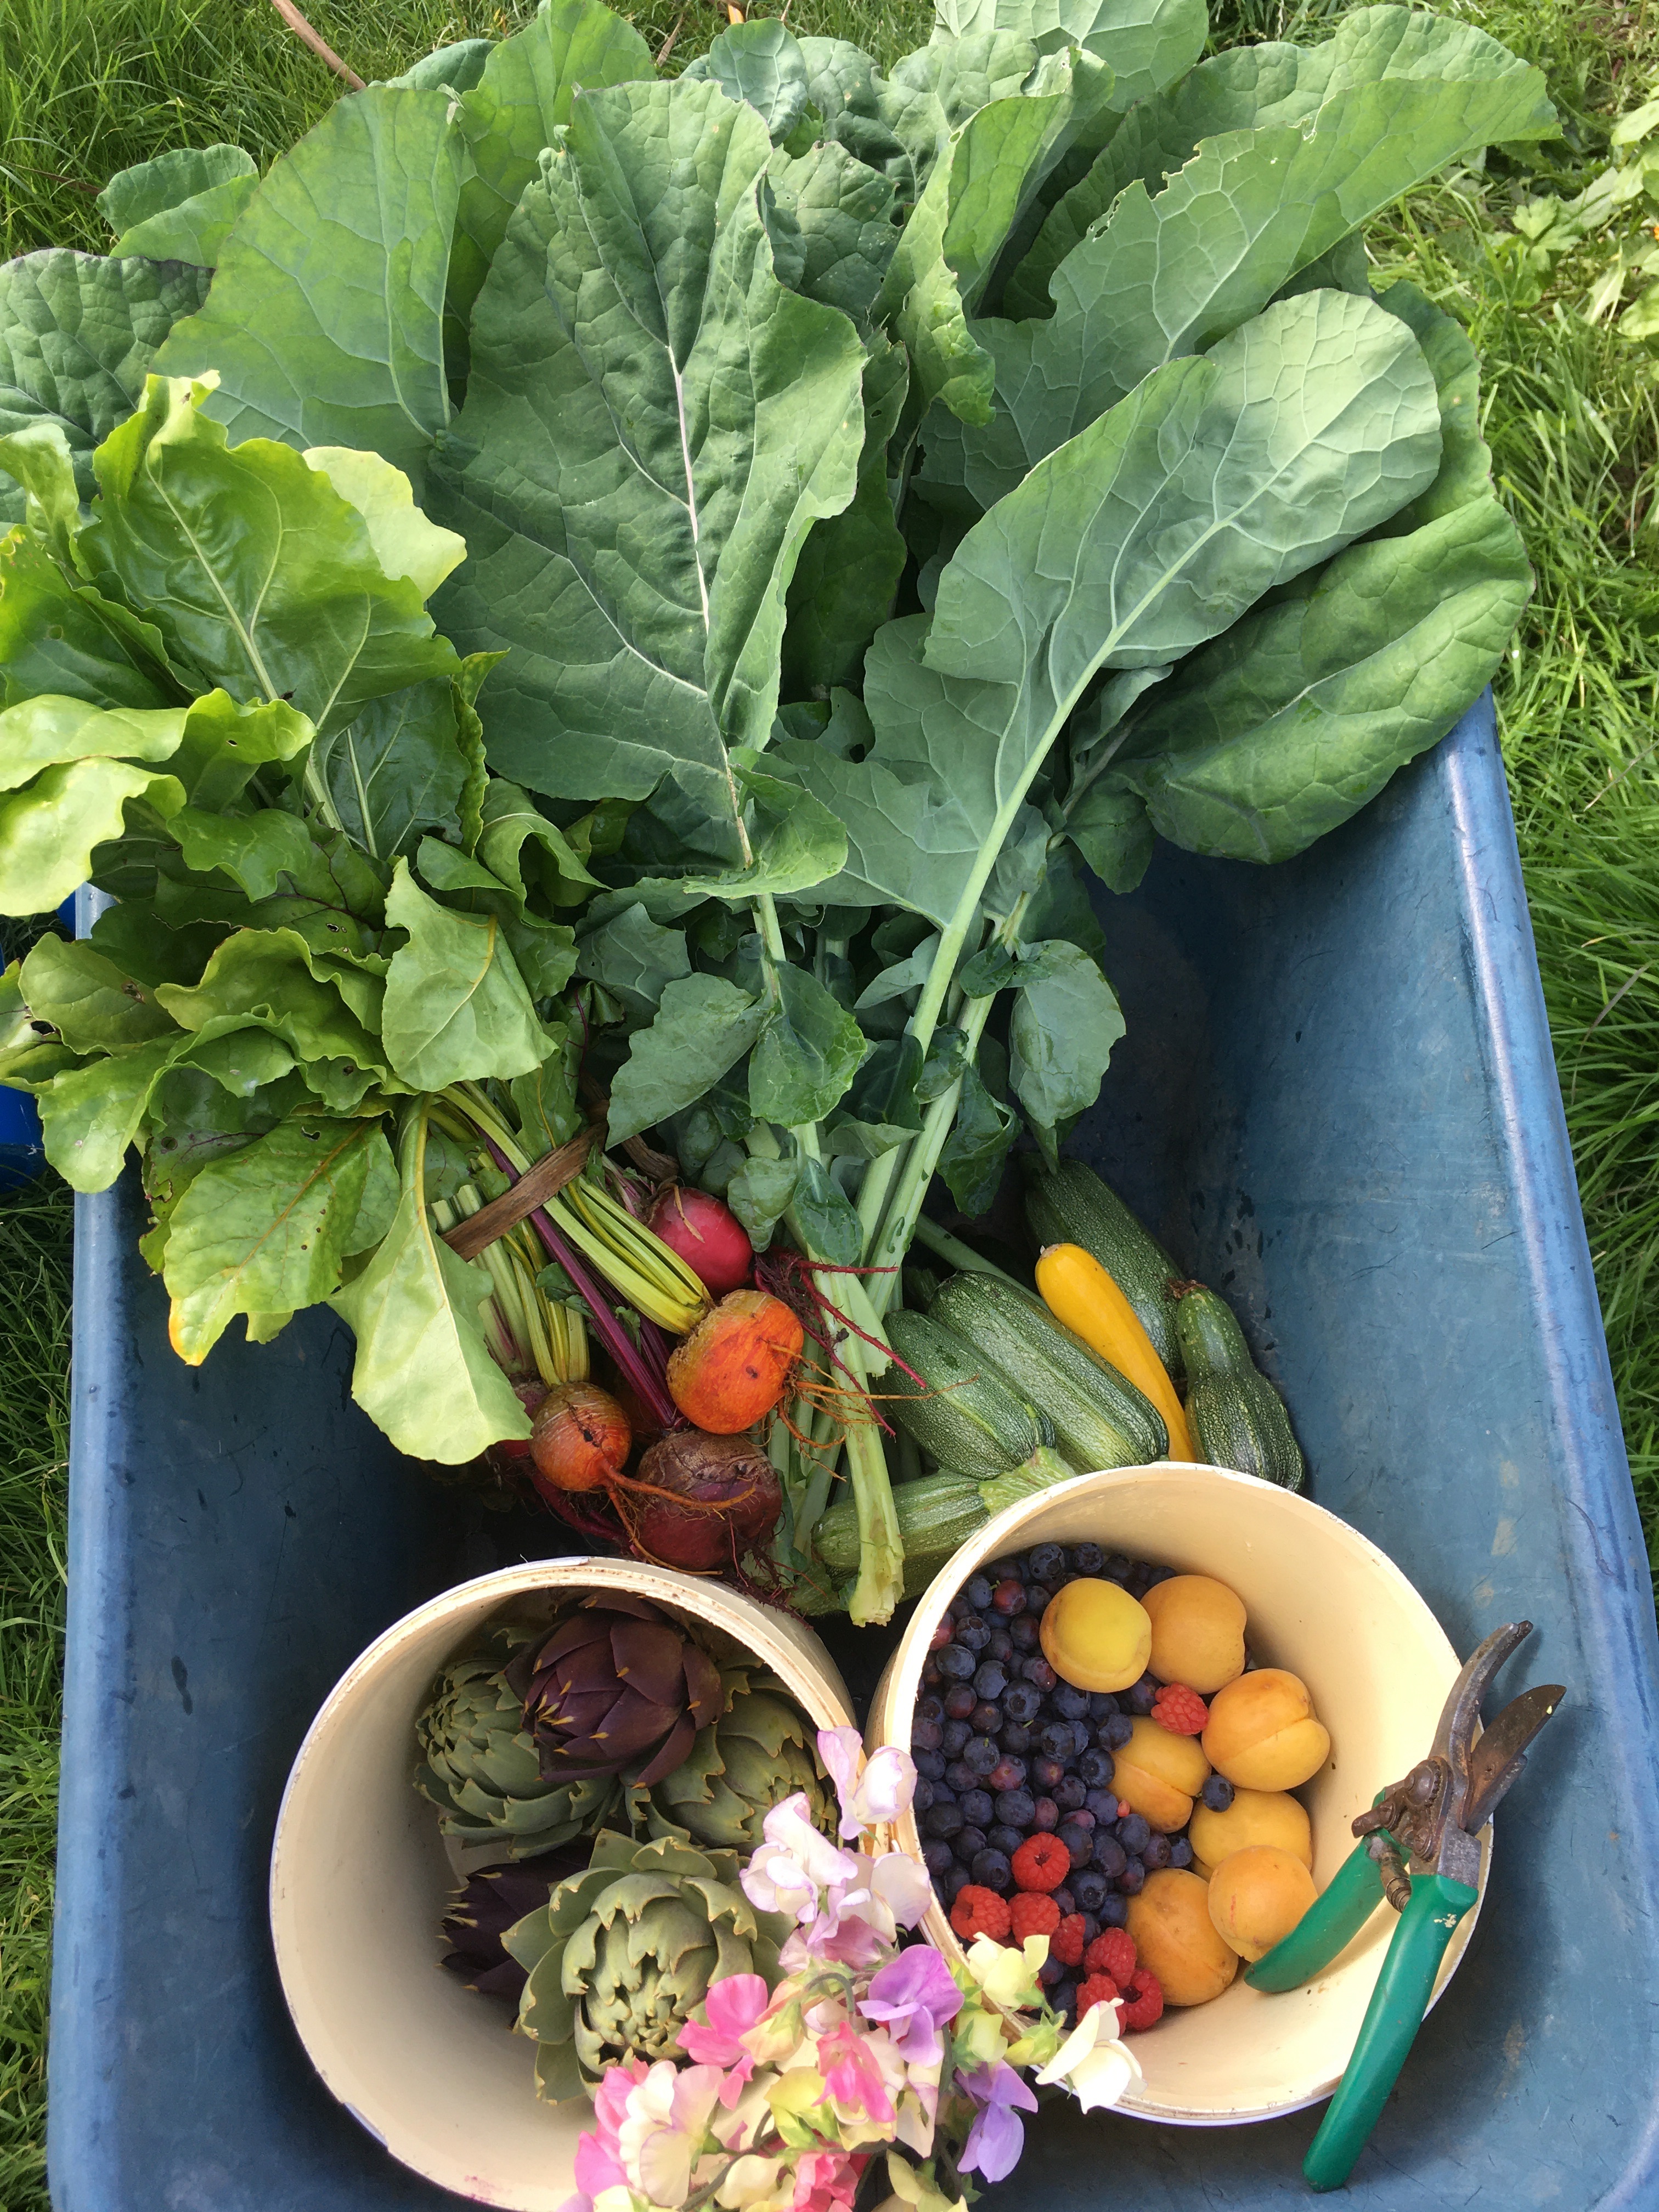
We have a healthy rhubarb patch in our garden and each year, after our initial rhubarb tart enthusiasm it ends up languishing unless I have jam making fit.

Rhubarb cordial is easier to make than tarts, crumbles or jam, the only vaguely complicated part of the process is straining the mix. It can be poured directly through a sieve  but I prefer to line the sieve with a piece of muslin. This ensures a beautiful clean pink juice, no stray bits of fruit etc. which might sneak through a sieve. This is not  a difficult step although it may entail a trip to your local haberdasher to buy a piece of muslin.

The grandchildren love the pink lemonade – rhubarb cordial plus sparkling or tap water, in fact we all do and it’s fun to add to a favourite tipple especially served chilled.

Rhubarb Cordial

500g rhubarb (stems removed)

350mls water

350g sugar

1 orange, zest and juice

1 lemon, zest and juice

2 slices fresh ginger

Muslin

string

Put the water and sugar into a pan. Bring to the boil then turn to a simmer.

Wash the lemon and orange well then pare the peel of the fruits with a small knife or a vegetable peeler. A vegetable peeler works best as it doesn’t cut through to the pith but if you don’t have suitable peeler just use a knife.

Cut two or three slices of ginger, no need to peel.

Put the lemon and orange peel and the pieces of ginger into the sugar syrup and continue to simmer.

Wash the rhubarb well. Discard the leaves and the other end. There’s no need to peel especially as you need the pink skin to colour the cordial. Cut the rhubarb into 1cm pieces, add to the sugar syrup and bring everything to the boil. Turn to a low simmer and cook for 25 – 30 minutes, until the rhubarb has disintegrated.

Leave to cool then strain using either of the following methods. 

A) Just straining

Put a fine meshed sieve over a bowl that is large enough to collect the juice – without sitting in the  juice as it strains. Pour the cooked rhubarb in and leave to strain for an hour  – better a little longer if you have the patience. Don’t poke or squeeze otherwise the cordial will become cloudy

 B) Using a piece of muslin to line the sieve; Cut a piece of muslin so that it’s large enough to sit in your                   sieve/colander and drape over the sides. 

Organise somewhere to hang the muslin bag. I use an upside down stool but  a large saucepan with a wooden spoon across the top to suspend the bag works too. 

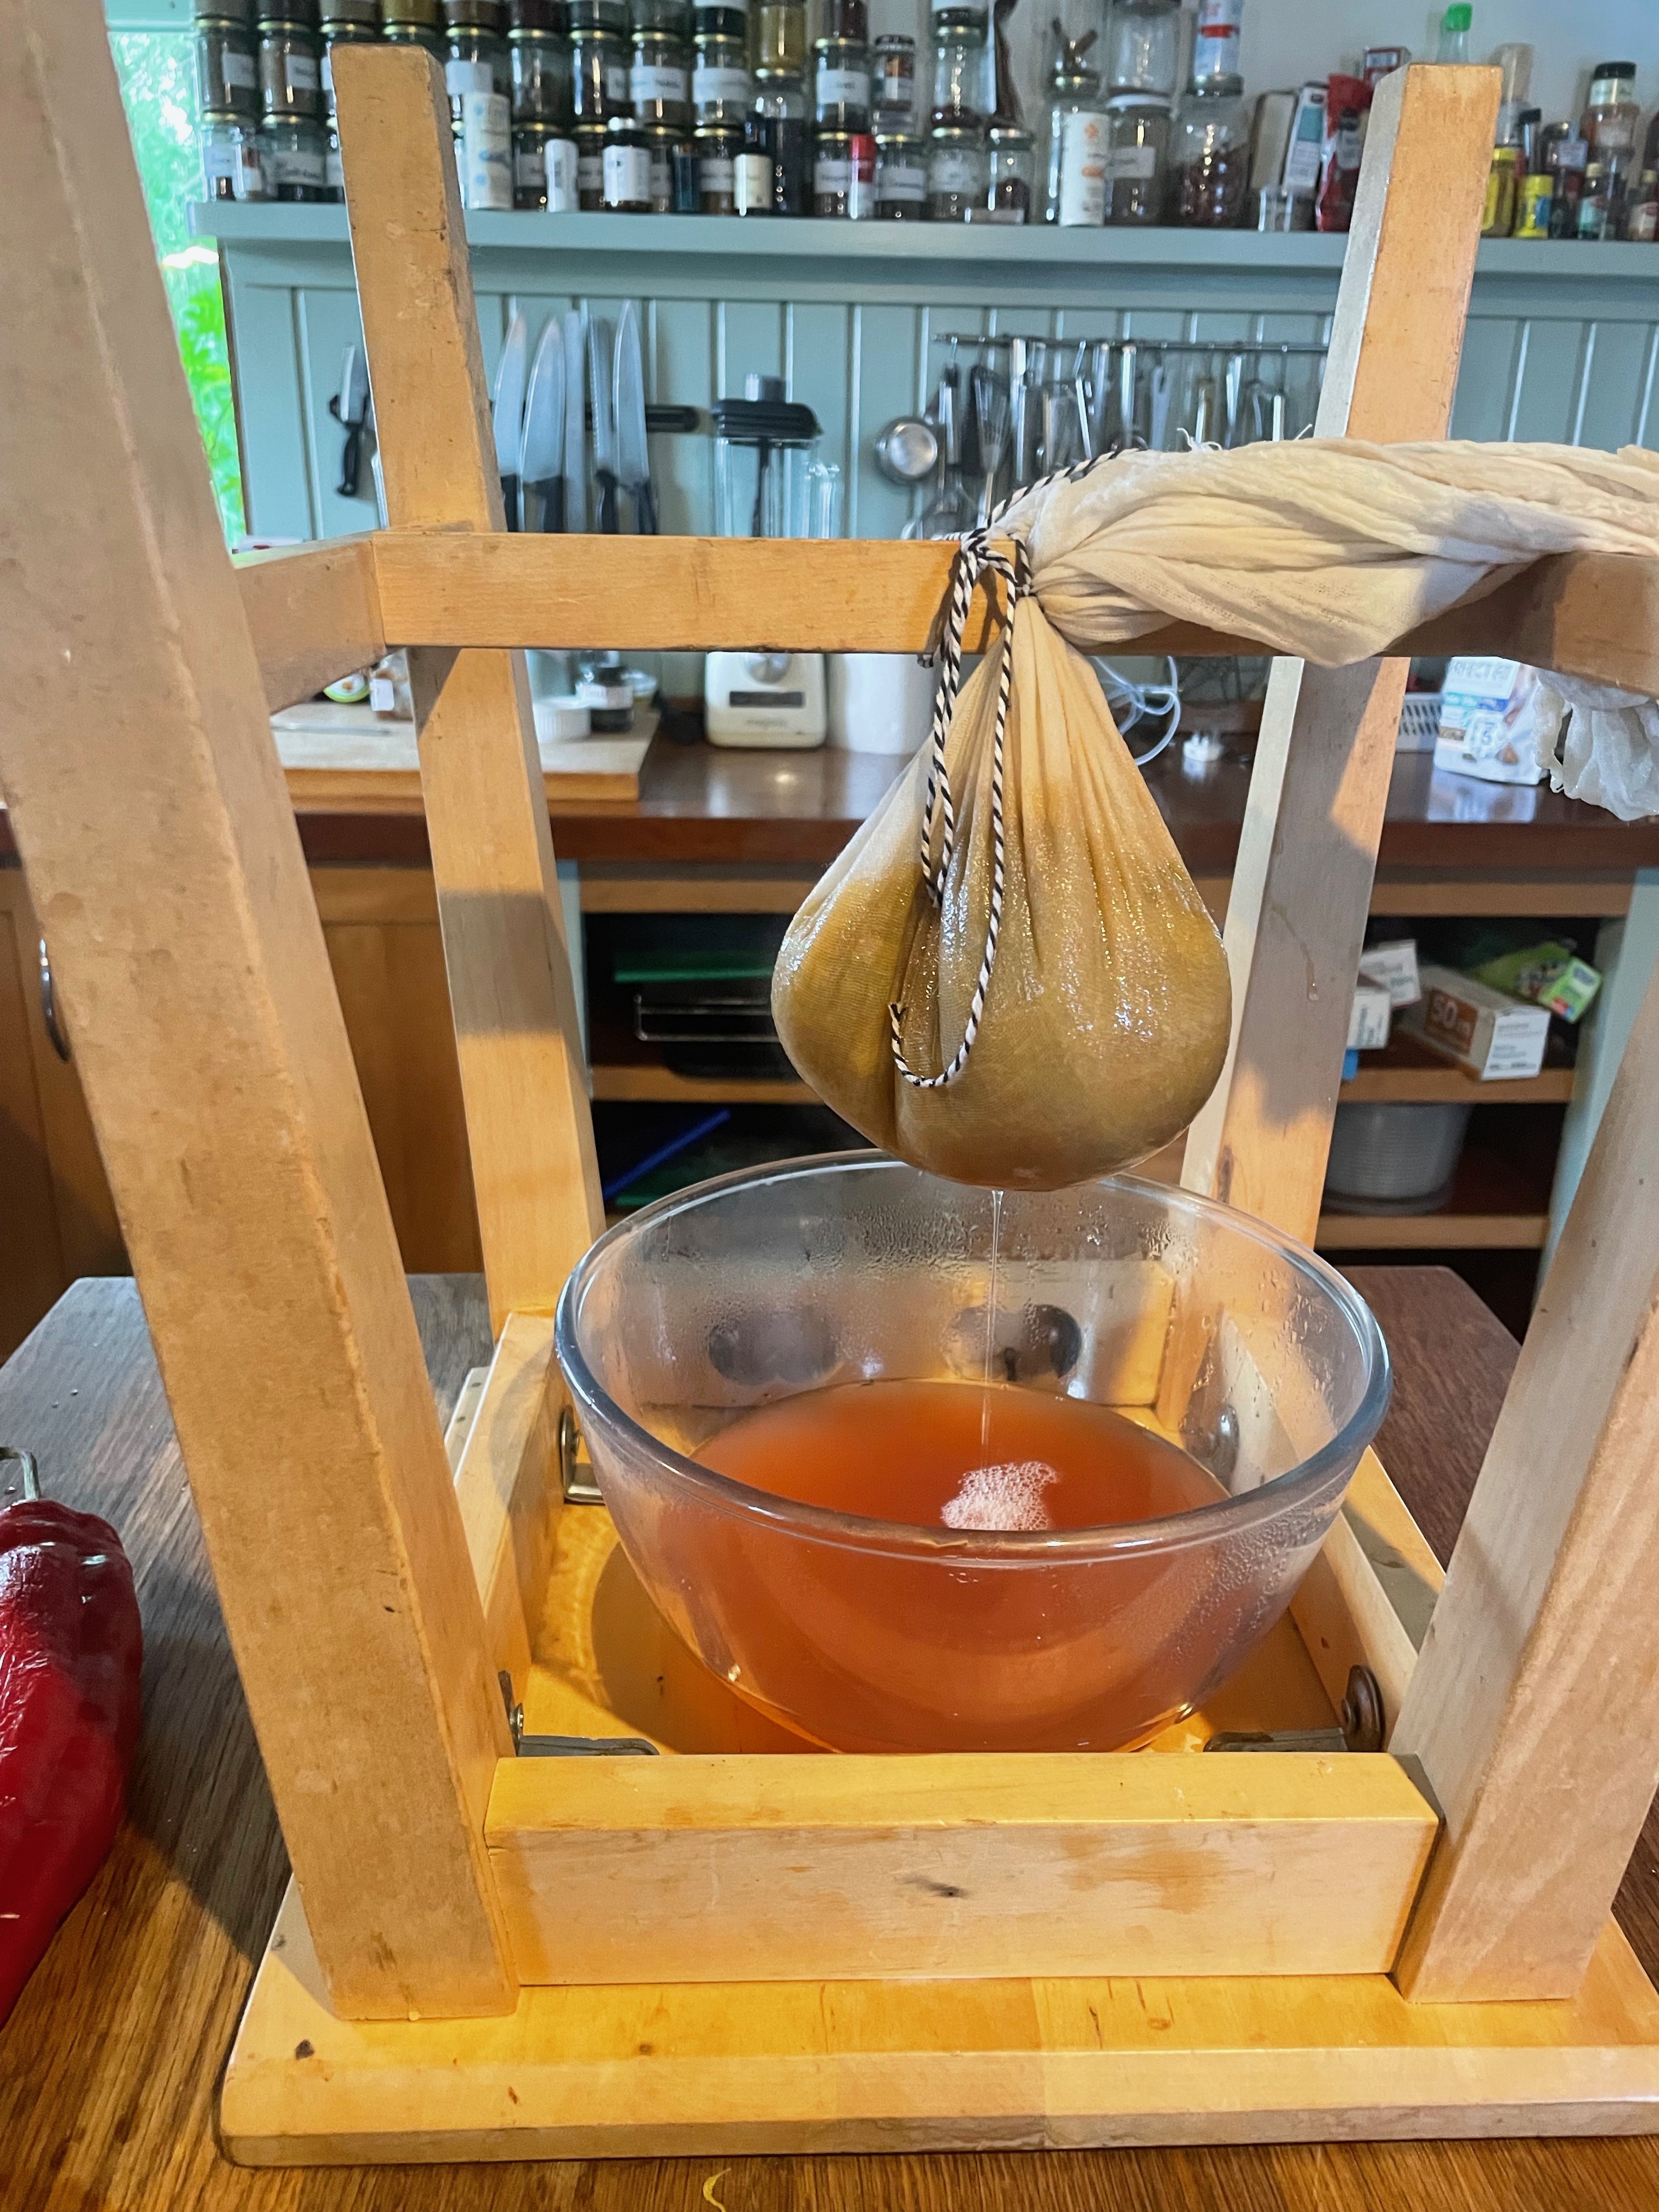
Wet the piece of muslin under the tap then squeeze it out and drape it over the colander/sieve – wetting the cloth helps to keep it in place and encourages the juice to flow through., then pour in the cooked rhubarb.

Pull the four corners of the muslin together then gather up so that the rhubarb is contained without squeezing and secure with a piece of string. The string needs to be long enough to tie onto the bars of the stool or the wooden spoon over the saucepan with the bag hanging above a bowl to collect the juice. Leave for an hour or longer if you’re not in a hurry.

This method gives maximum extraction as the weight of the fruit pushes the juice through. Don’t squeeze the bag or the juice will become cloudy.

Put the finished cordial into clean bottles or a large jar and store in the fridge.

Perfect for sunny days!


After the Storm Spicy Pancakes

Three storms in a week left our garden in tatters. Lettercollum –  Leitir Colm in Irish, doesn’t translate as windy hillside for nothing.

We had to use the chainsaw to cut our way out the morning after storm Eunice rocked by and any previous complacency that we had about the imminent arrival of an early crop of spinach and chard vanished when Eunice whisked the plastic off of the tunnel. It was left flapping in the wind like wet washing which mixed in with the debris of the uprooted tree and broken fruit cages made sad viewing.

Luckily the glasshouse is secure and is a comfortable refuge. There’s a kettle on the bench, teabags and a small stash of snacks. All mod cons.

The propagator is cranked up and I am slowly sowing seeds. The next crop of spinach and chard are in the seed trays as are the tomatoes, aubergines and chillies – no sign of them yet but it is early days. I have sown salad, rocket and herb seeds in the tunnel that’s still standing and the rocket true to it’s name has shot up. Another growing season is on the move.

Exciting times – one way or the other.

With the spinach on hold we’ve been enjoying Kimchi.

Kimchi is a spicy fermented Korean cabbage dish, like an Asian sauerkraut. It’s made by salting and spicing cabbages that are then allowed to ferment with wild cultures. It’s very much part of the Korean food culture. 

Fermented foods are full of probiotics which in turn are good for our gut health and immune systems. I reckon our immune systems could do with a boost after two years of covid/covid avoidance.

One of my favourite ways to eat kimchi is a kimchi pancake, known as Kimchijeong.

Kimchijeong are very easy to prepare as is kimchi if you have the time. For those of us who don’t there’s the perfect solution- open a jar! We use a locally produced Kimchi that is made by the Cultured Food Company. Not as spicy as Korean kimchi it is perhaps better tuned to the Irish palate and one jar of this kimchi fits the recipe perfectly.

With Shrove Tuesday imminently arriving this recipe for pancakes will be like an Asian mini break. 

Crispy on the outside, juicy on the inside these pancakes are addictive. Serve with little gem lettuce leaves and dipping sauce on the side, they are guaranteed to be hoovered up.

This recipe makes four medium pancakes that are designed to be shared. 

Serves 2-4 – depending on appetite!

Kimchi Pancakes – Kimchijeong

150g standard flour

75g white rice flour

½ tsp salt

1 large egg

1 x 300g jar of kimchi

Juice from the jar of kimchi (about 6tbs)

4 spring onions, finely chopped 

1/2tsp chilli flakes (optional)

250mls cold sparkling water

100mls vegetable oil for frying

Dipping Sauce

2tbs soya sauce/tamari

2tbs rice vinegar 

1 tsp toasted sesame oil

1tsp sugar

1 tsp sesame seeds

1tbs finely chopped spring onion greens

1 fresh chilli, finely chopped or ½ tsp Korean chilli flakes

Little gem salad leaves or similar for serving

First make the dipping sauce. Lightly toast the sesame seeds in a dry frying pan until they take little colour and become fragrant. Tip into a small bowl, add all the other ingredients then stir together and put aside.

Wash the salad leaves.

Drain the jar of kimchi, reserving the liquid.

Chop the kimchi quite small.

Whisk the egg, fizzy water and kimchi juices together then whisk in the flour, rice flour, salt and chilli or chilli flakes. Stir in the chopped kimchi and spring onions.

Heat a non-stick frying pan and add roughly 2tbs oil. Add one quarter of the mix, spreading it out with the back of a wooden spoon.

Fry the pancake on a medium high heat for 2-3 minutes until a golden crust forms then using a spatula carefully flip the pancake over and cook the other side. Add a little more oil around the sides. This might seem like a lot of oil but it’s the oil that makes the pancake crispy so don’t skip this step. You should see the oil bubbling around, but not over, the pancake.

Flip the pancake one more  time and cook for a further minute or two then again on the other side. Slip the pancake onto a plate then cut like a pizza for sharing. Repeat the process 3 more times.

Put the dipping sauce, lettuce leaves and pancake on the table then tuck in. Break off pieces of the pancake, wrap in a lettuce leaf then dunk in the dipping sauce.

Delicious!


Sweet Aubergine

The garden is beginning to look a little woolly now that it’s the end of September, the apples and pears are falling from the trees and the courgettes have slowed so much that they have become a valuable commodity again. Even the beans are beginning to be defeated with the drop in temperature but to be honest we have eaten so many beans that it’s time for a change. The pumpkins are dragging their feet a bit which, considering we had quite a lot of days over 18c this summer, is strange but no doubt they will have caught up by the end of next month. There has been enough rain for them to continue  to grow.

We have a great crop of aubergines in the tunnel which partner well with the ripe tomatoes. Both are technically fruits and members of the nightshade family and as they generally grow in harmony with each other they turn up together in a lot of recipes.

I have been making Caponata, a Sicilian dish, which is like a sweet and sour version of ratatouille. It’s one of those recipes with lots of variations and secret family twists. Some recipes include raisins or sultanas and some peppers and courgettes. It’s a very flexible recipe so use what you have and what you enjoy. I’ve added a pear from our ancient gnarly pear tree which produces very hard fruit. It’s not traditional but I think it’s an interesting addition.

Caponata can be eaten warm with meat and fish, as a side vegetable, stirred through pasta or on bruschetta (toast rubbed with garlic and olive oil). It’s one of these dishes that gets better as it sits so if you have time to make it ahead and can leave it for some hours so much the better.

For this recipe you need to find yourself a beautiful bright aubergine that’s nice and taut, avoid any that are  soft as they will have been picked some time ago.

Caponata

1 aubergine 

1 onion

mls olive oil

3 stems celery

1 hard pear

3-4 lrg ripe tomatoes or 1 can tomatoes

2 tbs capers

3tbs golden sultanas

2 -3 tbs pitted green olives

20g pine nuts

3tbs good red wine vinegar or balsamic 

1-2 tsp sugar

Handful fresh basil

Salt and pepper

Dice the aubergine into 2cm cubes, toss with a little salt and put aside for 15 minutes. 

Soak the capers in a small bowl of water to remove excess salt then drain. 

Peel and chop the onion, heat a medium pot, add enough olive oil to cover the bottom and stir in the onion. Cook on a medium heat. Chop the celery small and add to the onions, Season with a little salt then leave it to gently sizzle away without browning. Peel and chop the pear and stir in. Cook the vegetables for ten minutes, until they begin to melt down.

If you are using fresh tomatoes cut them in half then grate them on the coarse side of the grater over a bowl. If you using a can roughly chop the tomatoes.  Stir the tomatoes into the pot, increase the heat and when it’s bubbling away turn to simmer. Season with a little salt and pepper.

Take a handful of the aubergines and squeeze them to remove excess water. Do this to all the aubergines. Put a frying pan onto the heat, add enough olive oil to just cover the bottom of the pan and add the aubergine. Toss well then cook over a high heat for a few minutes, until the aubergine takes a little colour. You might need to do this in two batches. Add the fried aubergine into the pot then stir in the sultanas, olives, capers, vinegar and sugar. Leave to gently simmer for 15-20 minutes stirring occasionally. 

Heat a small pan and gently toast the pine nuts then stir into the Caponata.

Chop the basil, add, then check the seasoning – it probably won’t need any more salt as the olives and capers look after that department. 

Take off the heat and leave to rest before eating.

Enjoy the last of the summer’s harvest, we’ll be eating cabbages soon!


The Magic of Beans

I’m a bit of a bean freak and each year we grow a variety of beans in our garden. French beans, borlotti beans, angel beans, coca beans, dwarf beans…. and most years each of these produces enough beans for us to enjoy but no way overwhelm us but the runner beans exceed all expectations. They love the Irish climate.

Picking them is like magic. You walk one way along the row, picking beans until you think you’ve got them all then you turn around and walk back the other way and they reappear. Next thing you have a bucketful. 

When I was a kid we ate a lot of runner beans simply cooked as a side vegetable. This would go on for weeks. Lots of beans and no variation in cooking method. I like runner beans but they did lose their appeal.

We now cook them in many different ways but the preparation always has to begin with stringing the beans. There is a ‘string’ on either side of a runner bean which needs to be removed. My mum used to do this with a paring knife which is effective but a vegetable peeler is faster and more fun. Just top and tail the bean then zip down each side with a vegetable peeler and the string falls away.

Here’s a recipe for pancakes that I found in my odd recipe file when searching for runner bean ideas. It’s adapted from a recipe by Claire Thompson which was in the Guardian years ago. The pancakes have a definite Asian hum and make an easy and tasty treat which I’d happily eat for breakfast, lunch or dinner. I made this recipe early one morning to check it out and it was like having breakfast in India.

Runner Bean Pancakes

350g runner beans

170g gram flour

300mls chilled sparkling water

1tsp salt

1tsp turmeric

1tsp garam masala

1-2 chillies

2-3 cloves garlic

4 spring onions

1tsp nigella seeds

1tsp black mustard seeds

Oil to fry

Put a large pot of water to boil. Add a little salt

String the beans then slice thinly on the diagonal. When the water boils add the beans then cook for 2 minutes. Drain and refresh the beans in cold water to stop them from cooking further then drain and put aside.

Peel and chop the garlic and chop the chillies.

Chop the spring onions. Keep a few green bits aside for the garnish

Sift the gram flour, turmeric and garam masala into a bowl then  stir in the salt and the sparkling water 

Heat a small frying pan, add little oil, ¼ tsp mustard seeds and ¼ tsp nigella seeds then enough enough runner beans to cover the bottom of the pan. Cook on a medium high heat for two minutes then add ¼ of the chopped garlic, ¼ of the spring onions and ¼ of the chillies. Cook for 2 minutes more then pour over enough batter to just cover the beans. Put a few extra beans in any gaps. Cook on a medium heat for 3  minutes or until lightly browned then flip the pancake. The easiest way to flip this pancake is to hold the pan with dry tea towel, put a small plate on top of the pancake then flip it over onto the plate then slip the pancake back into the pan. Cook the other side until golden then put on one side. Repeat  the procedure 3 more times.

Delicious hot or cold with fresh tomato salsa on the side

Fresh Tomato and Chilli Salsa

2 big ripe tomatoes

1 small red onion

1-2 chillies

Juice ½ lemon

A small bunch fresh coriander

Salt

Cut the tomato in half and remove most of the seeds then dice quite small

Peel the onion and chop very finely

Peel and chop the garlic finely

Chop the coriander.

Put all the ingredients into a bowl. Mix gently and season with a little salt


Welcome Bounty

The Azores High brought great excitement and good weather to West Cork in July. For ten days it was like living in the Mediterranean. The beaches were packed and the sea full of people bobbing about, a rare and delightful sight. Families were moving in with plastic bathtubs full of picnic and kit and I felt I had been transported to another country. It began to feel the norm to get up and put my shorts on at every opportunity until the day the rain returned.

Inchydony beach at 8 o’clock in the evening

The culmination of the heatwave with the torrential rain was welcomed by gardeners and farmers alike and the courgettes sighed a breath of relief. For a vegetable that has a sunny reputation it needs a lot of water to happily produce. I have lived here for so long that I really should not be surprised about this nor how late it is before they arrive in abundance. And I must concede that everything seems happier with a little less heat and more water. I’d happily stand in the sunshine watering the garden but it’s not the same as a good dump of rain. All in all the garden is good, first sunshine and then rain seems to have done the trick, it’s all looking very green and happy

August brings home gardeners to the ultimate eat everything you have grown moment. After patiently waiting, weeding and watering there’s a rush on the ripening front. Peas, beans, kales, salads, fennel, beetroots, spuds, tomatoes, cucumbers, onions, apricots, raspberries, blueberries. We’re drowning in some kind of food nirvana!

Here is a recipe from our friend Elisa of Syros in Greece which we enjoy this time of the year. 

Gemista, which means ‘filled with’ in Greek, are ripe vegetables stuffed with rice and herbs then baked with potato wedges and olive oil. Tomatoes, peppers and courgettes all enjoy this treatment. It’s an ideal recipe to make for sharing, perfect for a big family dinner or entertaining. Once the vegetable preparation is done the dish goes into the oven for an hour, then comes to out relax for at least 30 minutes before serving. In Greece this dish is not served hot. Letting everything sit allows the juices to settle and flavours develop.

The tomatoes are very important in this recipe as it’s the juice of the tomato that cooks the rice. Big fat tomatoes are the ones to look out for. It doesn’t matter if they are misshapen or ugly as long as they are big. If you don’t grow your own or have a friend or relative that might share some with you try the farmers markets, failing that the supermarkets sell big tomatoes. As a general rule the more local the tomato, the tastier it will be.

This recipe makes enough for six hungry people but is easy to scale back if you would like to make less

Gemista – Stuffed Tomatoes and Peppers

6 large ripe tomatoes

6 small bell peppers

6 onions

12tbs arborio rice

50g pine nuts

50g currants

150mls olive oil

bunch parsley

bunch of mint

6 medium/large waxy potatoes

Cut the tops off the tomatoes with a small sharp knife and scoop out the seeds and the flesh with a spoon without tearing the tomato. Put the tomato tops and the empty tomatoes aside.

Roughly chop the flesh and seeds, keeping all the juices as far as possible then put into a bowl. 

Cut the tops from the peppers, take out the seeds then put the peppers and tops aside

Peel and finely chop the onions. Heat a large frying pan, add enough oil to generously cover the bottom and when it’s hot add the onions. Cook on a medium heat, without browning, until the onions soften. Season with a little salt. Add the pine nuts and currants, cook for a couple of minutes more then add the rice, tomato juice and flesh and season with salt and pepper. Take off the heat. Chop the herbs and stir in then leave to cool.

Pre heat the oven 180c

Fill the tomatoes and peppers loosely with the mix and put the tops back on.

Place in an oven proof baking tray with high sides that will accommodate the vegetables snuggly.

Peel the potatoes and cut into wedges. Jam these in between the tomatoes and peppers. Drizzle everything generously with olive oil.

Bake for about 1 hour, until the tomatoes and peppers are soft and lightly charred.

Leave them to relax for 30 minutes before serving.


A Little Sunny Crunch

Winter slaws are the business when you crave something to give yourself a boost, They are bright and crunchy and made with vegetables that don’t mind wintery weather.No need to use fragile jetlagged vegetables as local seasonal vegetables are perfect to shred and dress. The bright oranges, greens and purples are like sunshine in a bowl.

The key ingredients for a slaw are usually some kind of cabbage – red or green and then whatever you have or fancy in the line of  fennel, beetroots, carrots, radishes, onions, endive etc. Apples, oranges, mangoes and pears also make good additions as do toasted nuts and seeds . They can be dressed with vinaigrettes or creamy mayonnaise. The options are endless so you can let your imagination go riot. 

This recipe is for a simple slaw that I made today from our vegetable basket and the remaining red cabbage in the garden. Salting the cabbage briefly makes the cabbage sweat and the juices run, softening the cabbage to a delightful succulent crunch. Ditto with the fennel.

Half a small red cabbage

1 fennel bulb

1 red onion

1 pear

1tsp sugar

2tbs white balsamic vinegar or white wine vinegar

Salt

1tsp Dijon mustard

100mls olive oil

Finely shred the red cabbage – discard the core. Sprinkle it with a little salt, toss well then leave it aside for 10 – 15 minutes. 

Finely slice the fennel and toss with a little salt. Leave aside for 10 – 15minutes

Peel and finely slice the red onion, sprinkle a little salt over then massage until the rings separate. Put the sugar into a bowl, whisk in the vinegar then toss the onions in the mix. Leave aside for 10-15 minutes

Peel and chop the pear.

Put the cabbage onto a clean cloth or kitchen roll then dry well to remove excess liquid and salt, tip into a bowl the repeat the process with the fennel.

Put all the vegetables except for the onions into a big bowl.

Drain the pickling liquid from the onions and use this as  a base for the vinaigrette

Add the onions to the big bowl.

Whisk a teaspoon of Dijon mustard into the onion vinegar then slowly whisk in the olive oil

Pour the dressing over the vegetables then toss everything together. 

The slaw is ready to eat but it’ll also sit happily in the fridge for a day or two.


Blow Your Socks Off Lemon Chilli Sauce

I have finally taken the lemon drop chillies out of the bucket they were sitting so prettily in and am converting them to chilli sauce.

Half are sitting fermenting on the kitchen counter and the rest I made into chilli sauce yesterday

It was quite an epic heat ride.

I chopped the stalks from the lemon drop chillies, peeled red onion and garlic and put them into a saucepan with enough water to cover them, bought them to the boil then simmered for fifteen minutes.

After draining them I buzzed them in the food processor until they were smooth. I made the mistake of taking a good sniff of the salsa to enjoy the aroma – it blew me across the room.

The initial tasting was soooo hot that realistically not many people were going to eat it. I added a mango hoping it would stretch the heat but it didn’t seem to have much effect. I then sieved the sauce in the hope that removing the seeds would do the trick.

Wooo, still extremely hot !

I then incrementally added in

light muscovado sugar ,

honey,

white balsamic vinegar

another mango

and we finally seemed to be smoothing out the edges.

Phew I was getting worried!

It’s a chilli sauce to use with caution but perfect for chilli heads – like good habanero sauce and it’s a fab colour!

I’m not sure what to do with the fermenting chillies …. any ideas?


Pumpkin, Harry’s Nut Butter and Tamarind

We have a shed full of pumpkins to eat.

They were damaged by last weeks freezing weather. We don’t often get freezing weather here in West Cork and by the time we thought of the pumpkins it was too late so it’s pumpkin in everything right now.

Today’s soup was livened up by a couple of spoonfuls of Harry’s Nut Butter and a swirl of tamarind.

HNB is an Irish addiction made by the aforementioned Harry with nuts (obv) that’s slightly sweet, kind of salty and a little bit spicy and lifts the soup to a ‘where am I’ level. If you don’t have access to HNB tart up some peanut or cashew butter with a little smoked paprika, maple syrup and tamari or even miso. Actually the possibilities are endless…..

Pumpkin Soup with HNB and Tamarind

1 onion – peeled and chopped

75mls olive oil

1-2 stems celery – diced

500-600g pumpkin – peeled and diced

3 cloves garlic – peeled and finely chopped

200g diced tomatoes or half a can chopped tomatoes

2tbs red lentils ( heaped not level)

750mls stock

2 generous tbs HNB or PB

1 tbs tamarind

salt and pepper

Heat a medium/large saucepan, add the olive oil and chopped onions. Give them a stir then turn the heat to medium.

Cut the celery into quarters lengthwise then chop into a dice. Stir in with th onions.

Peel the pumpkin and chop into a rough dice – doesn’t need to be too small. Add to the pot and stir well. Season with a little salt. Cook for five minutes without browning then add the chopped garlic, stir for a minute or two then add in the tomatoes. If you’re using fresh tomatoes let them cook down. If you are using canned just stir them in . Add the vegetable stock and the red lentils. Taste, season with salt and pepper. Bring to the boil then simmer for 15 minutes.

Stir in the nut butter and tamarind and mix well.

Buzz the soup until smooth and check the seasoning.

Serve with a swirl of creme fraiche and chopped herbs – I have chervil right now but parsley or coriander would be good too.


Excited About Chickpeas

I’m not sure where the chickpeas we can usually obtain come from but generally they are old. Old and hard and take a very long time to cook so when I saw that the olive guys in our local Neighbourhood Food had imported chickpeas and pinto beans I had to try them.

I’m always on the lookout for good chickpeas – I’m possibly one of the only people that travel home from Spain with dried chickpeas in my bag. A true chickpea geek. Big fat chickpeas that only take 30-40 minutes to cook make me very happy. They obviously haven’t been sitting about in dusty depots for months on end.

I cooked some of the above prize chickpeas this morning after soaking them overnight. The weather was awful – torrential rain – it seemed pretty obvious that what we needed was warming sustenance so I made this dish. I’m never quite sure whether it’s a soup or a stew but the recipe is an old favourite. Sometimes I make it with spinach and sometimes with kale, depending on what I have and on the tomato front just use the best you have – fresh or canned. One thing is for sure – you will have a delicious bowl of bright nutrition to beat the rainy day blues.

And the new chickpeas cooked up a dream.

Chickpeas, Spinach and Coriander

250g dried chickpeas, soaked in cold water overnight – or 2 cans

2 onions – peeled and finely chopped

100mls olive oil

2 stems celery- diced

3-4 carrots- peeled and diced

3 cloves garlic- peeled and finely chopped

1-2 chillies (Optional) – chopped finely

2 big tomatoes or 1 can – chopped

1 tsp turmeric

1 tsp ground coriander

800mls vegetable stock/chickpea liquor

1 bunch spinach or kale – 2 big hanfdfuls when shredded

1 bunch fresh coriander – parsley or chervil work too if that’s what you have

salt and black pepper

Put the chickpeas to cook. Drain and cover with water. Bring to the boil then cover and turn to a simmer. Cook until tender – anything between 30 mins and 3 hours , depending on the vintage of your chickpeas. Take off the heat and reserve the cooking liquor.

Heat a large saucepan then add the olive oil and chopped onions followed by the celery and carrots . I chop and add in that order, adding a little salt as I go. Cook the vegetables on a medium heat until they begin to melt down but don’t brown.

Stir in the garlic and chilli, cook for a couple of minutes then stir in the tomatoes. Let the tomatoes melt down then add about 800mls reserved chickpea liquor or vegetable stock or a mix of the two. Bring to the boil and leave to simmer for 20 minutes. It’s up to you whether you eat this a s stew or soups add more stock if needed

This is when I popped up the garden and picked some spinach and chervil. The recipe does call for coriander but our coriander is in animated suspension at the moment but we do have a healthy amount of chervil Basically use what you have!

Wash the spinach and remove any thick stems then gather it up and chop into thin ribbons. Stir this into the pot, allow everything to return to the boil then take off of the heat. Taste and add salt and ground black pepper. I use a hand held blender to give the soup a couple of buzzes – very quickly – just enough to create a little background creaminess. Chop the herbs and stir in.

Admittedly this makes a large pot but I put a picture up on the family WhatsApp and it was soon devoured!

It’s ideal to share but it would also freeze well


Pea Days

I have a cameo memory from when I was young of sitting on the back doorstep shucking peas in the sunshine with my mum. Peas were super exciting then as although peas were available in cans all year round it was before the frozen pea revolution and canned peas were completely different to fresh peas. Fresh peas were a total treat when they arrived.

We grow peas in our garden. Just for us, not for the shop, because if we were paid to grow, pick and shuck the peas without a mechanised system they would be like gold.

IMG_9063

We just grow them to eat like sweeties when they first ripen and as the crop ripens we always make risi e bisi (a pea risotto) and summer vegetable pilafs, paellas and salads but after that we begin to scratch our heads and the peas keep coming. It’s a real grow your own phenomenon, the all or nothing syndrome and when the peas ripen they need eating as it’s obvious they should not go into the freezer.

This is new recipe that we’ve enjoyed this summer. It was inspired by a recipe from Spain called Tortillitas de Camarones which are crispy little fritters made with baby shrimp. Last autumn we visited Sanlucar de Barrameda in the very south of Spain and I have happy memories of bars where camarones were served as tapas on the terraces, usually with an accompanying glass of chilled manzanilla, the local sherry.

I became addicted to these thin crispy fritters and when I got home I tried to make my own. They weren’t quite the same and it wasn’t only the lack of sunshine that was missing  so I googled the problem and after reading many recipes and watching a particularly edifying YouTube tutorial I cracked it!

You might be wondering at this stage what this has to do with the peas, well I discovered they are an excellent addition to this recipe, either peas and shrimp or peas alone. Both work very well and the peas alone are suitable for vegans which is always a bonus.

There are couple of little tricks involved so read the recipe carefully before you begin.

Use a combination of gram flour and white rice flour if you want the fritters to be gluten-free. The water needs to be chilled and sparkling gives the best results


Pea fritters – Tortillitas de Guisantes


200g peas – fresh or defrosted

1 small onion

90g gram flour

40g white flour or rice flour

¼ tsp turmeric

A little lemon zest

1 tbs finely chopped parsley

Chilled sparkling water

Oil to fry


Pod or defrost the peas.

Sift the gram flour and regular flour or cornflour into a bowl. Add half teaspoon salt and turmeric. Stir to mix.

Peel and finely chop the onion small and finely chop the parsley. Zest a few swipes of lemon for the mix

IMG_9374.jpeg

Put everything except for the water into the bowl and mix well then start stirring in the chilled water until the batter has a medium pouring consistency, like a crepe pancake mix or pouring cream.

IMG_9376

Heat 4cms oil in a frying pan or wide based saucepan and when it is hot add a tablespoon of the fritter mix, spread it a little with the spoon after it goes into the pan, spreading the fritter with the back of the spoon under surface of the oil., it should be bubbling just below the surface. You need to do this quickly. Repeat but don’t overcrowd the pan.

IMG_9379

Cook each side for 2-3 minutes, until golden. Lift onto kitchen paper then cook the next batch. It’s a good idea to stack the fritters like dishes so the oil drains off both sides.

Serve with lemon wedges

IMG_9383.jpeg