Category Archives: gluten-free

The Great Quinoa Experiment

The great Quinoa experiment began back in the spring.  With all the talk about world food shortages we decided to experiment. We were curious how some of our pantry staples would grow here. 

It was a very domestic experiment. I bought the seeds in Skibbereen market from Brown Envelope Seeds. I had in fact only gone to buy quinoa seed but when I saw the oat and lentil seeds I got very excited and bought a packet of each. 

First we planted the seeds into seed compost in little modules. They all germinated no problem. The oats were very robust and the quinoa grew steadily. The lentils were more delicate with frondy leaves which were more of sprawl than upright so we planted half of the lentils in the tunnel and the rest on the experimental bed outside.

Once transplanted to their onward growing space the oats took off. It was hilarious, in no time at all there were a couple of sturdy rows of oats growing. It was a bit of a no brainer that the oats would thrive in this climate but when I eyed the healthy little crop up I realised I had only grown enough to make a bowl of porridge.

 The quinoa was very happy too. It shot up and enjoyed the weather, I reckon it thought it was in the Andes.

The lentils took their time. In fact the lentils that we planted inside keeled over and died but the lentils outside, once they had their roots established, quietly grew.

All three had the summer of their dreams, plenty of sunshine, intermittent rain and a watering service if needed which was very little as all three were quite happy with minimal water as they ripened. 

Finally the time to harvest arrived.

The oats were ready first. We cut them down, arranged them in bunches and hung then up to dry. They look beautiful, like something from a life style magazine, and I have to admit they are still there. I was thinking to crush the groats with a hydraulic car jack but haven’t been hungry enough to get around to that yet.

The lentils were next and we sat in the sunshine and picked through them – two lentils in each pod!

It was tedious but enjoyable, sitting outside chatting and sorting until we produced a medium sized bowl of velvety black lentils. They were very cute and very tasty.

The quinoa was harvested a little later then laid out to dry in the glasshouse. We turned it daily to make sure it didn’t go mouldy and as we had such great weather it dried well.

The next task was taking the quinoa seeds from the plant. I tried various techniques and in the end settled for a big metal bowl on my lap, teasing the seeds from the heads.

The quinoa seeds landed into the bowl with plenty of chaff which I tried to pick off – not very successfully. Google advised putting it into a bowl of water, which I did.

The chaff rose to the surface, I skimmed it off and then vigorously agitated the quinoa in the water before straining it through a sieve and repeating. There’s quite a process to clean quinoa as each piece is covered with saponins, which are toxic. Not toxic enough to kill us but enough to make them quite unpalatable. I left it soaking overnight, then rinsed it again, agitating well, then repeated, soaking again overnight. 
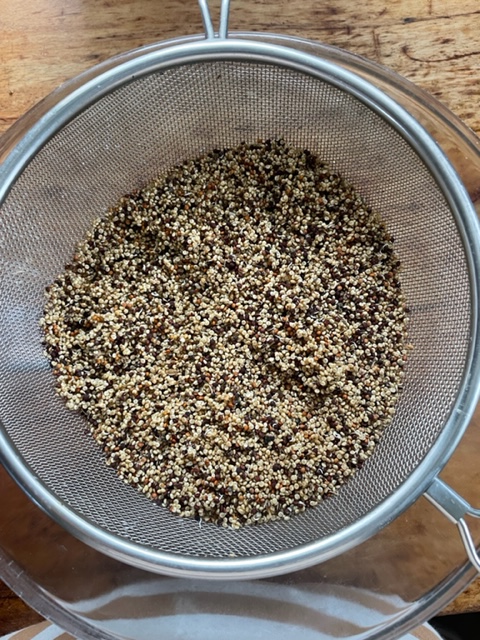
We were on day three of quinoa cleaning at this stage and my curiosity was exceeding my patience so I rinsed and drained the quinoa one final time then laid it out on clean t-towels to dry. 

So far, so good. It looked like the real thing. 

Next it was time to try cooking it. It took a long time to cook. Ordinarily quinoa is cooked in twelve to fifteen minutes but mine was cooked for at least forty minutes and still retained a healthy nuttiness, which I decided was how it was meant to be – the brain can be very fickle at times.  

The final test was the taste test and I have to report that it was absolutely vile. So bad that I had to spit it out and hang my mouth under a running tap. To be sure that it was as bad as I experienced I employed a couple of unsuspecting guinea pigs and in no time at all everyone was running around the kitchen in horror.

We threw the rest of the cleaned quinoa into the chickens, together with the quinoa that we hadn’t yet sorted but the chickens weren’t having anything to do with it. They’ve obviously got good survival genes and we headed of on holiday to Greece!


Garden Gratin

Jerusalem artichokes are easy to grow, they’re part of the sunflower family and are very undemanding on the gardening front. Pop the tubers into the ground and after that they pretty much look after themselves.

We grew Jerusalem artichokes last year and then forgot about them until last week when I went on an exploratory dig and discovered lots of knobbly roundish roots. They were in great condition and there are plenty of them. It’s presented the dilemma of what two do with them. Luckily they don’t all need to be eaten at once , they look quite comfortable in the bucket, muddy but dry, and will hopefully sit for a while whist we eat them up.

First up I made a gratin. I mixed some with potatoes, spinach, leeks and Tallegio cheese. This was adelightful combo, creamy, cheesy and very tasty with the sautéed leeks and spinach layered through and perfect eating for this weeks wet and wild weather. We ate the gratin after a beetroot and blood orange salad which is why the plate is pink.

One of the properties of Jerusalem artichokes is that they have a high content of inulin. Inulin has lots of dietary bonuses; plenty of fibre which in turn is helpful in managing diabetes, constipation and general gut health but they really should come with a warning. These powerful vegetables have great flavour but are also very windy. All that fibre causes mighty flatulence. Our duvet almost hit the ceiling when we went to bed. I guess it’s the type of vegetable to be only eaten with close family or friends – they aren’t known as fartichokes for nothing. Apparently if you eat them little and often you can override this side affect so I guess we need to proceed through the stash and see what happens.

The gratin was delicious!

Garden Gratin

600g potatoes

600g jerusalem artichokes

1tbs olive oil

250g fresh spinach

2-3 leeks

25g butter

a small bunch of thyme

300mls cream

250g Tallegio cheese

salt and pepper

Peel the potatoes and artichokes then slice very thinly. Put them into a big bowl. Drizzle over little olive oil, season with salt and pepper and add the thyme. Toss well .

Clean the leeks then slice small. Wash the spinach and trim any big stalks. Put a saucepan with little butter on the heat, add the leeks and when it begins to sizzle turn the heat low and cover with a lid. Shake very couple of minutes until the leeks soften then stir in the spinach. Cover again with the lid and cook for 2-3 minutes until the spinach has wilted down. Season with salt and pepper.

Pre heat the oven 190c

Rub a little butter or olive oil around a gratin dish put in a layer of half the potatoes and artichokes then add the spinach and leeks. Break the tallgio into small pieces and distribute over the top then layer up the remaining potatoes and artichokes.

Put the cream into a small saucepan and bring too the boil. Pour the cream over the vegetables. Cover the gratin dish with a piece off aluminium foil then bake for 50 minutes. Remove the foil and bake for another 15-20 minutes or until the top of the gratin is golden.

Allow to sit for 10 minutes before eating. The ideal amount of time to consume a salad.


Marvellous Leeks

It’s like there is a switch in the middle of January which kicks everything into action again. Those few more minutes of extra daylight  give out a message that even our geriatric chickens respond to. Suddenly we have eggs and all the green things in the garden perk up. 

We have plenty to eat in our garden. Not a great deal of choice but we do have lots of kale, cabbage, brussels sprouts and winter salad. We have a mighty crop of leeks too with long white stems that we are very proud of and we’re still munching our way through last year’s pumpkin harvest. 

The spinach and chard will begin to grow again in the tunnel soon and providing there isn’t a big freeze we’ll be picking outside by the end of March.  

We have enjoyed many wintery feasts of soups, stews and gratins often complemented by the fresh crunch of slaw and our imagination and memories are always on the go wondering how else we can cook these ingredients.

One dish that we resurrected is Poireaux al la Greque. 

This long forgotten recipe was from a time when we worked in a restaurant in Belgium. It was a fairly fancy bistro which served leeks braised in white wine with coriander seeds, olive oil and lemons. The cooked leeks were then split down the centre and served with a line of creamy pink tuna piped down the middle. I could always live without the tuna part – which was simply tuna, mayo and tomato puree to make it go pink, but I did enjoy the leeks. 

To celebrate our marvellous leeks I began to play with the recipe again and we ate them piled on top of mash – any mash will do but I used carrots, celeriac and potatoes all buzzed to a puree with a generous amount of butter – served with crispy caramelised lentils strewn over the top.

This way of cooking the leeks elevates them to star status. They can be eaten with the combination that we had or can be simply served as a starter or alongside chicken or fish using the braising liquid as a sauce.

Poireaux a la Greque

6 leeks

1 large glass white wine

2tbs olive oil

½ lemon

1 tsp coriander seeds

Salt and pepper

First clean the leeks. Trim the ends, cut off the green part – put the greens aside for something else – you could use them in a soup or stew. Rinse the white part of the leeks under the tap, shake dry then line them up in the bottom of a large saucepan that has a lid.

Pour over the white wine, it should come roughly half way up the leeks. Drizzle over the olive oil, sprinkle over the coriander then squeeze over the lemon juice. Put the squeezed lemon in with the leeks. Season with salt and black pepper. Put the pot on the heat and when it comes to the boil cover with a lid, reduce the heat, then gently simmer for 30 minutes.

To serve, strip off the very outer layer of each leek, lay on a plate or over mash then spoon a little cooking liquid over or around. 

Crispy Caramelised Lentils

125g lentils

20g butter*

1 tbs olive oil

1tbs light muscovado sugar

2tsps white wine vinegar

Salt.

Put the lentils into small saucepan, cover with at least twice the volume of water then bring to the boil. Turn the heat to low so that they are simmering gently then cover with a lid. Cook for 15-20 minutes or until the lentils are tender – try a few to check.

Drain the lentils, rinse under the cold tap then shake dry.

Put a small frying pan on the heat. Add the butter and olive oil and when it foams up stir in the lentils. Season with a little salt. Cook on a high heat stirring until the lentils begin to colour. Add the muscovado sugar and white wine vinegar. Mix well then continue to cook and shake until crispy.

* If you would like to make this dish vegan omit the butter and use a little more olive oil


Sweet Aubergine

The garden is beginning to look a little woolly now that it’s the end of September, the apples and pears are falling from the trees and the courgettes have slowed so much that they have become a valuable commodity again. Even the beans are beginning to be defeated with the drop in temperature but to be honest we have eaten so many beans that it’s time for a change. The pumpkins are dragging their feet a bit which, considering we had quite a lot of days over 18c this summer, is strange but no doubt they will have caught up by the end of next month. There has been enough rain for them to continue  to grow.

We have a great crop of aubergines in the tunnel which partner well with the ripe tomatoes. Both are technically fruits and members of the nightshade family and as they generally grow in harmony with each other they turn up together in a lot of recipes.

I have been making Caponata, a Sicilian dish, which is like a sweet and sour version of ratatouille. It’s one of those recipes with lots of variations and secret family twists. Some recipes include raisins or sultanas and some peppers and courgettes. It’s a very flexible recipe so use what you have and what you enjoy. I’ve added a pear from our ancient gnarly pear tree which produces very hard fruit. It’s not traditional but I think it’s an interesting addition.

Caponata can be eaten warm with meat and fish, as a side vegetable, stirred through pasta or on bruschetta (toast rubbed with garlic and olive oil). It’s one of these dishes that gets better as it sits so if you have time to make it ahead and can leave it for some hours so much the better.

For this recipe you need to find yourself a beautiful bright aubergine that’s nice and taut, avoid any that are  soft as they will have been picked some time ago.

Caponata

1 aubergine 

1 onion

mls olive oil

3 stems celery

1 hard pear

3-4 lrg ripe tomatoes or 1 can tomatoes

2 tbs capers

3tbs golden sultanas

2 -3 tbs pitted green olives

20g pine nuts

3tbs good red wine vinegar or balsamic 

1-2 tsp sugar

Handful fresh basil

Salt and pepper

Dice the aubergine into 2cm cubes, toss with a little salt and put aside for 15 minutes. 

Soak the capers in a small bowl of water to remove excess salt then drain. 

Peel and chop the onion, heat a medium pot, add enough olive oil to cover the bottom and stir in the onion. Cook on a medium heat. Chop the celery small and add to the onions, Season with a little salt then leave it to gently sizzle away without browning. Peel and chop the pear and stir in. Cook the vegetables for ten minutes, until they begin to melt down.

If you are using fresh tomatoes cut them in half then grate them on the coarse side of the grater over a bowl. If you using a can roughly chop the tomatoes.  Stir the tomatoes into the pot, increase the heat and when it’s bubbling away turn to simmer. Season with a little salt and pepper.

Take a handful of the aubergines and squeeze them to remove excess water. Do this to all the aubergines. Put a frying pan onto the heat, add enough olive oil to just cover the bottom of the pan and add the aubergine. Toss well then cook over a high heat for a few minutes, until the aubergine takes a little colour. You might need to do this in two batches. Add the fried aubergine into the pot then stir in the sultanas, olives, capers, vinegar and sugar. Leave to gently simmer for 15-20 minutes stirring occasionally. 

Heat a small pan and gently toast the pine nuts then stir into the Caponata.

Chop the basil, add, then check the seasoning – it probably won’t need any more salt as the olives and capers look after that department. 

Take off the heat and leave to rest before eating.

Enjoy the last of the summer’s harvest, we’ll be eating cabbages soon!


The Magic of Beans

I’m a bit of a bean freak and each year we grow a variety of beans in our garden. French beans, borlotti beans, angel beans, coca beans, dwarf beans…. and most years each of these produces enough beans for us to enjoy but no way overwhelm us but the runner beans exceed all expectations. They love the Irish climate.

Picking them is like magic. You walk one way along the row, picking beans until you think you’ve got them all then you turn around and walk back the other way and they reappear. Next thing you have a bucketful. 

When I was a kid we ate a lot of runner beans simply cooked as a side vegetable. This would go on for weeks. Lots of beans and no variation in cooking method. I like runner beans but they did lose their appeal.

We now cook them in many different ways but the preparation always has to begin with stringing the beans. There is a ‘string’ on either side of a runner bean which needs to be removed. My mum used to do this with a paring knife which is effective but a vegetable peeler is faster and more fun. Just top and tail the bean then zip down each side with a vegetable peeler and the string falls away.

Here’s a recipe for pancakes that I found in my odd recipe file when searching for runner bean ideas. It’s adapted from a recipe by Claire Thompson which was in the Guardian years ago. The pancakes have a definite Asian hum and make an easy and tasty treat which I’d happily eat for breakfast, lunch or dinner. I made this recipe early one morning to check it out and it was like having breakfast in India.

Runner Bean Pancakes

350g runner beans

170g gram flour

300mls chilled sparkling water

1tsp salt

1tsp turmeric

1tsp garam masala

1-2 chillies

2-3 cloves garlic

4 spring onions

1tsp nigella seeds

1tsp black mustard seeds

Oil to fry

Put a large pot of water to boil. Add a little salt

String the beans then slice thinly on the diagonal. When the water boils add the beans then cook for 2 minutes. Drain and refresh the beans in cold water to stop them from cooking further then drain and put aside.

Peel and chop the garlic and chop the chillies.

Chop the spring onions. Keep a few green bits aside for the garnish

Sift the gram flour, turmeric and garam masala into a bowl then  stir in the salt and the sparkling water 

Heat a small frying pan, add little oil, ¼ tsp mustard seeds and ¼ tsp nigella seeds then enough enough runner beans to cover the bottom of the pan. Cook on a medium high heat for two minutes then add ¼ of the chopped garlic, ¼ of the spring onions and ¼ of the chillies. Cook for 2 minutes more then pour over enough batter to just cover the beans. Put a few extra beans in any gaps. Cook on a medium heat for 3  minutes or until lightly browned then flip the pancake. The easiest way to flip this pancake is to hold the pan with dry tea towel, put a small plate on top of the pancake then flip it over onto the plate then slip the pancake back into the pan. Cook the other side until golden then put on one side. Repeat  the procedure 3 more times.

Delicious hot or cold with fresh tomato salsa on the side

Fresh Tomato and Chilli Salsa

2 big ripe tomatoes

1 small red onion

1-2 chillies

Juice ½ lemon

A small bunch fresh coriander

Salt

Cut the tomato in half and remove most of the seeds then dice quite small

Peel the onion and chop very finely

Peel and chop the garlic finely

Chop the coriander.

Put all the ingredients into a bowl. Mix gently and season with a little salt


Welcome Bounty

The Azores High brought great excitement and good weather to West Cork in July. For ten days it was like living in the Mediterranean. The beaches were packed and the sea full of people bobbing about, a rare and delightful sight. Families were moving in with plastic bathtubs full of picnic and kit and I felt I had been transported to another country. It began to feel the norm to get up and put my shorts on at every opportunity until the day the rain returned.

Inchydony beach at 8 o’clock in the evening

The culmination of the heatwave with the torrential rain was welcomed by gardeners and farmers alike and the courgettes sighed a breath of relief. For a vegetable that has a sunny reputation it needs a lot of water to happily produce. I have lived here for so long that I really should not be surprised about this nor how late it is before they arrive in abundance. And I must concede that everything seems happier with a little less heat and more water. I’d happily stand in the sunshine watering the garden but it’s not the same as a good dump of rain. All in all the garden is good, first sunshine and then rain seems to have done the trick, it’s all looking very green and happy

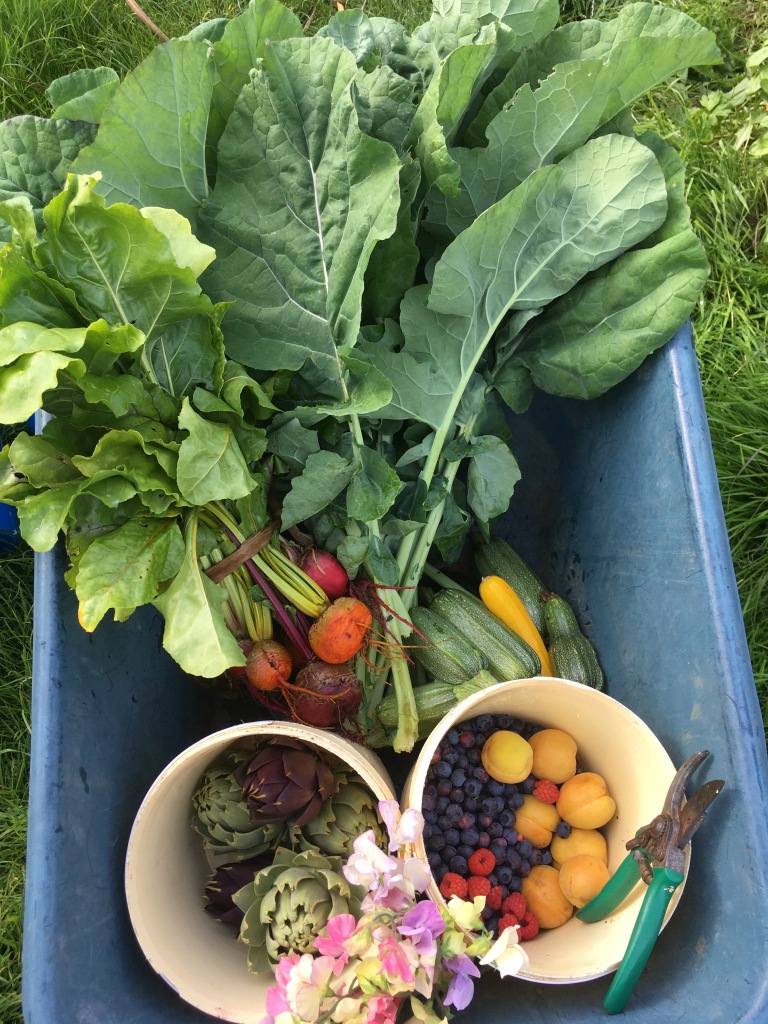
August brings home gardeners to the ultimate eat everything you have grown moment. After patiently waiting, weeding and watering there’s a rush on the ripening front. Peas, beans, kales, salads, fennel, beetroots, spuds, tomatoes, cucumbers, onions, apricots, raspberries, blueberries. We’re drowning in some kind of food nirvana!

Here is a recipe from our friend Elisa of Syros in Greece which we enjoy this time of the year. 

Gemista, which means ‘filled with’ in Greek, are ripe vegetables stuffed with rice and herbs then baked with potato wedges and olive oil. Tomatoes, peppers and courgettes all enjoy this treatment. It’s an ideal recipe to make for sharing, perfect for a big family dinner or entertaining. Once the vegetable preparation is done the dish goes into the oven for an hour, then comes to out relax for at least 30 minutes before serving. In Greece this dish is not served hot. Letting everything sit allows the juices to settle and flavours develop.

The tomatoes are very important in this recipe as it’s the juice of the tomato that cooks the rice. Big fat tomatoes are the ones to look out for. It doesn’t matter if they are misshapen or ugly as long as they are big. If you don’t grow your own or have a friend or relative that might share some with you try the farmers markets, failing that the supermarkets sell big tomatoes. As a general rule the more local the tomato, the tastier it will be.

This recipe makes enough for six hungry people but is easy to scale back if you would like to make less

Gemista – Stuffed Tomatoes and Peppers

6 large ripe tomatoes

6 small bell peppers

6 onions

12tbs arborio rice

50g pine nuts

50g currants

150mls olive oil

bunch parsley

bunch of mint

6 medium/large waxy potatoes

Cut the tops off the tomatoes with a small sharp knife and scoop out the seeds and the flesh with a spoon without tearing the tomato. Put the tomato tops and the empty tomatoes aside.

Roughly chop the flesh and seeds, keeping all the juices as far as possible then put into a bowl. 

Cut the tops from the peppers, take out the seeds then put the peppers and tops aside

Peel and finely chop the onions. Heat a large frying pan, add enough oil to generously cover the bottom and when it’s hot add the onions. Cook on a medium heat, without browning, until the onions soften. Season with a little salt. Add the pine nuts and currants, cook for a couple of minutes more then add the rice, tomato juice and flesh and season with salt and pepper. Take off the heat. Chop the herbs and stir in then leave to cool.

Pre heat the oven 180c

Fill the tomatoes and peppers loosely with the mix and put the tops back on.

Place in an oven proof baking tray with high sides that will accommodate the vegetables snuggly.

Peel the potatoes and cut into wedges. Jam these in between the tomatoes and peppers. Drizzle everything generously with olive oil.

Bake for about 1 hour, until the tomatoes and peppers are soft and lightly charred.

Leave them to relax for 30 minutes before serving.


Wacky Watermelon

How time flies! We have already entered the second half of summer, having passed the longest day which seems to have come round faster than ever this year.

It may be the second half of summer but I’m still prowling around the courgettes plants waiting for them to spring into action, ditto with our broad beans and the tomatoes haven’t a notion of ripening yet. Luckily everything is looking healthy and with time we’ll have the usual gluts.

Meanwhile I’ve been obsessing about watermelons. This is in addition to my barbecuing obsession as I have this memory of a dish we ate whilst travelling 

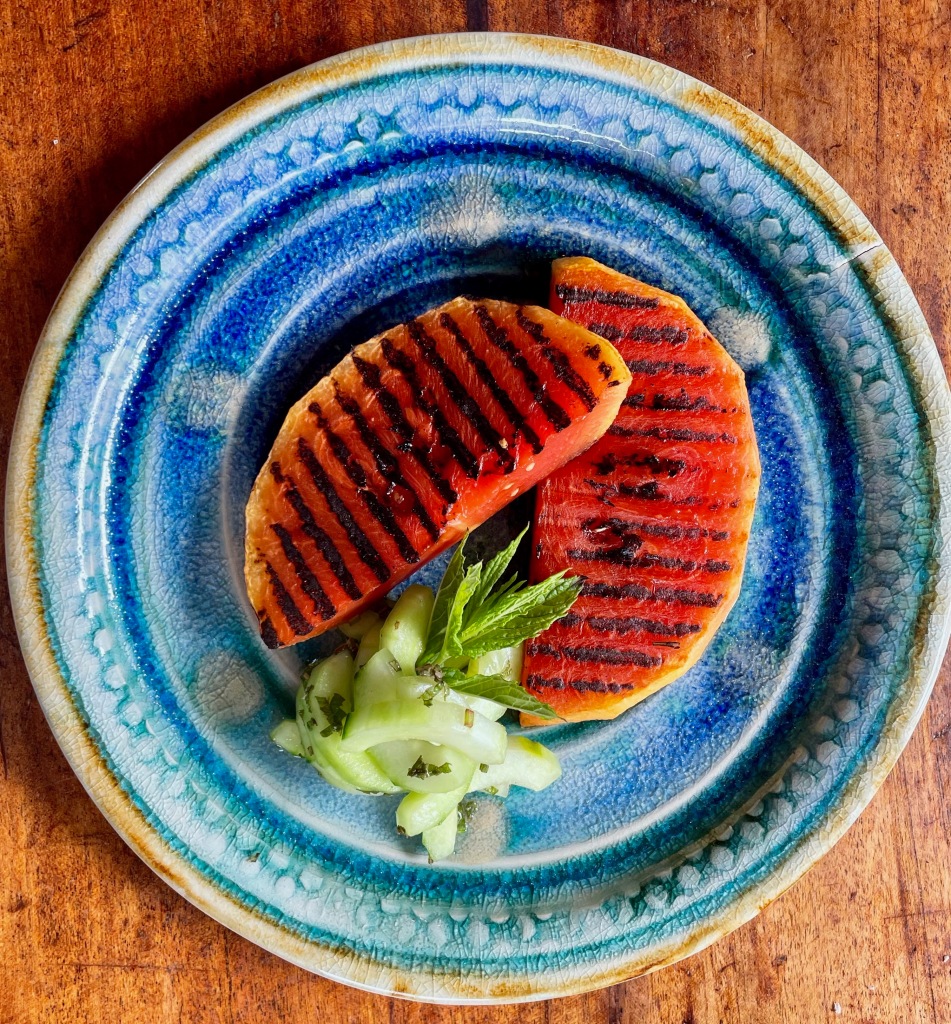
in Mexico. Long ago, before the lockdown, we were in Campeche on the Yucatan peninsula where I ate the most amazing grilled watermelon. It was one of the most memorable dishes that I had on that trip, maybe because it was so surprising. I ordered it as it sounded so odd. Grilled Watermelon Fillet with Recado Rojo. It came to the table, king of the plate with little piles of pickled vegetables and avocado around it. Pretty as a picture and the flavour and texture was so surprising. Later that day I  had the good fortune to pick the chefs brains and I jotted down the recipe, gram for gram in my notebook where it lounged until this summer when I bought my barbie.

I was slightly trepidatious the first time that I made it as good memories have been known to trick the taste buds but the recipe worked. Spot on and very simple, which truth be told is what you need for a barbecue. 

There is one small hitch – the recipe uses achiote paste, which is known as Recado Rojo in the Yucatan. Achiote is made from seeds of the annato plant, a small tropical evergreen plant that grows in Mexico. It’s an orange/red spice which smells a little peppery and tastes slightly earthy, sweet and nutty . I have a box of achiote which I bought home with me but I know it’s not always available, there’s not a lot where we live, so I googled for alternatives and came up with a recipe that has  accessible ingredients and is a good substitute. 

This recipe involves a little forward prep – the watermelon needs to be marinated for twenty four hours – but the beauty of this is that when it comes to the day of the barbecue all the work is done. Just put the watermelon on the grill, resist poking it until it’s lightly charred then flip, cook the  other side and serve.  We ate ours with lightly pickled cucumber and mint. 

Grilled Watermelon Fillet with Recado Rojo 

Serves 6

1 small watermelon 

25g achiote/recado rojo/or the paste below

200mls white wine vinegar

500mls water

4g salt

2g cracked black pepper

Homemade Recado Rojo/Achiote paste substitute

1 ½ tsp sweet paprika

1tbs white wine vinegar

¾ tsp oregano

¼ tsp ground cumin

¼ tsp ground cloves

½ tsp turmeric

2 cloves garlic, peeled and very finely chopped

Mix all of the ingredients to a smooth paste.

First peel the water melon.

Using a sharp knife slice off the top and the bottom of the melon.  Place the melon on the chopping board bottom side down, this will give you a steady melon to work with. Carefully peel the melon rind away, cutting downwards then turn the melon over and repeat.

Chop the peeled melon into half then chop each half into 4cm slices.

Mix 25g of the achiote/recardo Rojo paste together in a fairly big bowl with the vinegar until it has dissolved then add the water and salt and pepper. 

Submerge the watermelon slices by carefully arranging them in the bowl – it will be quite a snug fit . Cover and leave aside in a cool place for 24hours.

To cook the melon fire up the barbecue or heat a grill pan

Take the melon from the marinade, shake off excess marinade then place on a hot grill. Grill each side for 2-3 minutes until nicely charred.

Serve with little piles of pickled cucumber.

Lightly Pickled Cucumber and Mint

1 cucumber

100mls white wine vinegar

2tbs sugar

½ tsp salt

A bunch of fresh mint.

Put the vinegar, sugar and salt into a bowl then mix together to dissolve

Peel the cucumbers, cut them in half lengthwise then remove the seeds with spoon.

Place the cucumber on a chopping board then cut into skinny slices on the diagonal.

Strip the mint from the stems and chop finely.

Put the mint and cucumber into the vinegar mix and toss well. Leave aside for at least 15 minutes.

The photos above where not taken on a barbecue as whenever I’ve made barbecues I’m been too busy cooking and socialising to take many pictures but here’s a photo to prove that we do have one!


Asparagus Days are Here

Our glasshouse is bursting at the seams and the only picture I have of it is photo of myself and a friend enjoying a breakout glass of wine – Semi al fresco, the door was open

There are crowds of seedlings waiting to move to a more spacious location to continue growing. We have just re-covered the tunnel that was destroyed in one of the winter storms so the tomatoes can relocate and the other tunnel is full of infant spinach, chard, herbs and baby beans.

The potatoes are peeping up and the fruit trees are in blossom. It’s such an exciting time of the year in a garden yet the pickings are fairly slim as last years green crops shoot for the sky and go to seed and the new ones aren’t quite ready to be picked.

One vegetable that’s coming into season is Irish asparagus. Sadly we don’t have any in our garden anymore – I dug it up in frustration. After several years of nursing the plants and trying to keep them weed free then only getting a couple of spears at a time I gave up.  I should have researched growing asparagus before wasting so much time as I have discovered that not only do the seedlings need three years on a weed free bed, it also hates slugs and needs warmth and sunshine – a minimum of eight hours sunshine a day! 
I take my hat off to the Irish growers who supply us with this seasonal treat as it takes so much time and effort and ideally a tunnel or covered growing area that is designated to this use.

The Irish asparagus season is short, there are six weeks in May/June when these plants do their thing, growing up to 18cms in a day and funnily enough it’s the male plants that shoot up the spears, the female plants provide the seeds – kind of reverse to humans.

I always enjoy the asparagus when it’s in season here in Ireland. It’s such a seasonal treat and one of the most nutritionally balanced vegetables packed with vitamins and antioxidants.

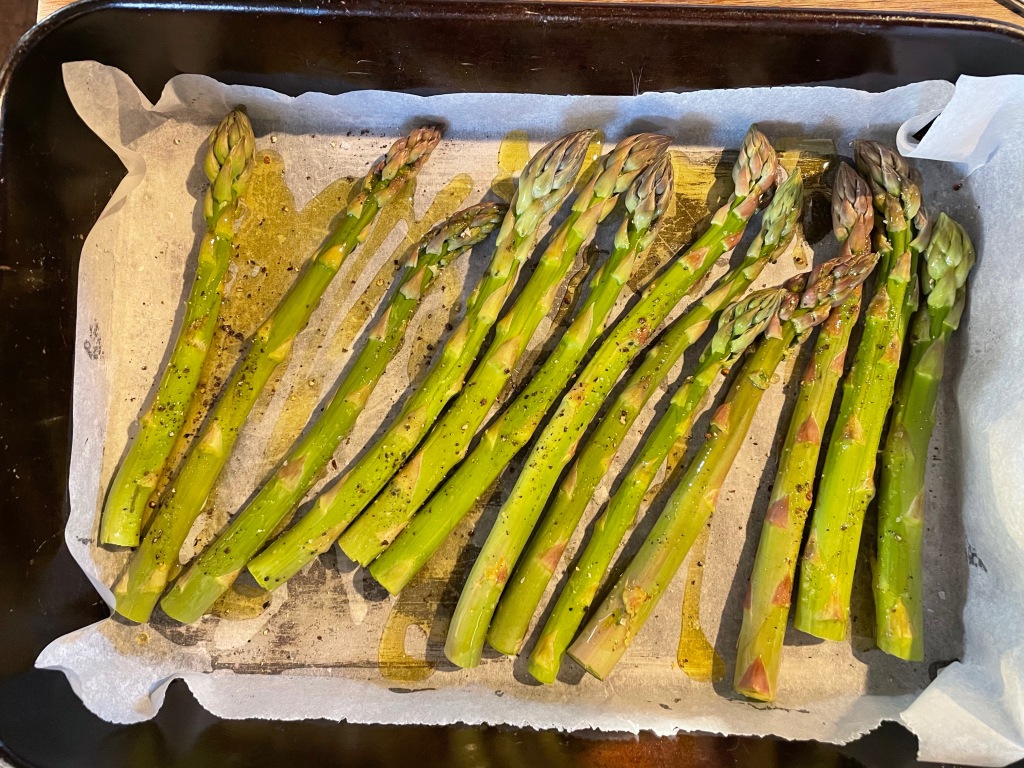
It’s best cooked simply. My favourite way is grilling on a cast iron pan but I have also discovered roasting in a very hot oven can produce a similar result. The heat seals in the flavours and the asparagus still has a little bite.

We have plenty of fresh eggs and a big bunch of Dunworely asparagus at hand so this month’s recipe is a plate of roasted asparagus over Puy lentils with herb hollandaise. The lentils are simply cooked then seasoned with salt and dressed with the best olive oil and a splash of balsamic vinegar to brighten them up.

Sublime!! It’s very easy to prepare and well worth seeking out the local asparagus for, infinitely superior to asparagus that has been flown half way round the world and sold for next to nothing. Help save the planet, buy local!

Roasted Asparagus with Puy Lentils and Herb Hollandaise

Serves 3-4

1 bunch asparagus –  4 spears per person

200g ripe cherry tomatoes

200g Puy lentils

200g butter

2 egg yolks

Juice of half a juicy lemon

A handful of fresh soft herbs – chives, basil and/or chervil

Salt and cracked black pepper

Extra virgin olive oil

Balsamic vinegar

Pre-heat the oven 220c

Put the lentils into a saucepan and cover with at least twice as much water. Bring to the boil, turn to simmer then cook for 20 minutes. Check them by tasting a couple and if they are still a little hard cook for 1-2  minutes longer but be careful as they should be just done. Drain the lentils, rinse with hot water then dress with a drizzle of extra virgin olive oil, a splash of balsamic vinegar and a little salt. Put the lid back on to keep them warm and put aside.

Whilst the lentils are cooking prepare the asparagus. Wash the spears then trim the woody end. You could snap them but I usually lightly run a sharp knife over the stem working from the stalk up and the knife cuts like butter as soon as you pass the woody bit. Line a baking tray that’s big enough to accommodate the asparagus in one layer with parchment paper. Dry the spears then put them in the tray and drizzle over olive oil. Sprinkle over a little salt and cracked pepper then roll them about so they are all lightly dressed,.

Wash the tomatoes and dry then put them into a baking tray with a drizzle of olive oil and a sprinkle of salt.

Put the tomatoes and asparagus into the oven and set the timer for 7 minutes, toss both then cook for a further 5 minutes.

The Hollandaise is made using a held blender which is a clever trick – no whisking over a bain-marie, just instant Hollandaise.

Put the egg yolks into the beaker or a jug with the lemon juice.

Gently melt the butter and heat until hot.

Chop the herbs finely

Put the blender into the beaker and buzz the yolks and lemon juice together. Add the hot butter in a slow steady stream. When it has emulsified season with salt and pepper and stir in the chopped herbs. If it is too thick, thin with a little warm water. If you are not ready to serve you can keep the sauce warm by putting the jug into a bowl of hot water.

To assemble the dinner put a big spoonful of lentils onto each plate, lay the asparagus on top and pour a little hollandaise across. Put the roasted tomatoes around the sides.


Giant Cauliflowers Make Giant Cakes

Finally our cauliflowers have arrived, there’s a colony of them and some are seriously big.

We have waited so long. I was convinced we would have caulis for Xmas but nope, nothing happened . We just had these huge plants on long stems that seemed to be in some kind of animated suspension and now, all at once they are emerging. It’s far from the first cauliflowers that we have grown but usually they arrive rather inconveniently in August or are very welcome in October and November. Last years lockdown meant we got our seeds where we could and I must have picked up this winter variety. I’ve now checked it out and discovered that winter cauliflowers take 40-50 weeks to mature which is quite some time to nurture a vegetable but they are so welcome. A joy to the eye and they’re going to be exciting to eat, or perhaps I should say a challenge.

We regularly make cauliflower fritters and cauliflower pakoras which are both delicious but last night I broke out and and made a cauliflower Sfomato with the enormous cauliflower that I had picked. Sformato looks like a cake which has a touch of a soufflé to it. It’s also enormous, enough to feed 6- 8 for dinner or 4 for dinner and 4 for lunch!

I have feeling we’re going to have cauliflowers coming out of our ears!

Cauliflower Sformato

1 large cauliflower

olive oil to roast the cauliflower

2 red onions, peeled and chopped

90g butter

90g flour – I used rice flour as it’s gluten free

800mls milk

6 eggs

75g grated parmesan or mature cheddar, grated

1tbs Dijon mustard

1/2tsp smoked paprika

Pre heat the oven 190c

Line the base and sides of a 24-26cm loose bottomed cake tin

Break the cauliflower into even sized florets and toss with little olive oil and salt. Spread out on a large baking sheet and roast for 20 minutes. leave aside to cool a little then chop small.

Melt the butter in a large saucepan (mine was little small) then stir in the flour. Cook gently for a few minutes then begin to add the milk. Do this in stages, whisking the milk and roux(flour mix) until it comes together in one mass before adding a little more. You will end up with a fairly thick sauce. Season with salt and cracked black pepper. Stir the chopped cauliflower, smoked paprika, mustard and grated cheese.

Check the seasoning then pour into the prepared tin.

Bake in the centre of the oven for 40 minutes or until a knife comes out clean.

Bake in the centre of the oven for 40 minutes or until a knife comes out clean.

Leave to rest for a few minutes before removing the tin and serving.

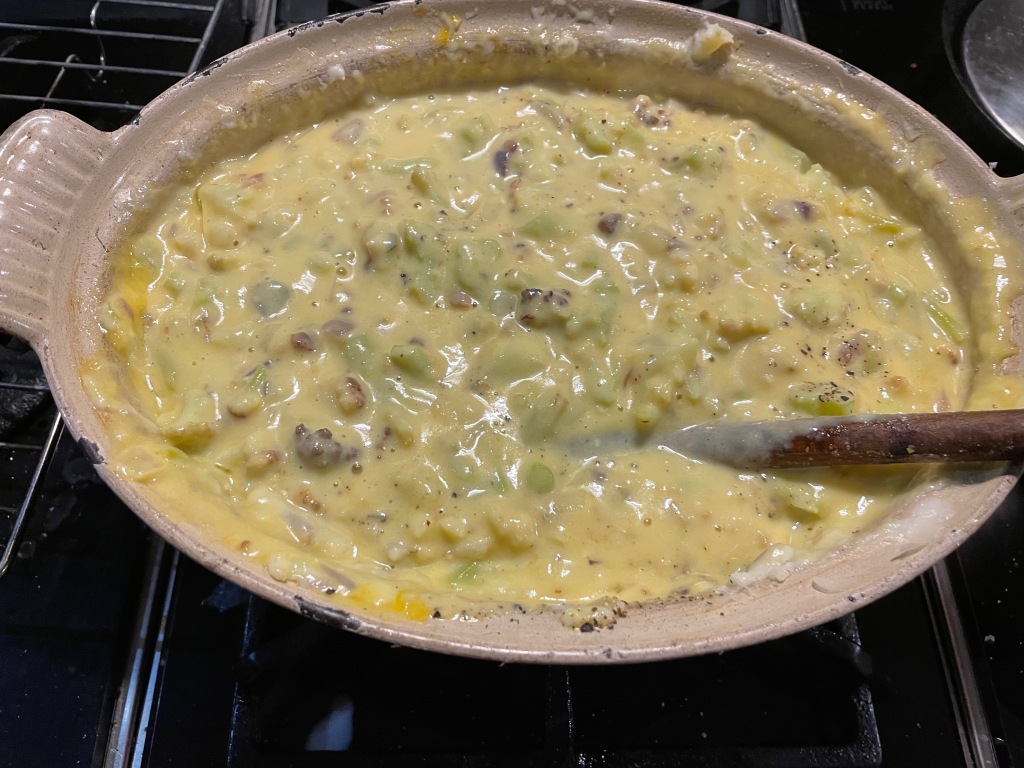
It’s not going to win a beauty contest but very tasty!


Bright Food for a Dirty Day

Today was not an outside day.

A big wind, very cold and occasional snow flurries, which is a romantic way of describing West Cork’s attempt at snow which is really large drops of frozen rain. After a quick run around to feed the chickens I was back inside again.

It was the perfect day to hang out in the kitchen.

I spent the morning trying a couple of new recipes then turned my eyes to lunch.

We are still ploughing through our rapidly deteriorating frozen by mistake pumpkins. At this stage the chickens are getting as much of each pumpkin as we are but we’re getting places. We’ve been eating them in many guises, today’s collaboration was with beetroots and coconut which made a delicious and warming soup full of antioxidants to beat the bugs

Beetroot, Pumpkin and Ginger Soup

1 large red onion

75mls olive oil

2 sticks celery

300g pumpkin

450g beetroots

1 finger of fresh ginger

700mls vegetable stock

200ml coconut milk

Peel and chop the onion. Heat a pot, add a little olive oil and the onion then cook on a medium heat. Cut the celery lengthways then dice into small pieces. Add to the pot and give a stir.

Peel the pumpkin and chop into chunks, then peel the beetroot and chop into a dice – the beetroots are going to take longer than the pumpkin to cook. Stir these both into the pot and season with a little salt. keep cooking on a medium heat, reducing the heat if they begin to brown or stick.

Peel the ginger and chop small. Add to the the vegetables, cook for a couple of minutes, then add the stock. Bring to the boil then simmer for 25-30 minutes, until the vegetables are tender.

Stir in the coconut milk then buzz everything to a smooth puree. It should be good and soupy but if it’s too thick thin with little water. Season with salt and black pepper and you’re ready to go.

Some fresh chopped herbs would be good but I wasn’t heading off outside to pick any!